Working in the studio, we will explore different lighting techniques , the use of flash and metering.
Studio Lighting
Once based in the studio I had a look at what light sources were available. There are bare lights, this is a hard light on its own and then there is a soft box to produce a lighter, muted and softer light.


We also can use a reflector to help enhance shadows or make the light cooler or warmer. The reflector can be a gold or silver material or a black material.

There are leads to pull the lights back and forth, the closer the light to the model, the more intense. A good starting position to be in when using manual on the camera is to have a middle aperture, and achieve the lowest ISO, for the least amount of grain and have the shutter speed somewhere around 1/125.
In the first session we would just be using a continuous bulb light and in the second session a flash would be introduced and in the third session a flash with metering.
The flash will produce a blue/cooler light and the continuous bulb light a warmer ight.
The modelling light has two bulbs in it, a round circle one and a flash. The modelling light gives you an idea of how the shadows are working and where the light is falling.
Metering:
Metering is how your camera decides what exposure to set the scene.
When I prepare to take a shot of a scene, its important to acknowledge how I depict the world and how the meter sees it. Whilst I’m experiencing all the wonderful colours, what the meter is actually seeing and attempting to record, is a story told in palette of greys. Or more accurately a world of one grey, the middle grey.
In the studio we will also explore using a meter. Setting the shutter speed at 1/125 and the lowest ISO of 50 or 100 I can aim to get a good exposure by reading what Fstop my camera should be via the meter.
Flash Photography
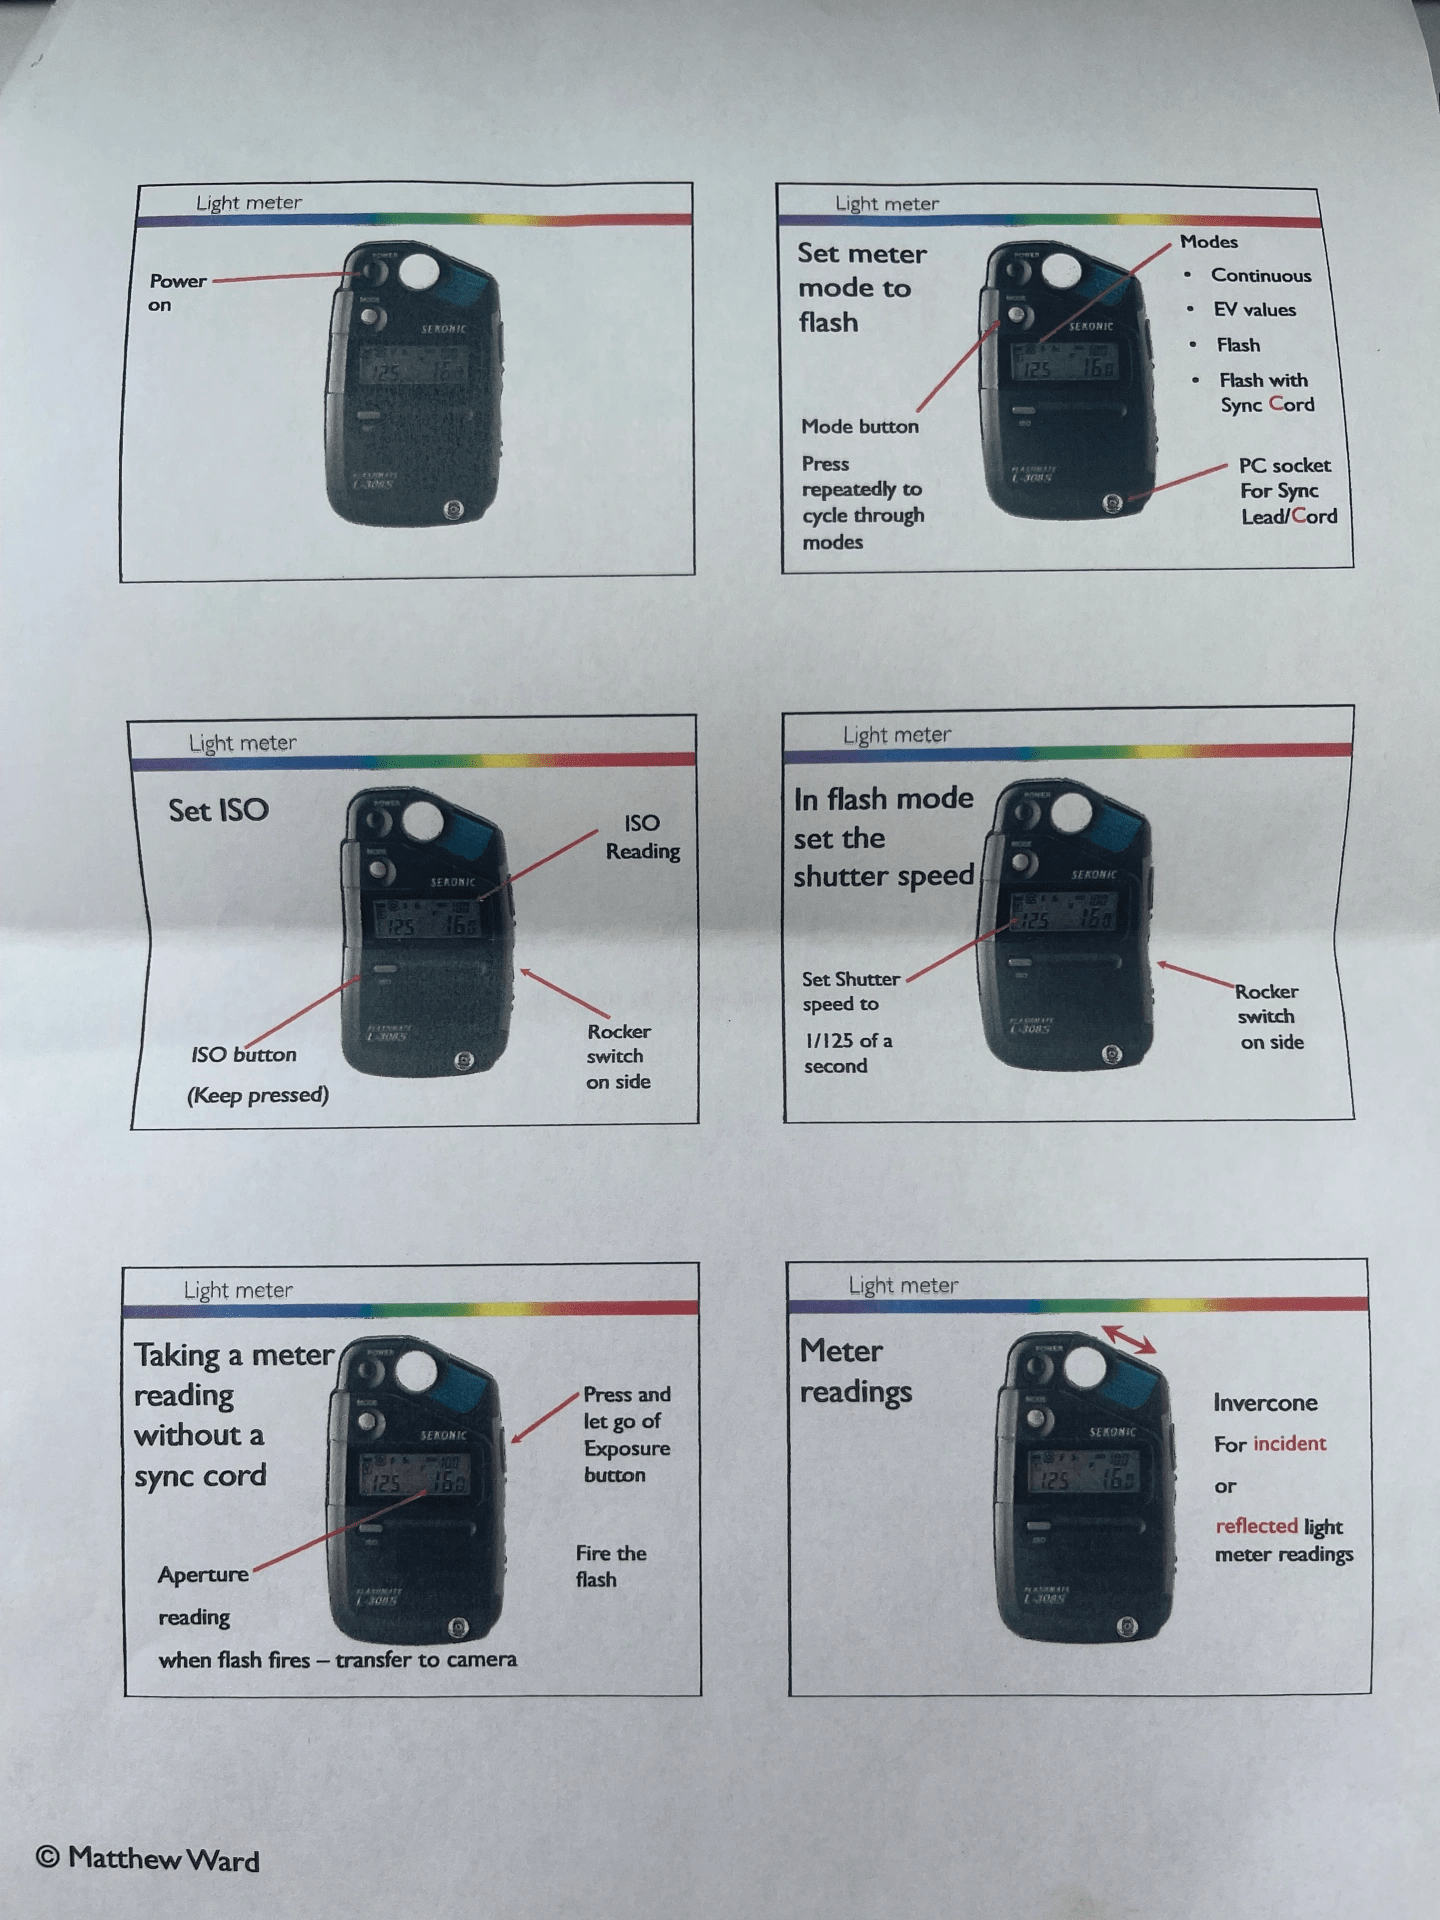
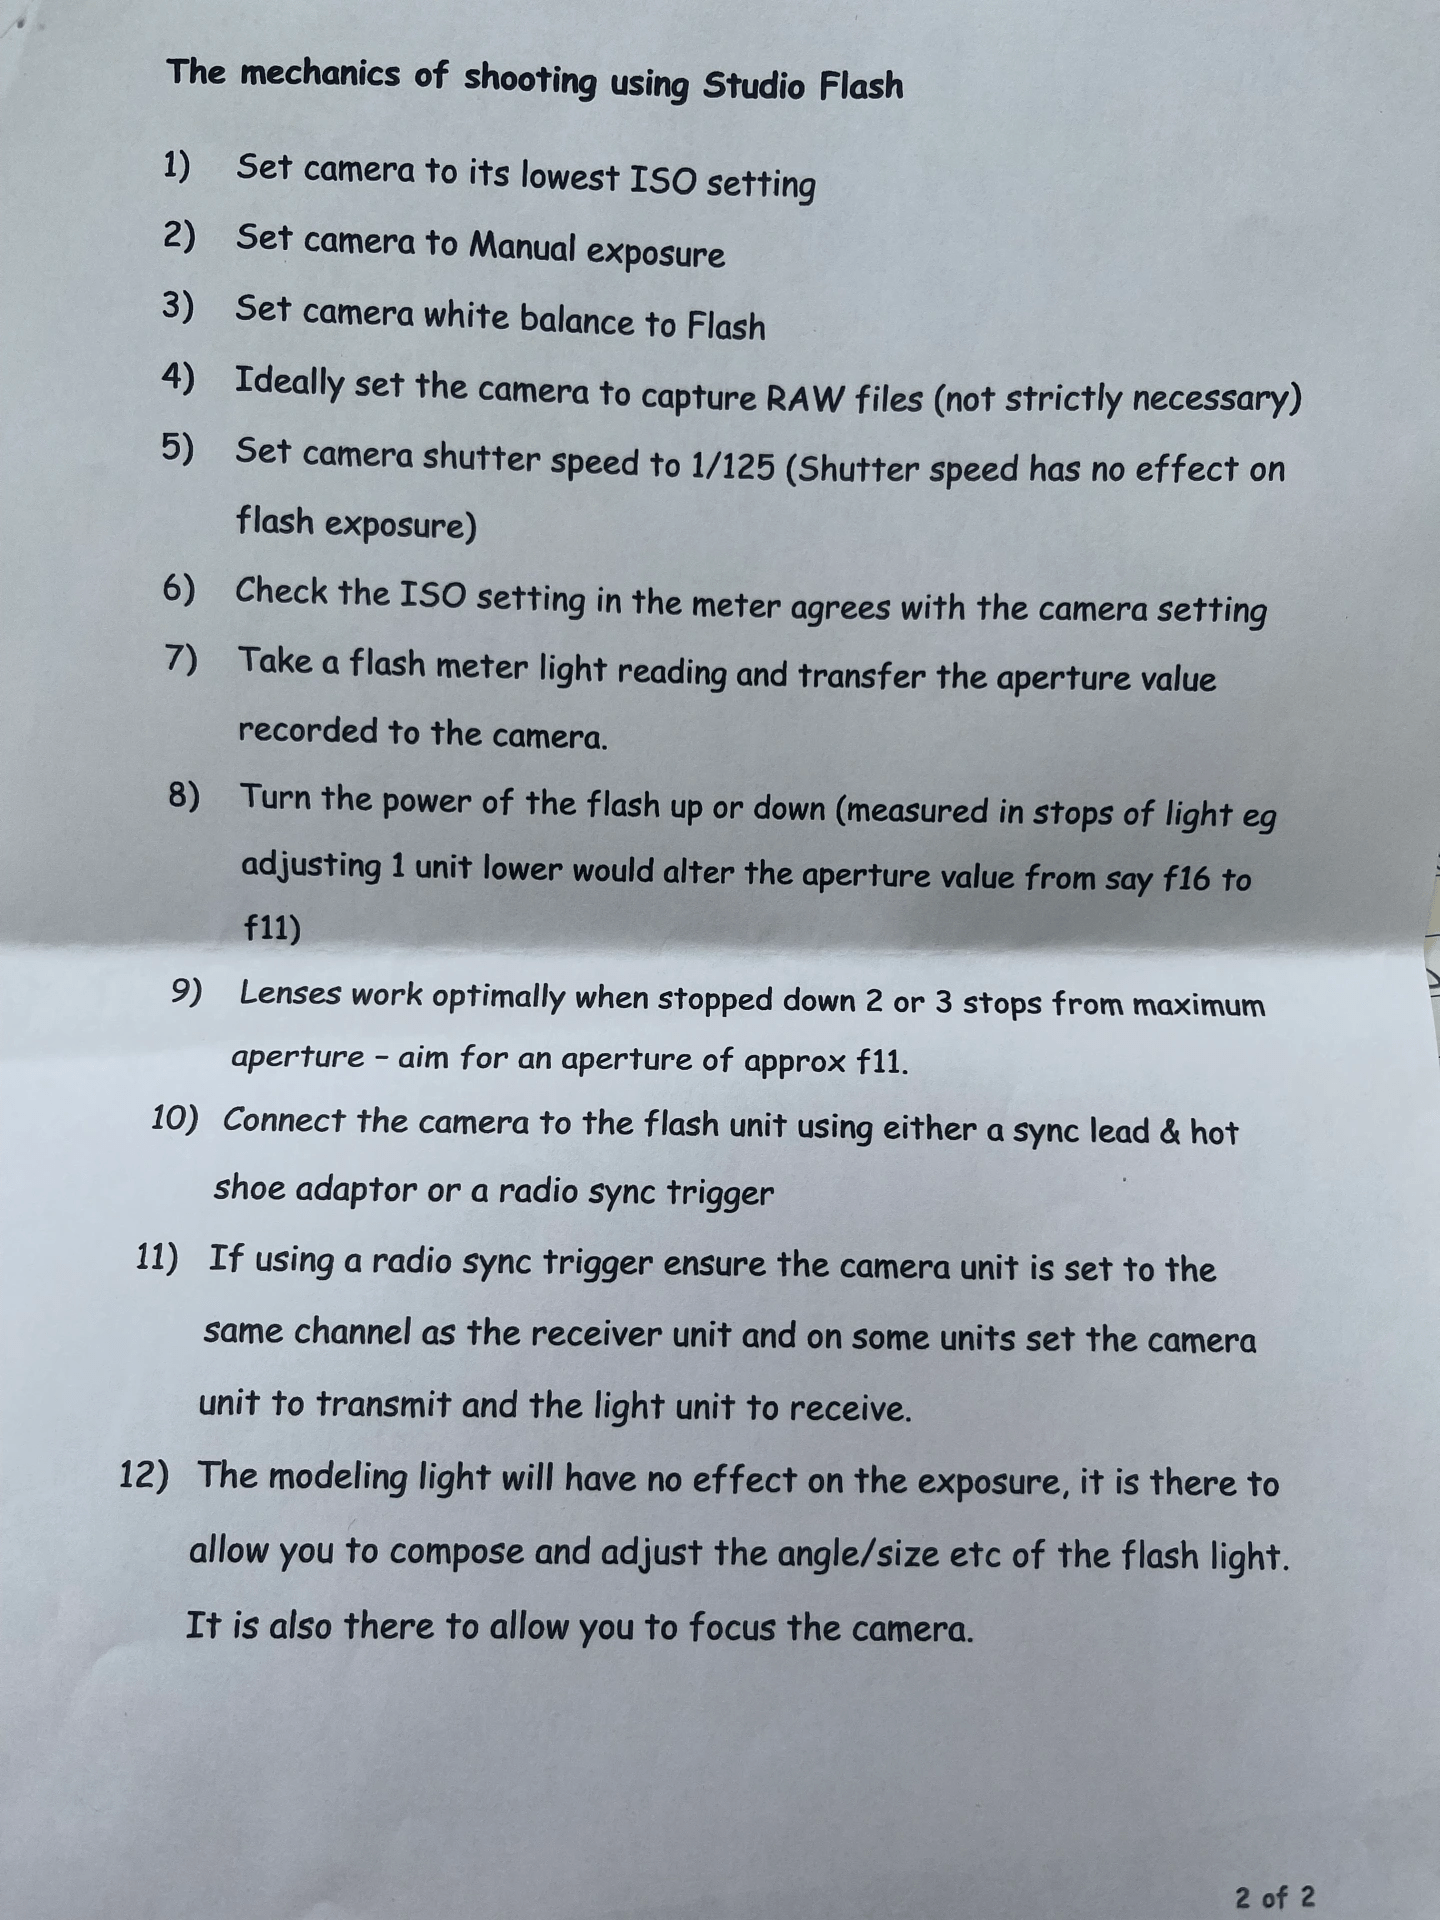
At the beginning of class we looked at the mechanics of using a studio flash.
With my Sony a7 camera and 24-70mm lens I was able to put the ISO as low as 50, switched the white balance to flash, the shutter speed to 1/125, then using a flash, you cannot set the shutter speed higher that 1/250. I started on a middle aperture of F16. My camera is also set up to capture RAW files so I can then do further improvements to the exposure in Lightroom.
TASK 1 -Studio Portrait Photography – Classical Painting Inspiration:
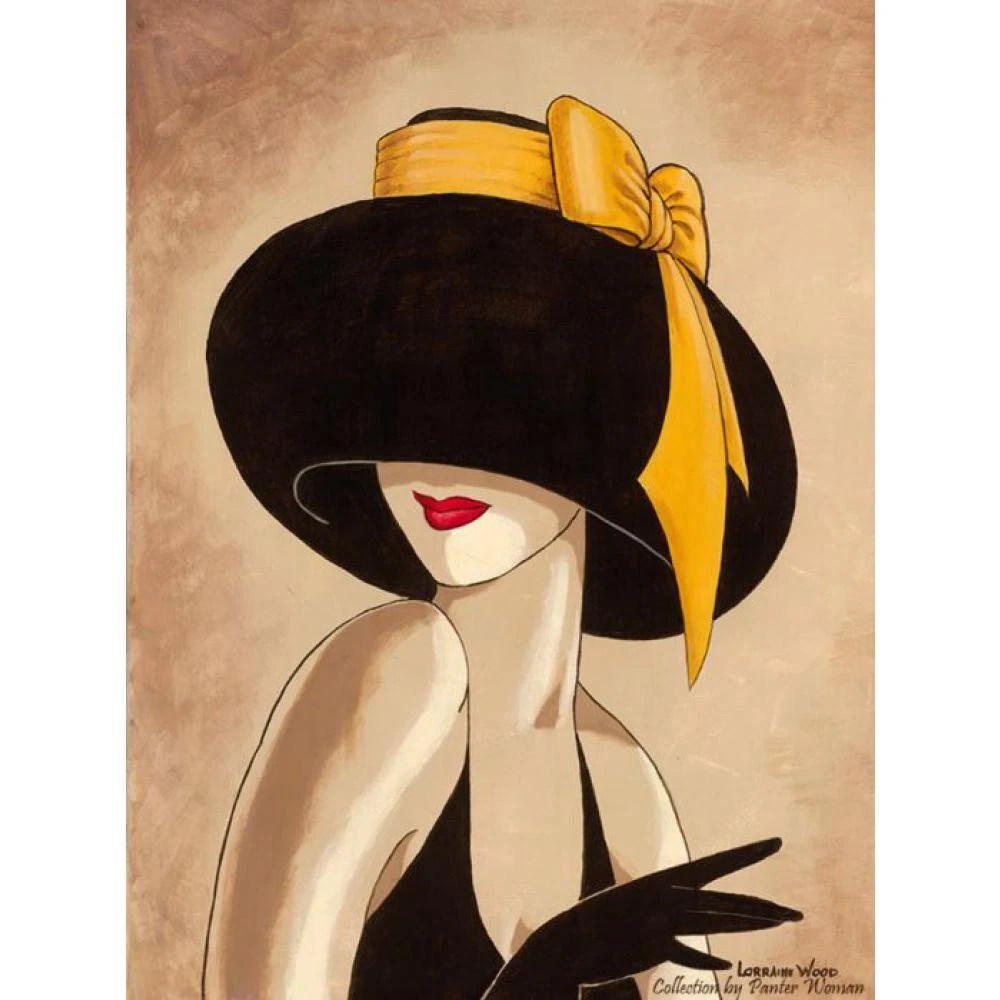
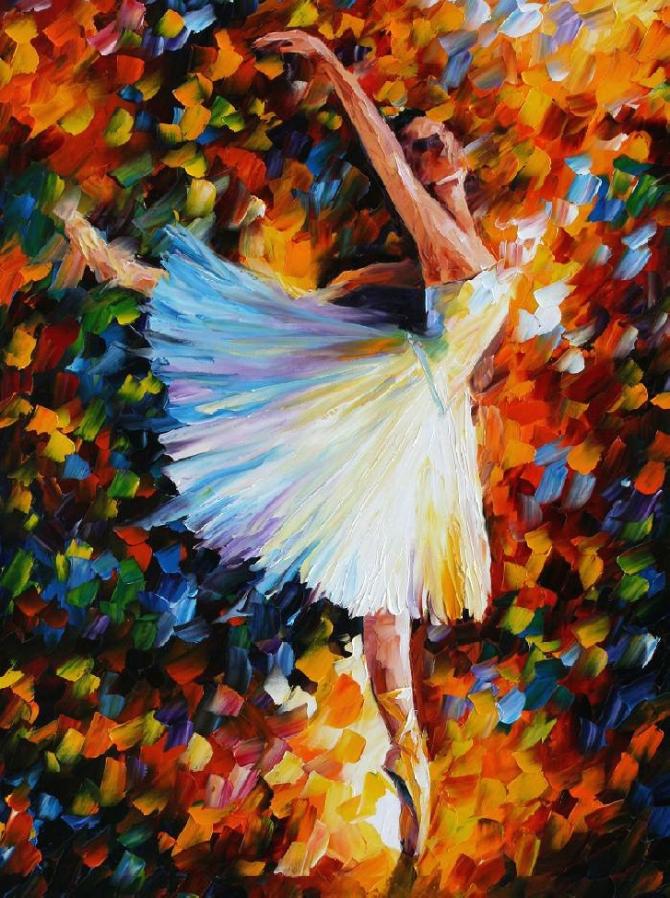
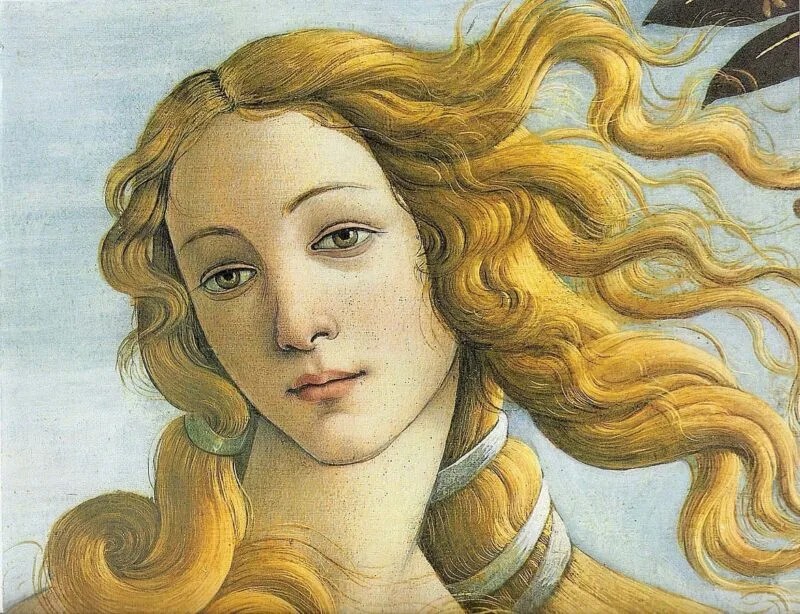
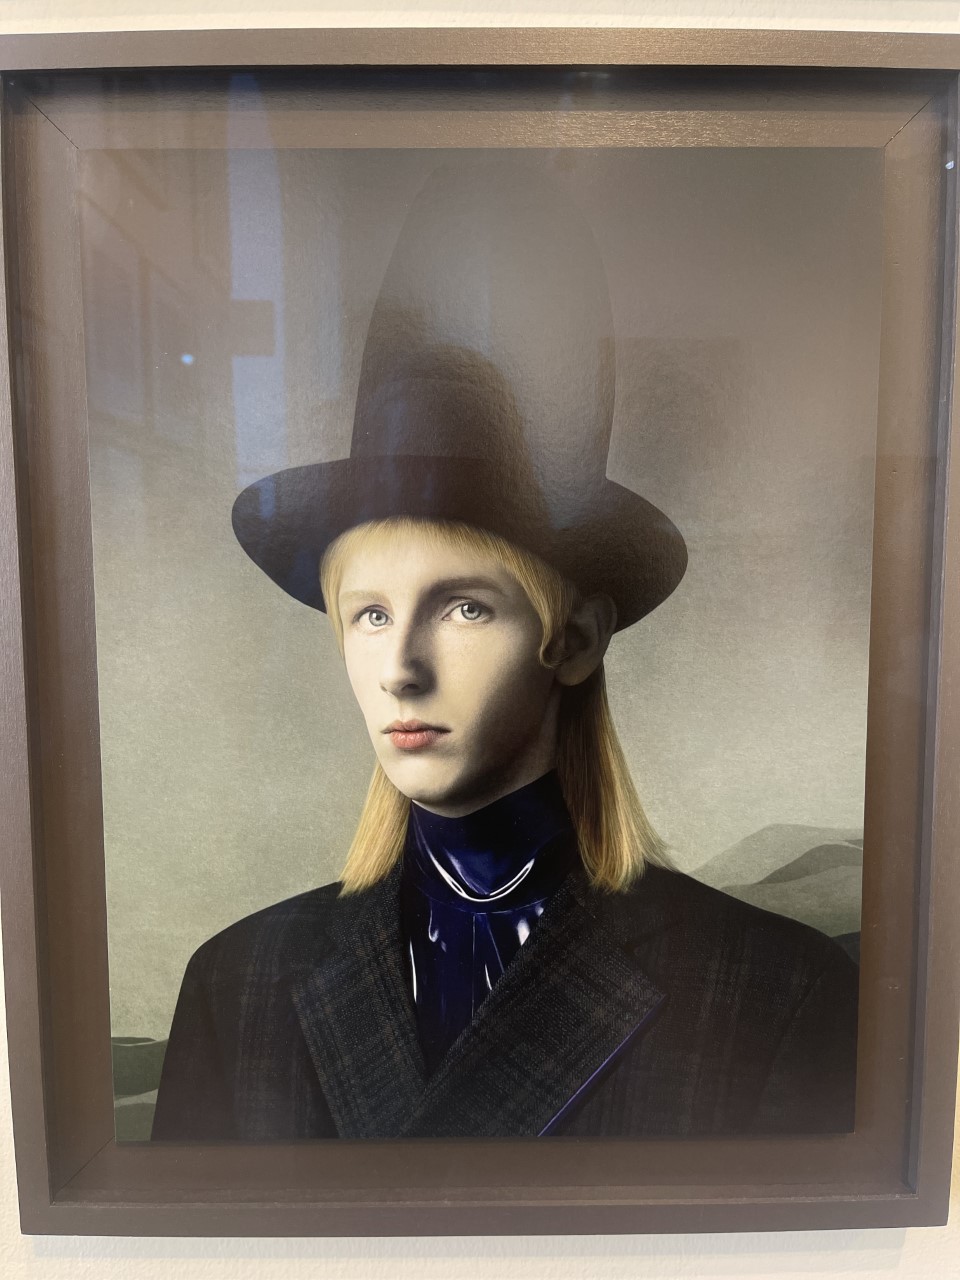
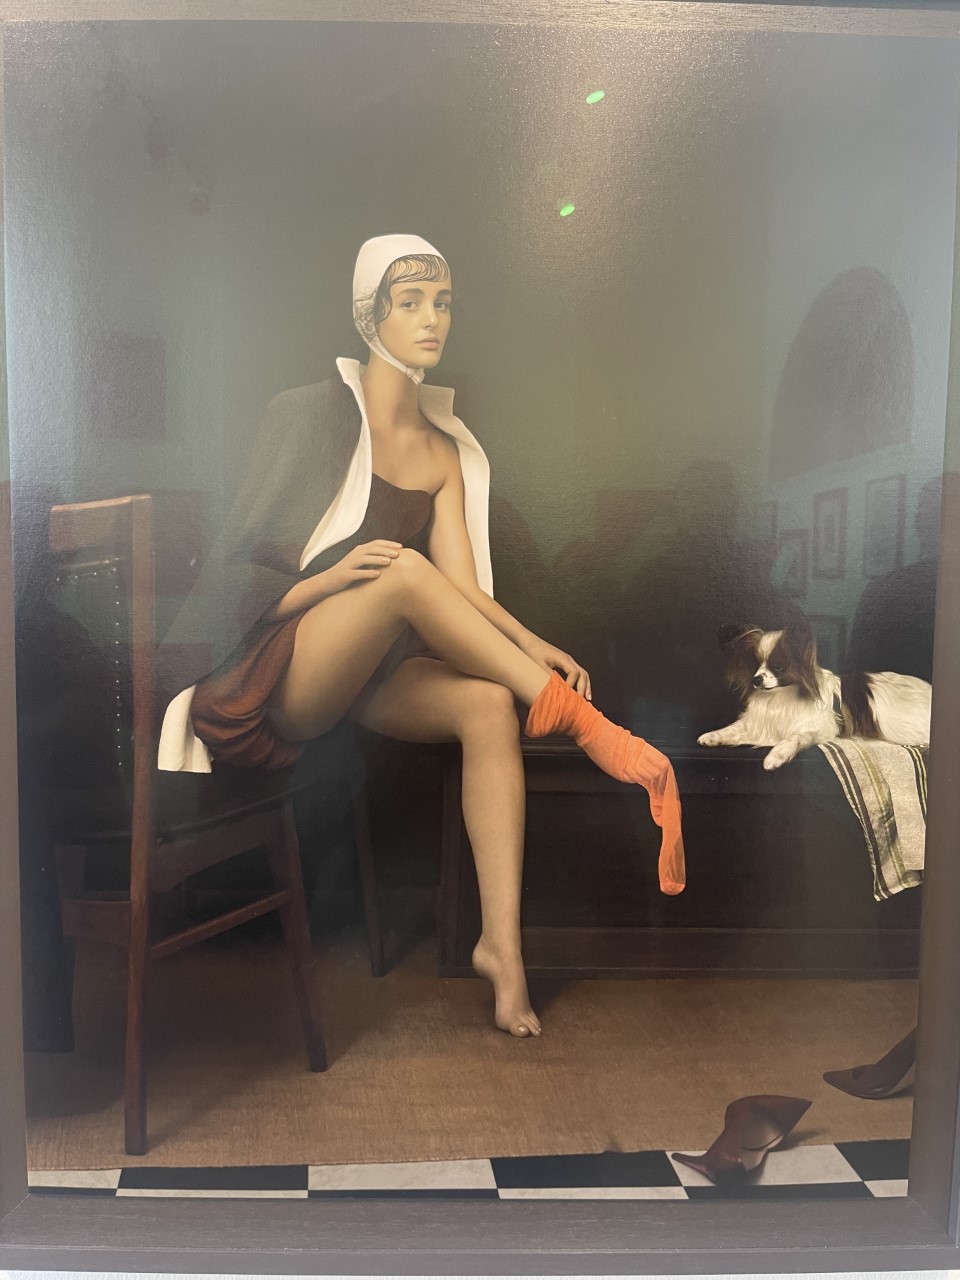
Below are paintings that I am particularly drawn to. I love the idea of a reflection of a face in a mirror, the hair blowing with the wind (a use of a fan), the glamour of make up and costume with a big hat and finally a dancer with lots of colour.


The National Portrait Gallery – The classic portrait
I visited the National Portrait Gallery in London and picked a few paintings I was particularly drawn to from the Rembrandt era.
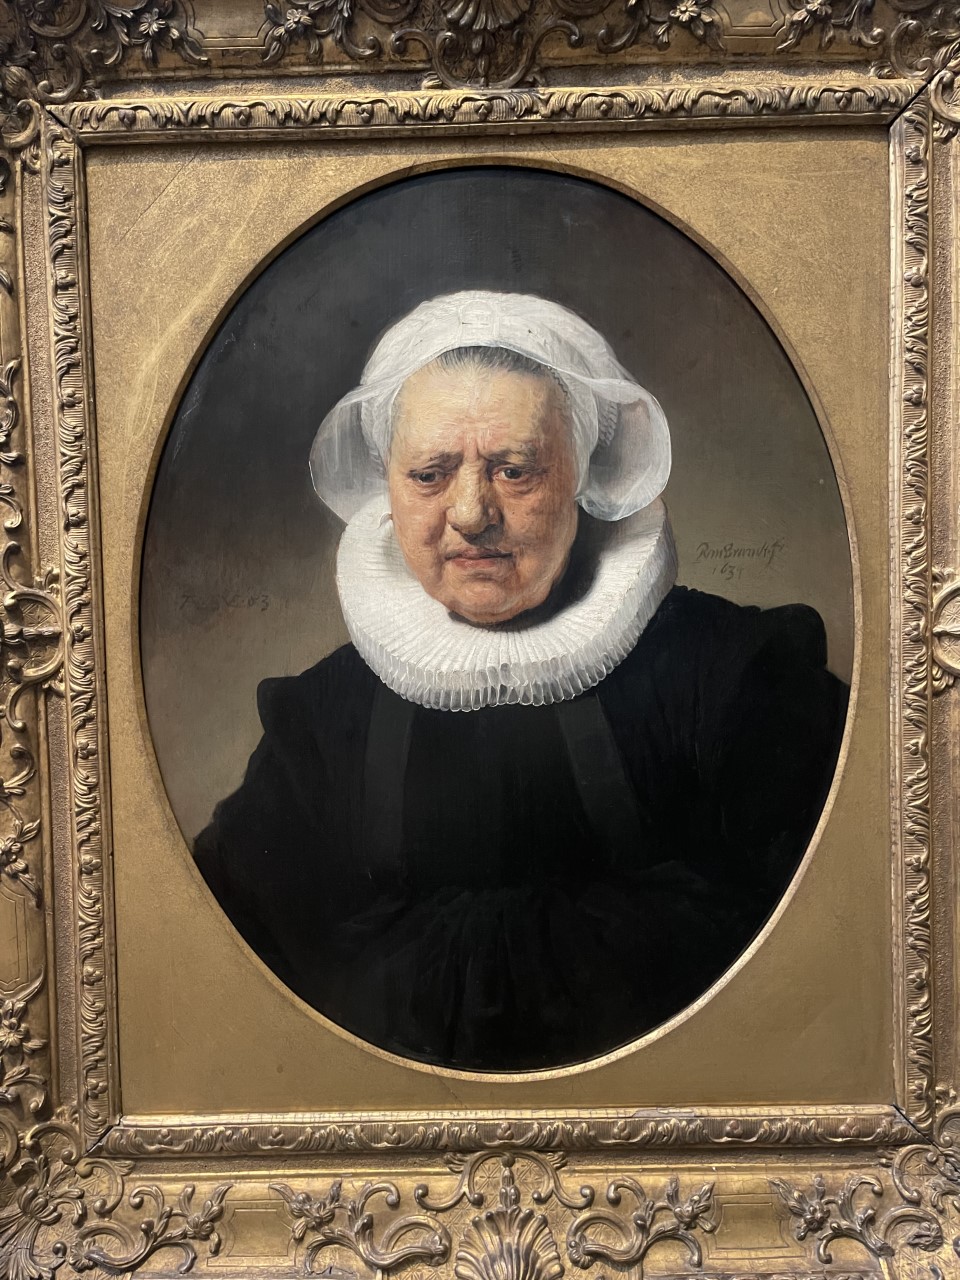
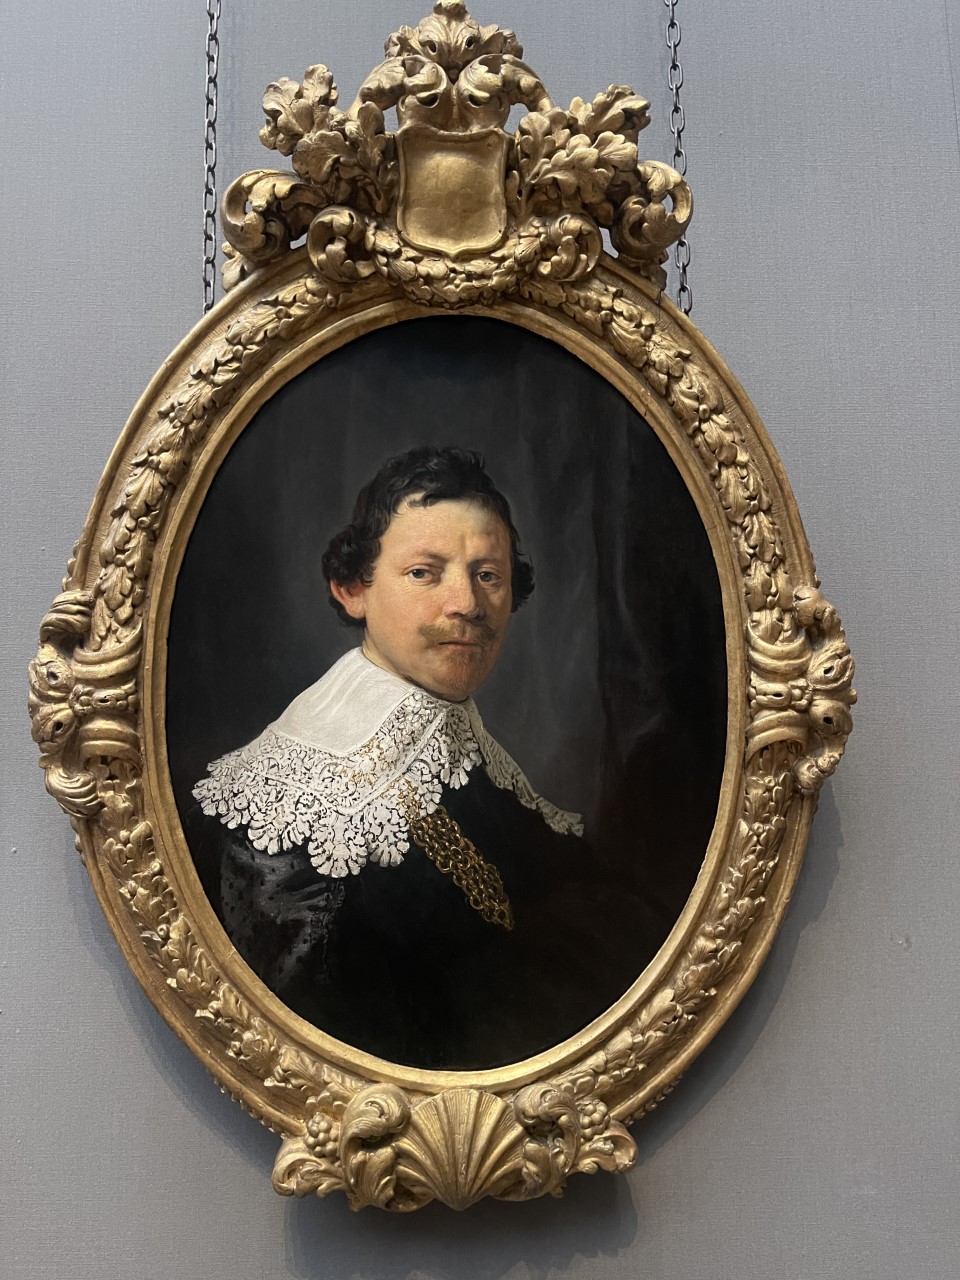
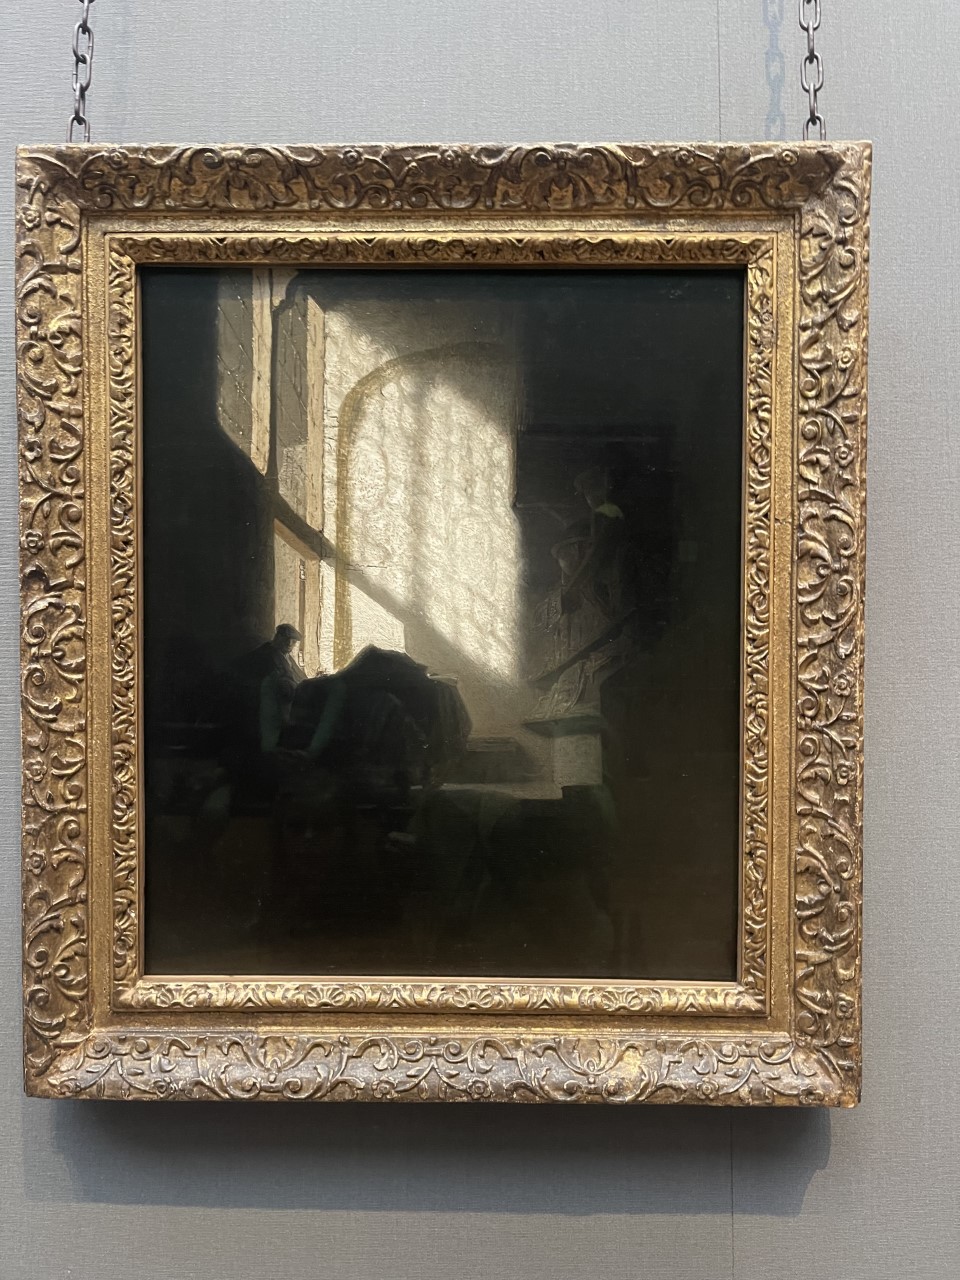

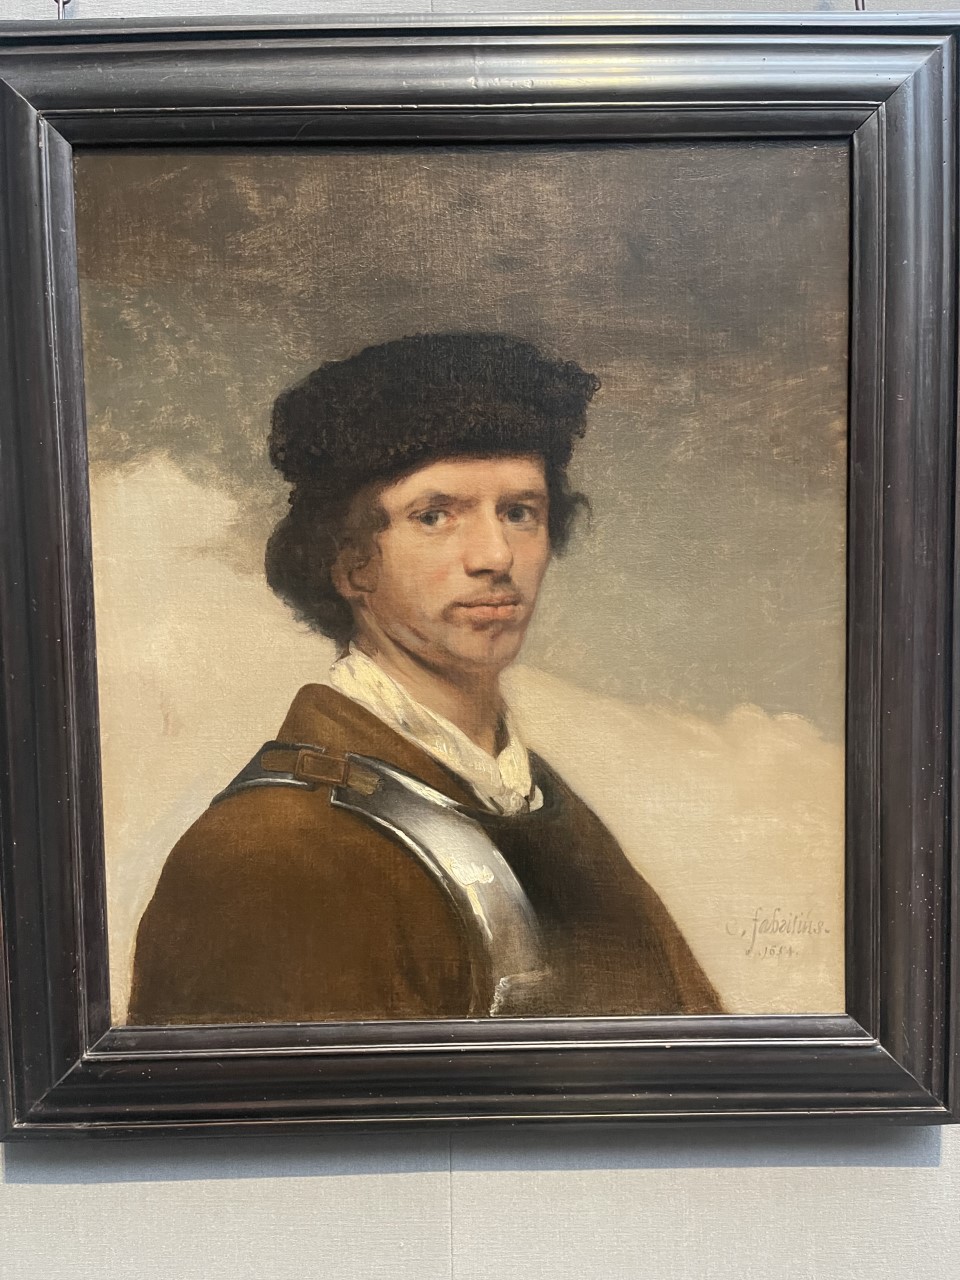
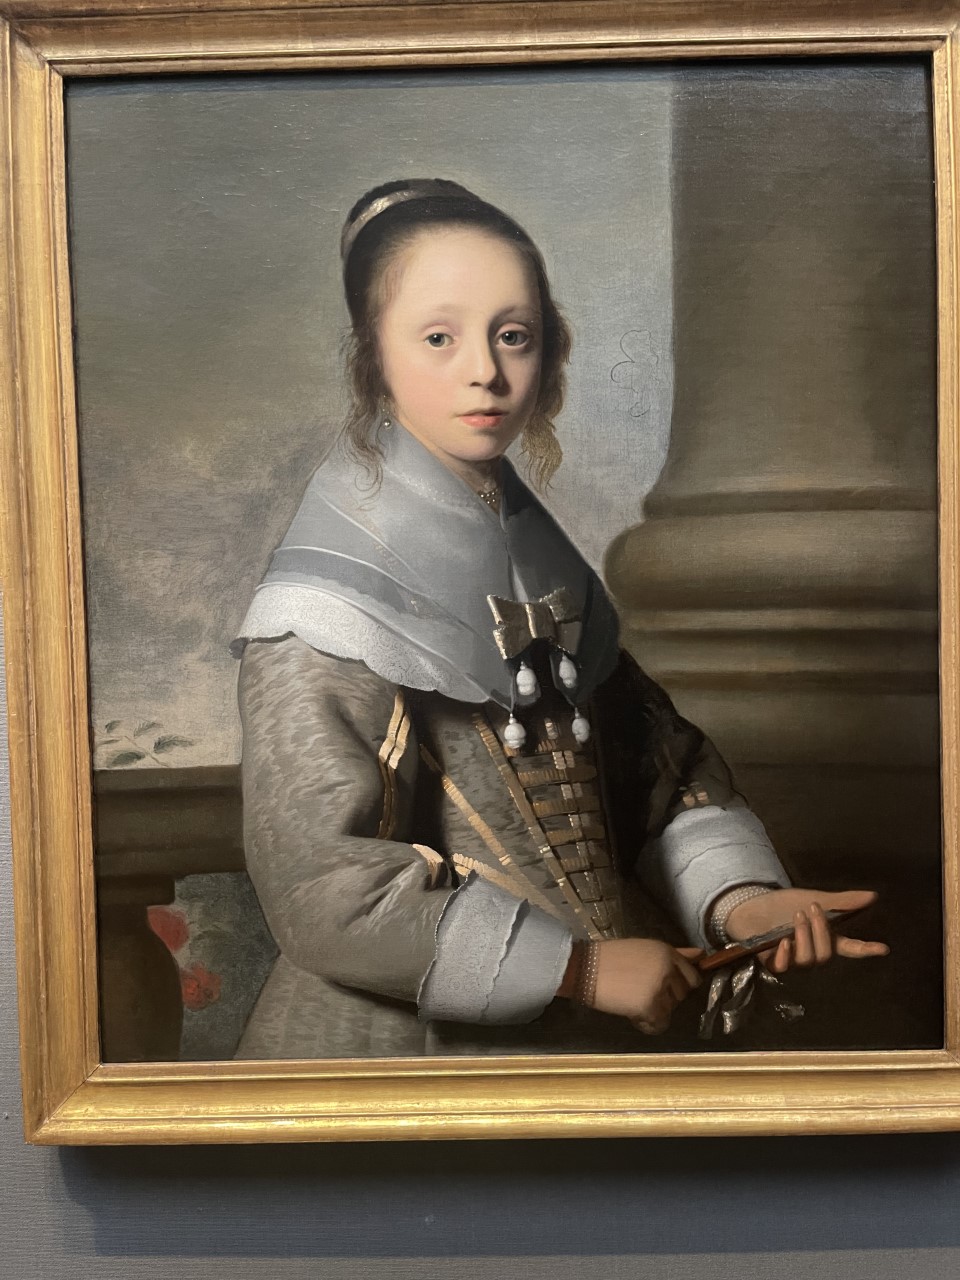


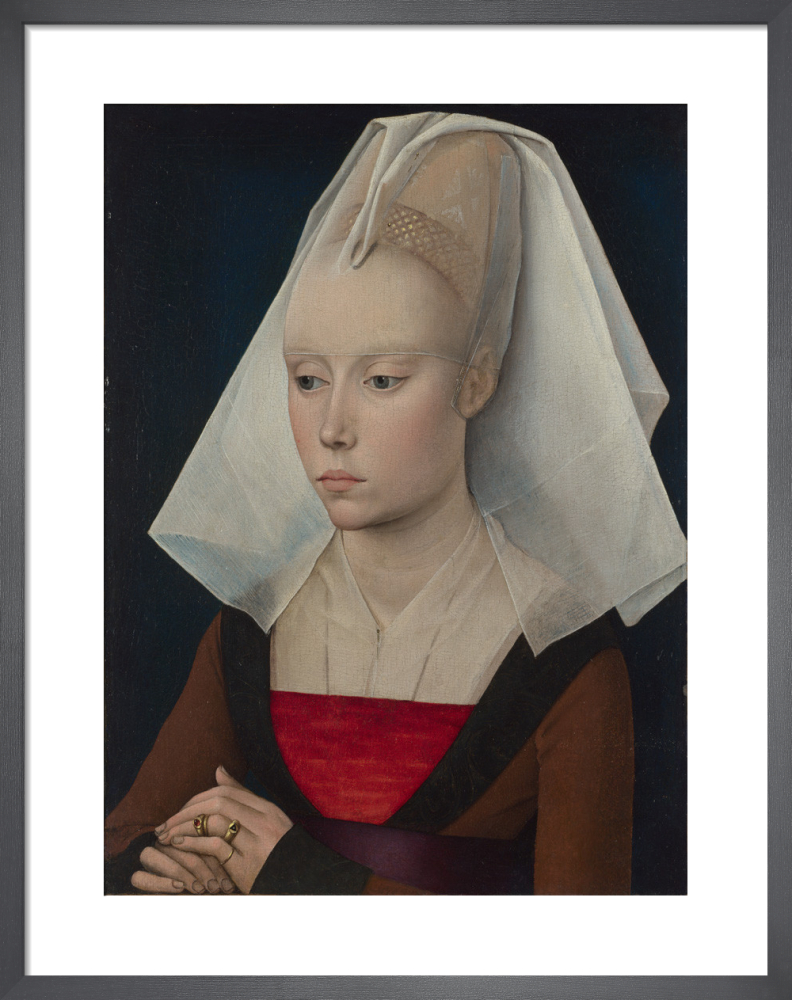
The three pictures I would like to work with are the three below. I would like to have a reflection of a child/person in a mirror, the hair in the wind, this could maybe be a self portrait and the Rembrandt one with a veil over the lit up face with a dark background. For the mirror, the background could be a soft neutral and for the wind in the hair I would like to have more fun with retro floral vintage fabric background.


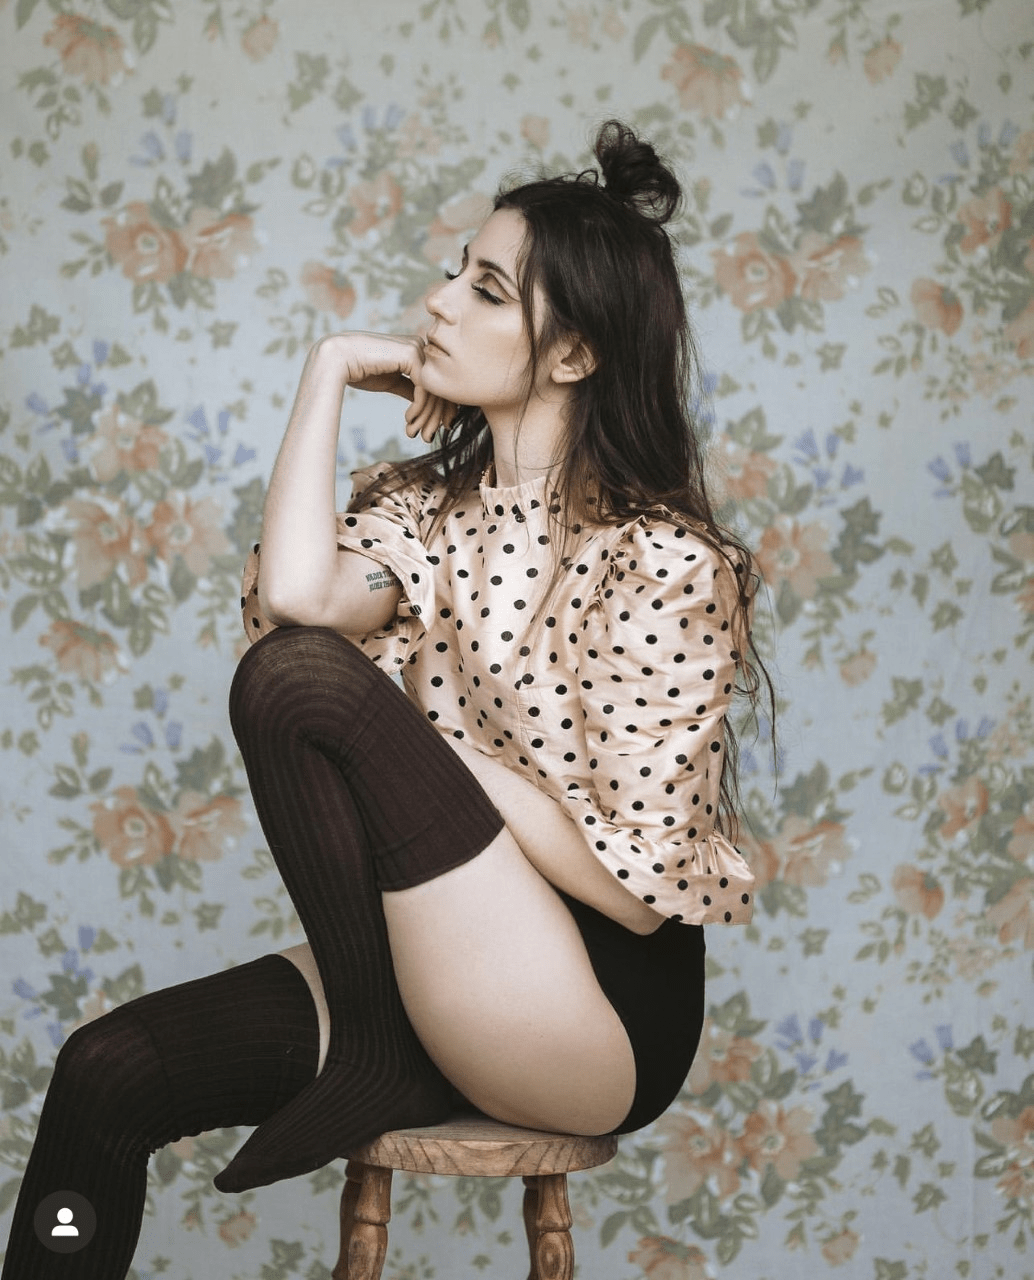
Ideas for the vintage floral background:
Photographer Alexandra Cameron

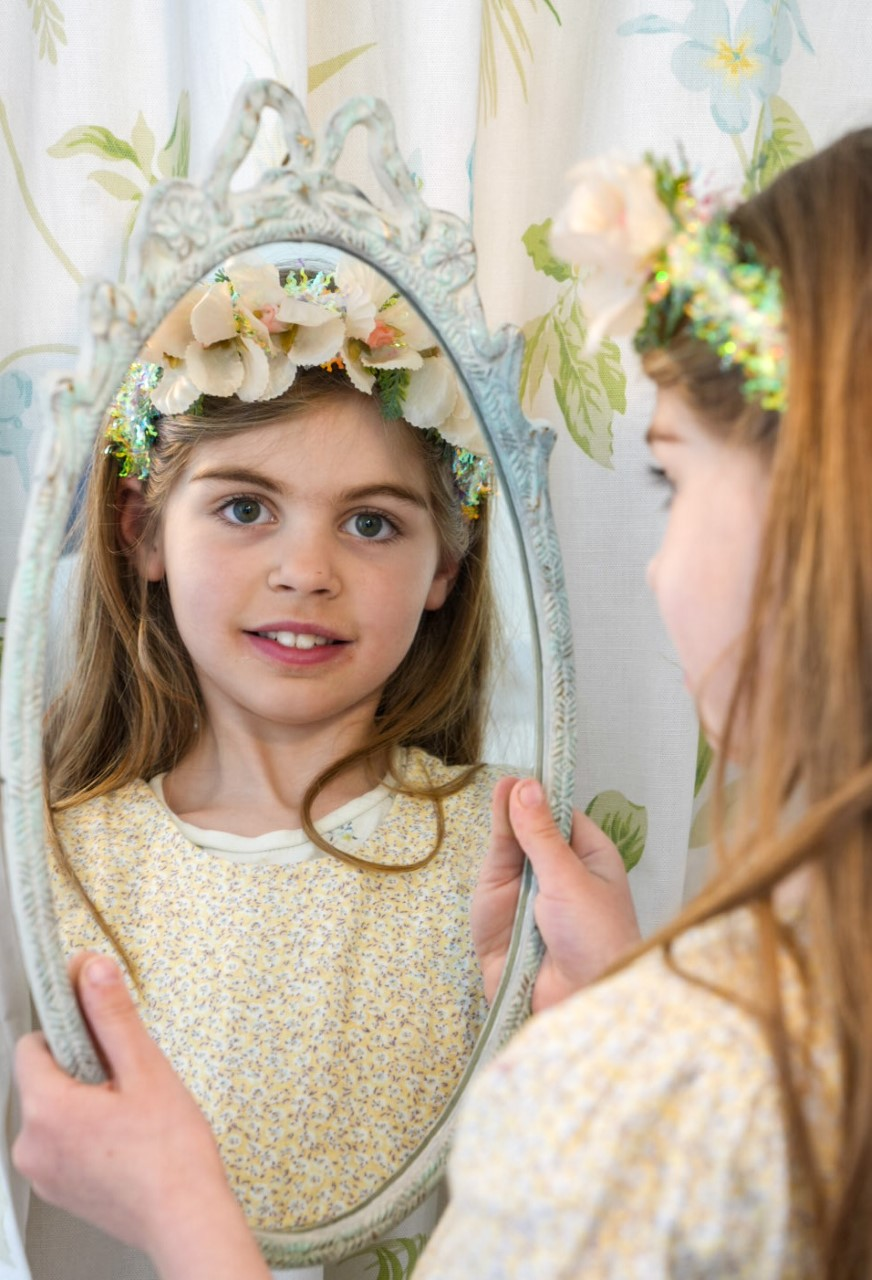
I experimented at home with my daughter the reflection of the girl in the mirror, I used natural light as well as a lamp behind her.

Portrait studio work using continuous lights:
3.1 Use a range of lighting sources to photographs range of subjects to meet identified goals.
We worked with the painting ‘Lady with an Ermine’ by Leonardo da Vinci. We needed a black background and rich colours.
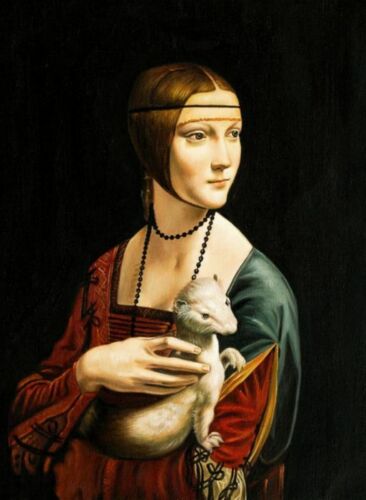
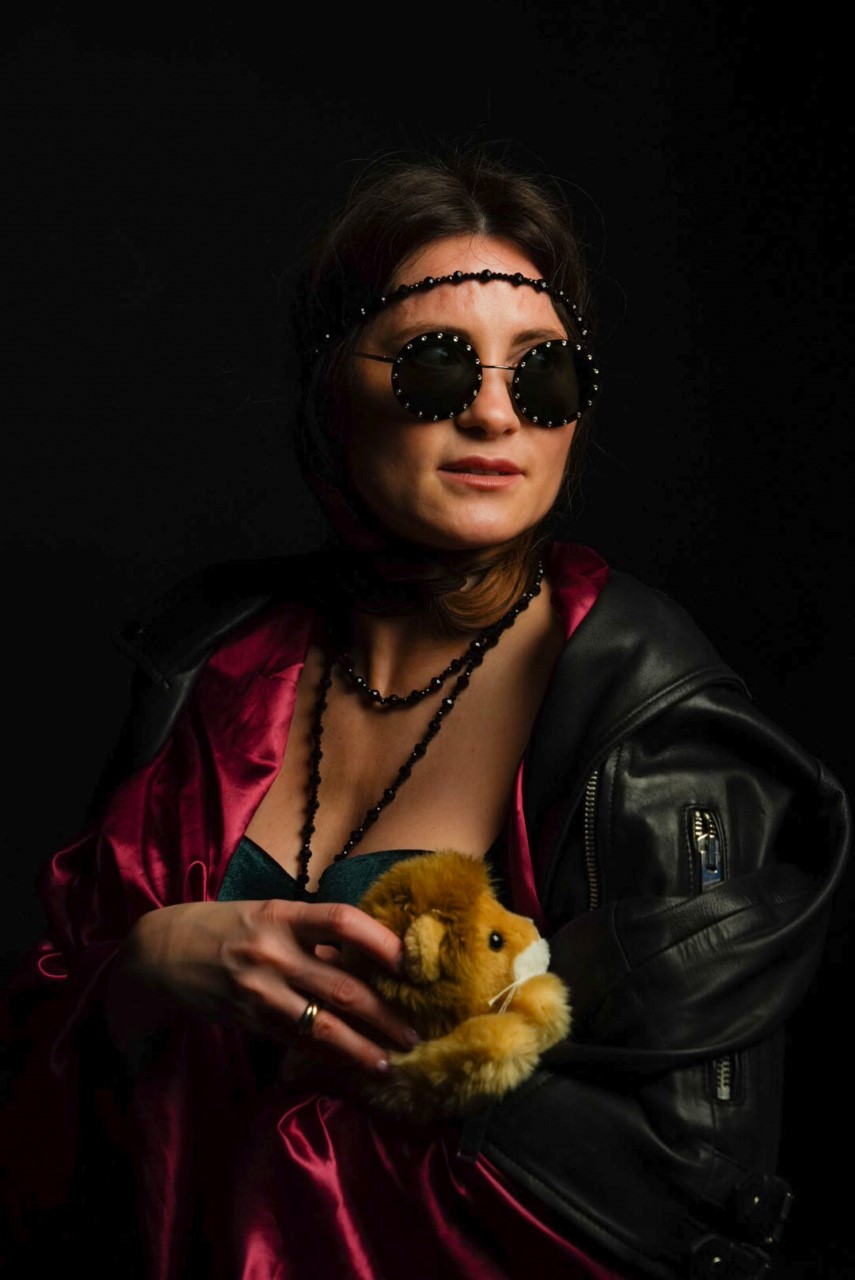

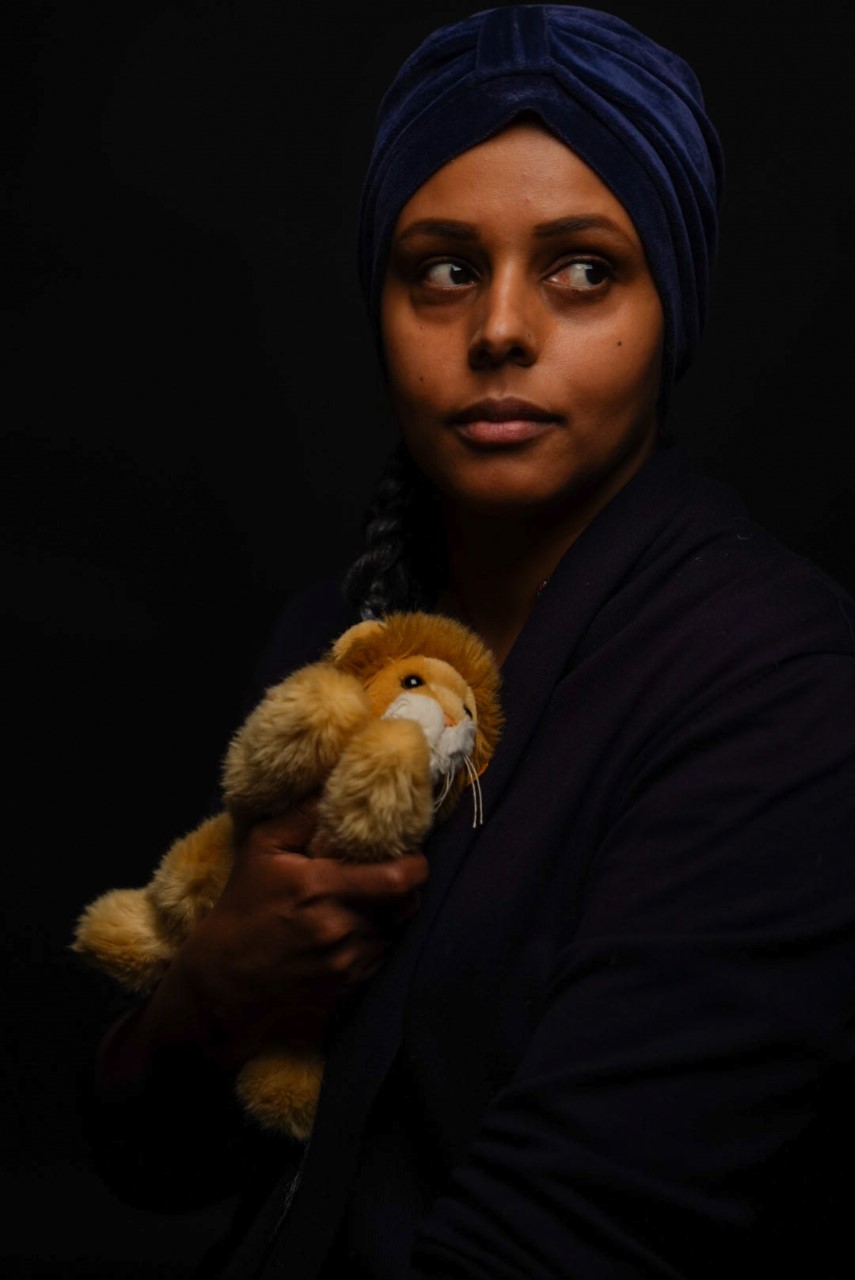
I set my camera to a wide F stop of 5.6 and a relatively high ISO of 800, this did need to be moved up to 1000 as I needed some more light. The shutter speed was set at 1/125. We used two continuous lights and adjusted the model accordingly to achieve the right amount of light on her face. As there was too much shadow to begin with, we moved the model forward and used a black reflector to enhance the shadows on the cheek bones.
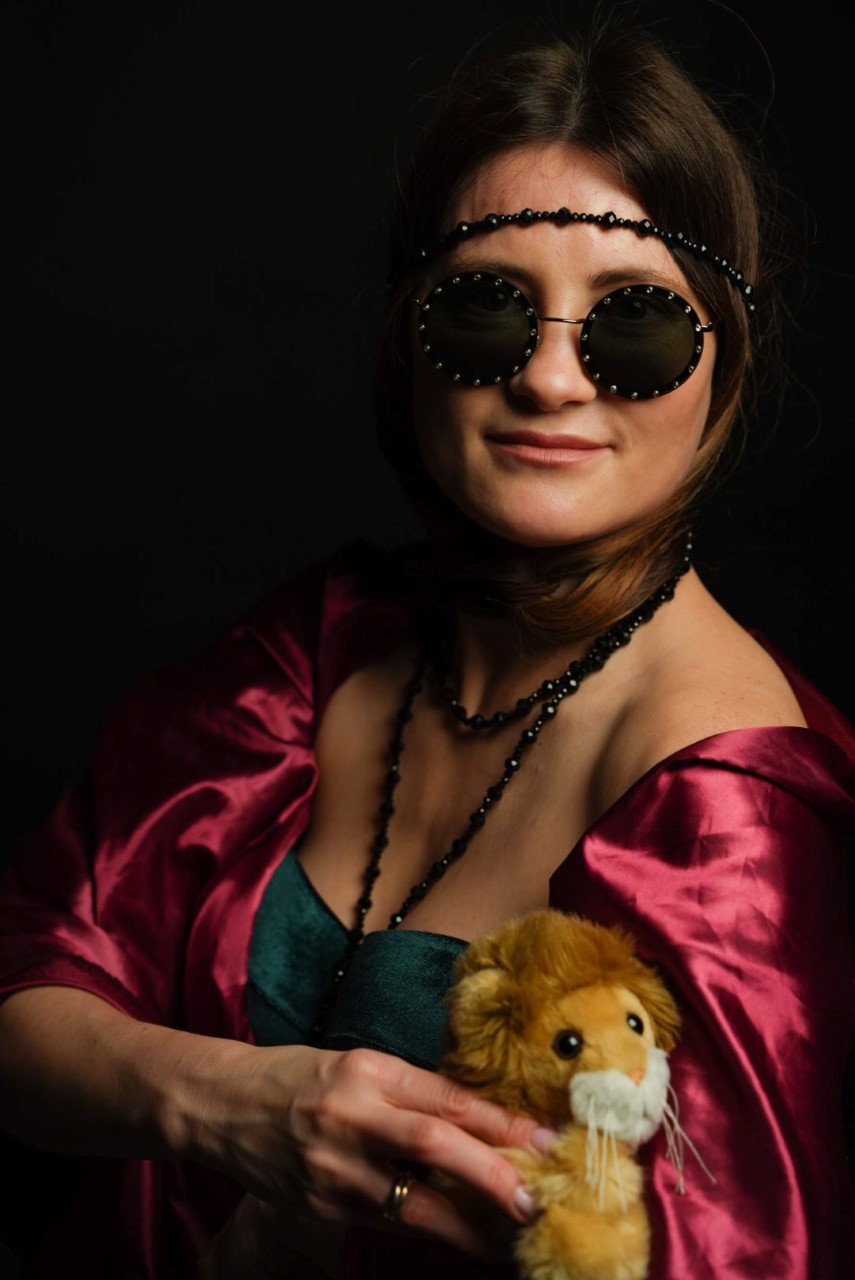
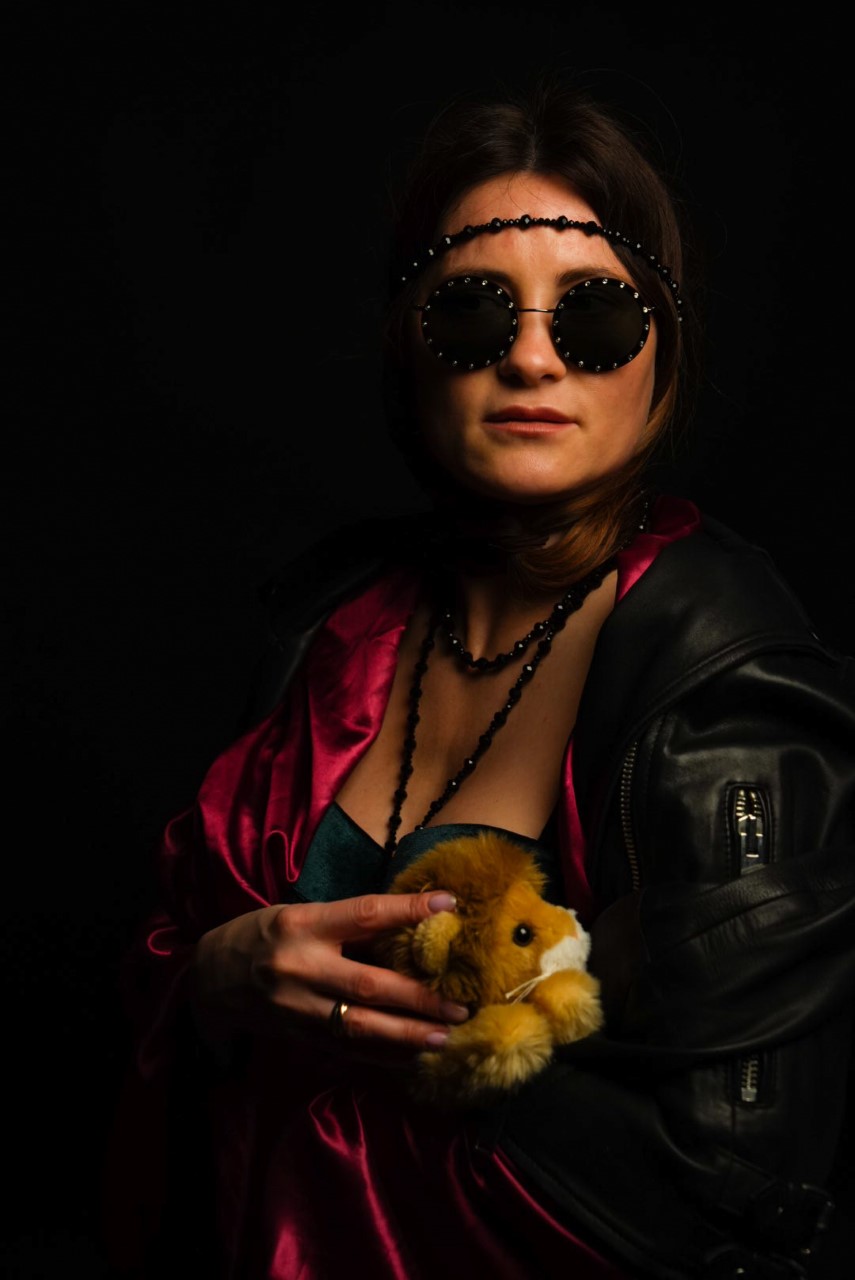
We then had some fun with a more contemporary shoot, moving the model in different positions and moving the lighting.


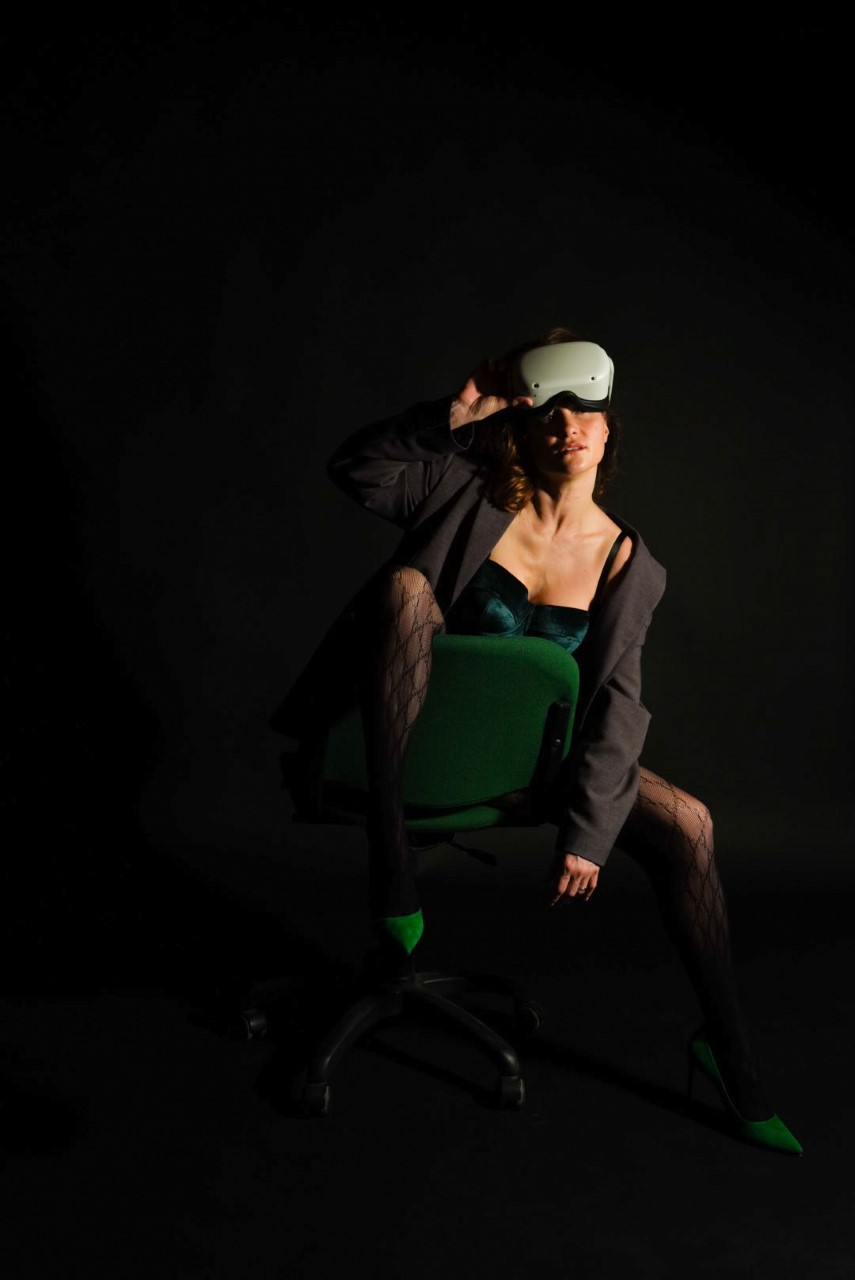


Using just one light and a soft box the light was a bit harsh to begin with. We then filled in with 3 lights and by the end we cut the 3rd light on the right to soften it and two lights to the left.
Portrait studio work using a flash:
The first painting we used was a portrait of Hendrickje Stoffels by Rembrandt. We had a great chair as prop and a black background. We used a soft box to the left of Ruth so half her face would be in shadow.


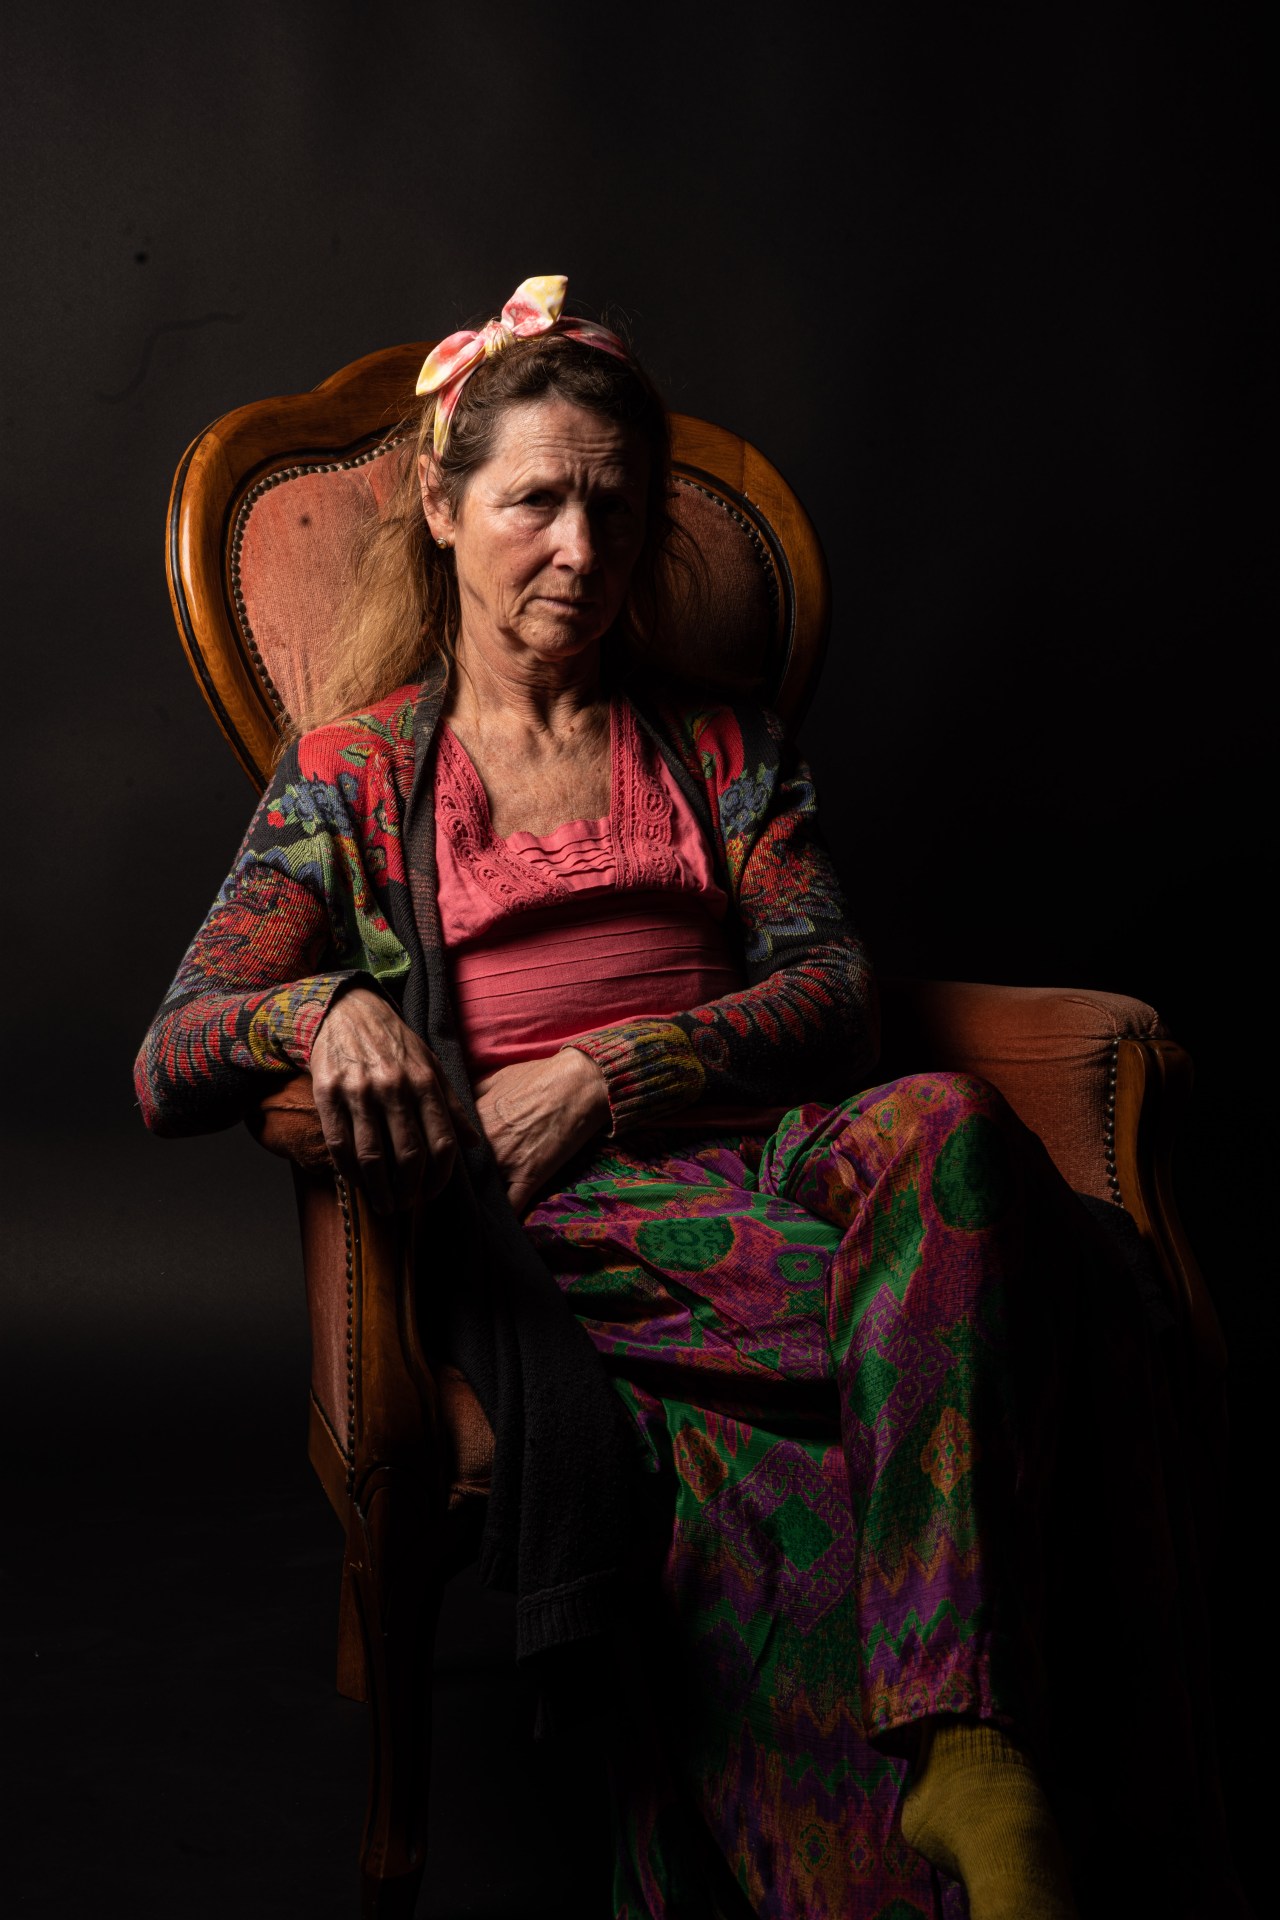
The light was too hash to begin with so we moved Ruth forward with a black reflector under the soft box so there was less spill on the background. I used an F stop of F16, but perhaps I could have gone wider for better exposure as the ISO was low at 50.
Next up we have the masterpiece that is Bubbles. He was an absolute joy to photograph!
Using the same lighting set up, I widened by F stop to 8 this time, for a bit more light .
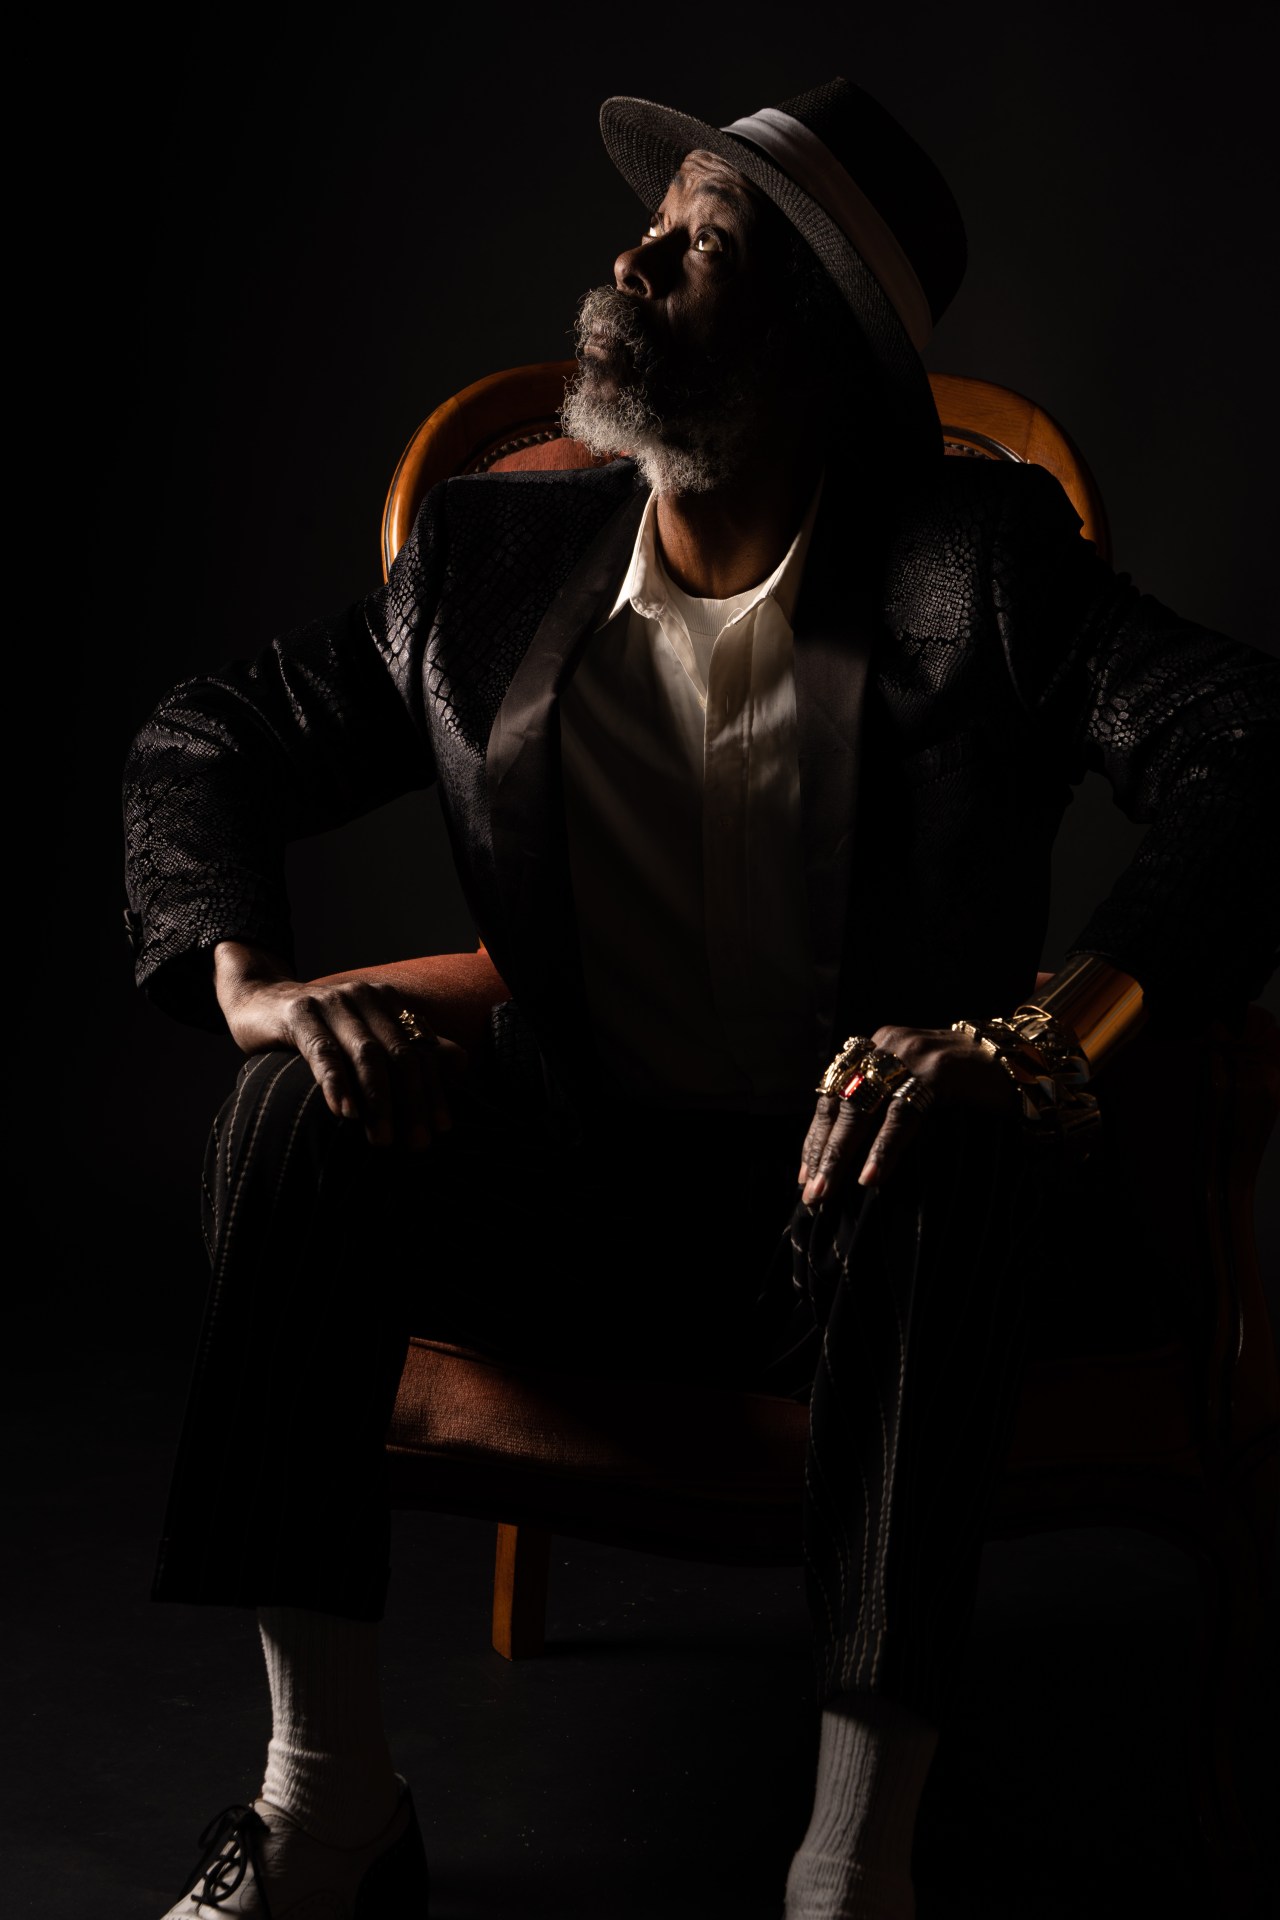
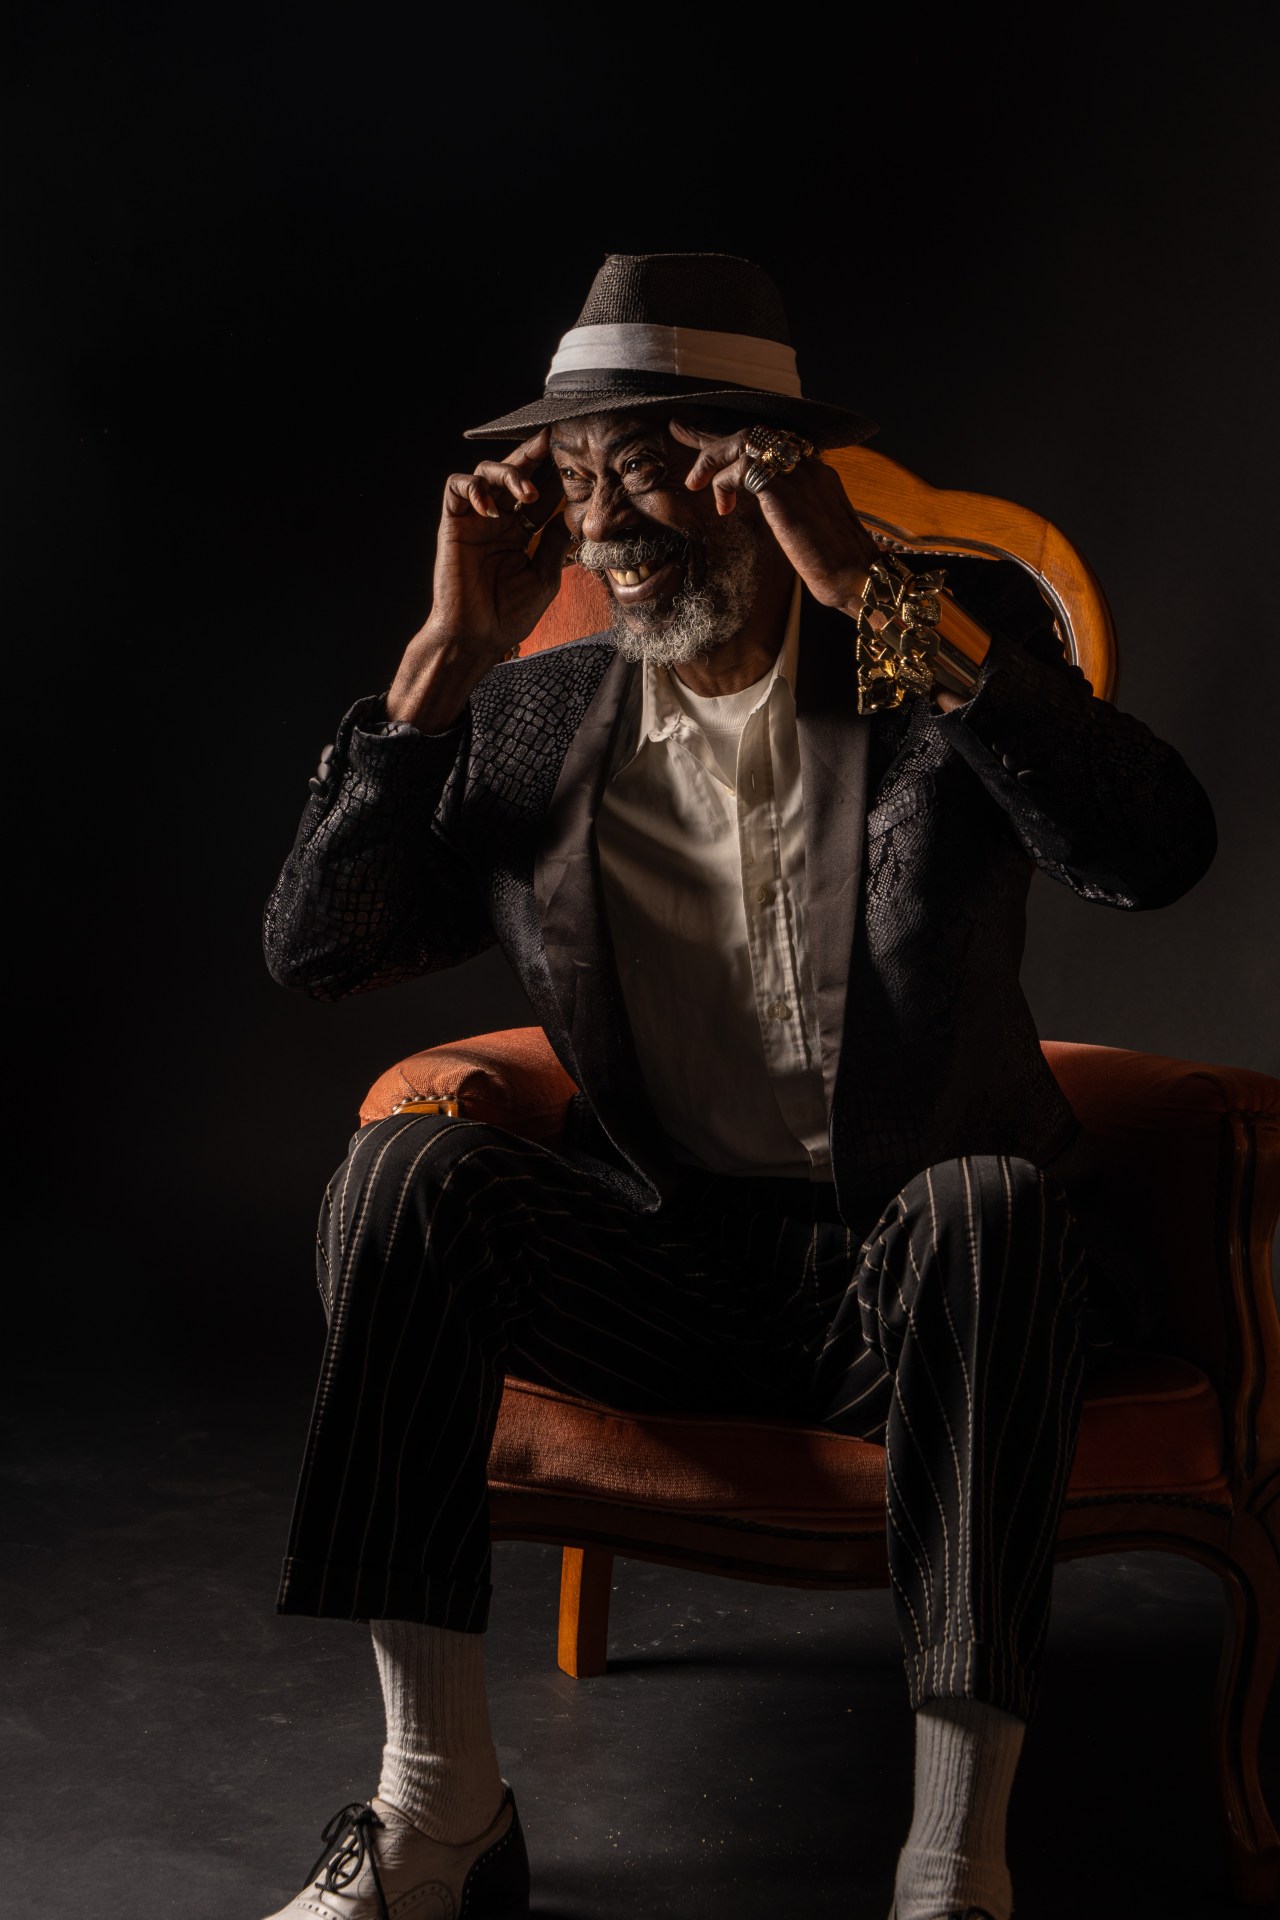

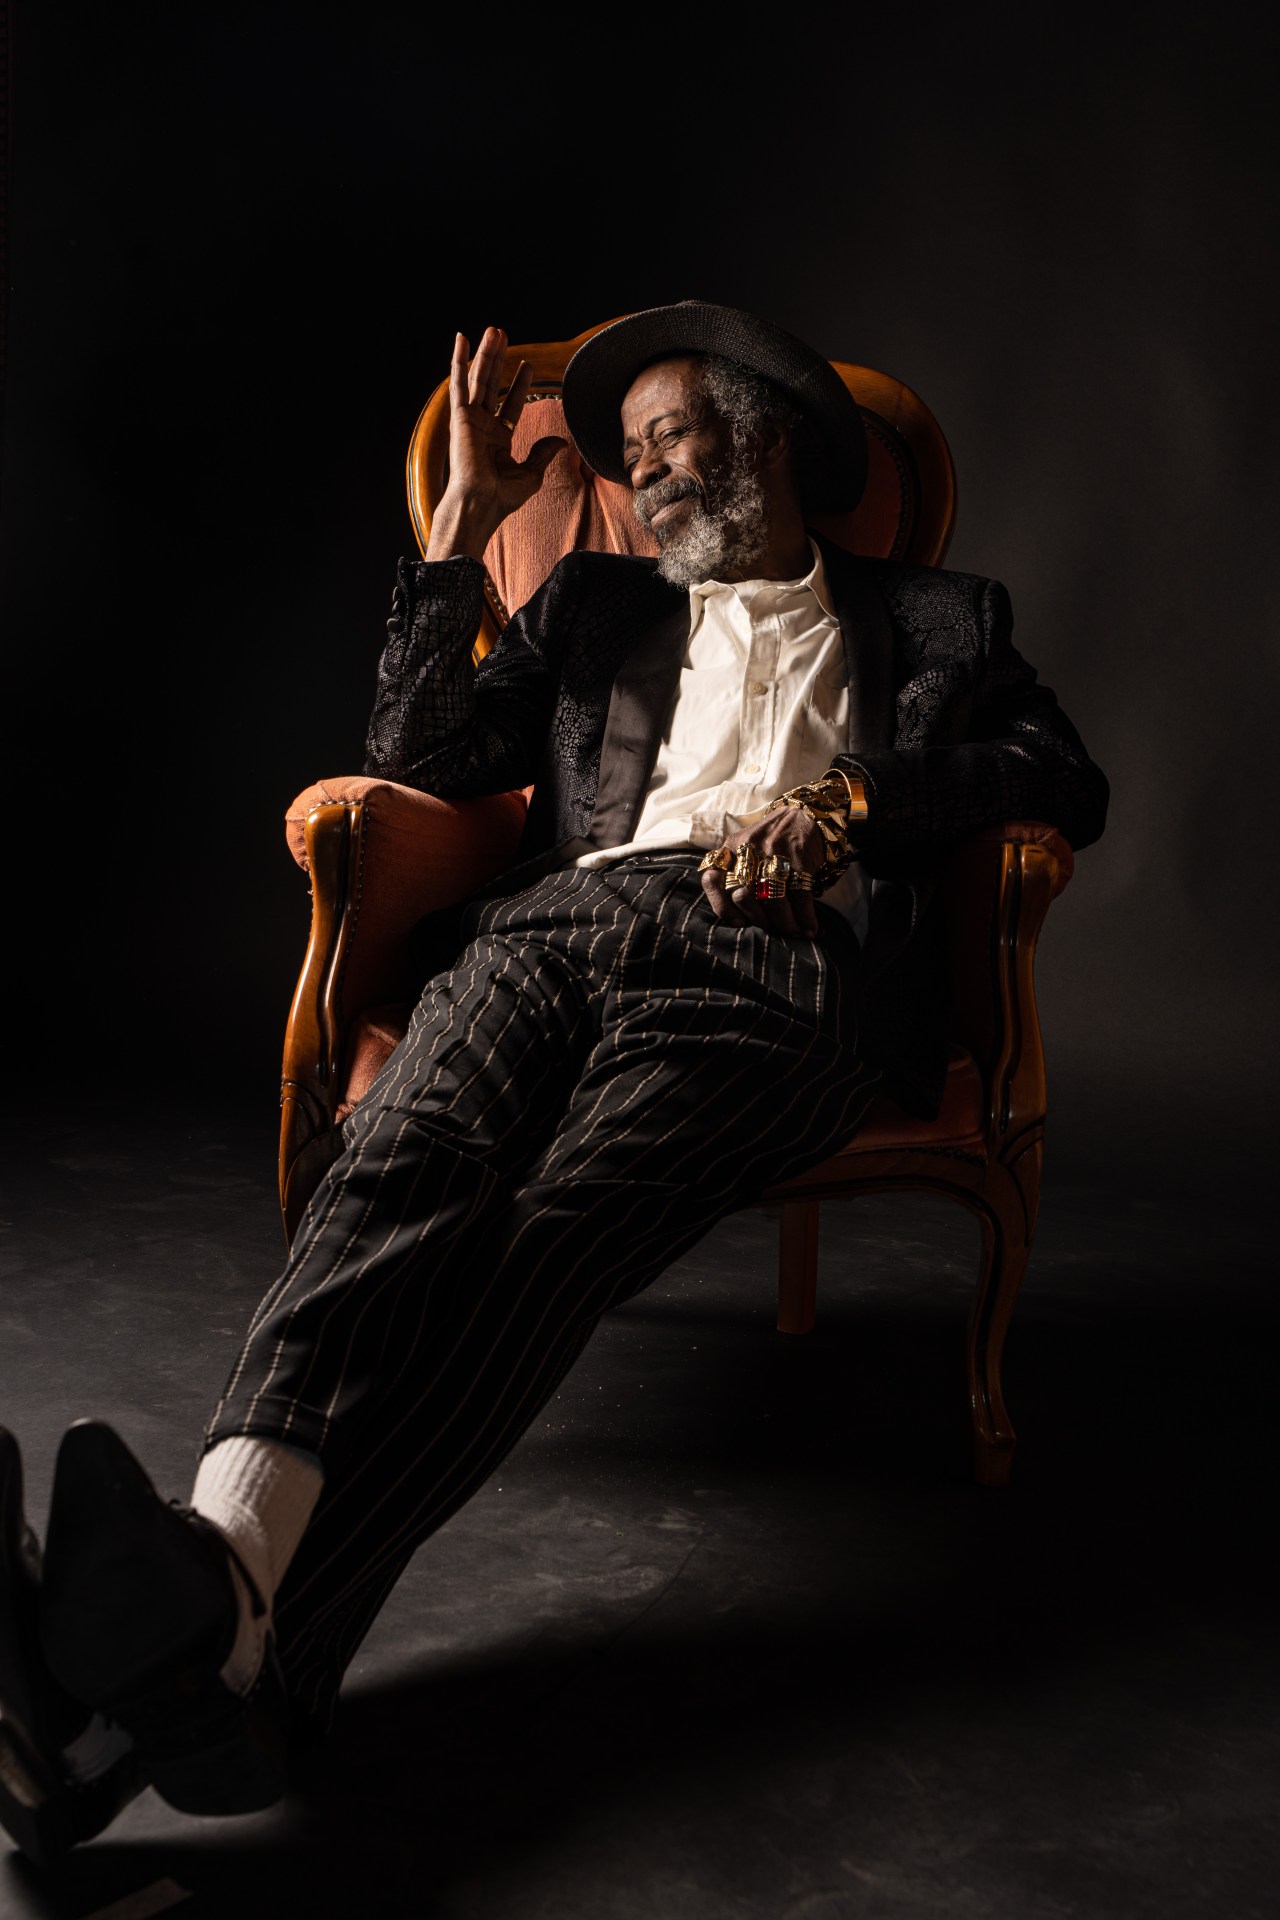

We took inspiration from a self portrait of Rembrandt, using the same props of hat and book and the dark background.


In the above shot, we used a sliver reflector below the magazine shot of the camera. To highlight we are student photographers, experimenting in the studio.
I was really impressed with how well the flash photography worked. Having a low ISO of 50 made the sharpness and clarity of picture really good. I did have to increase the exposure and decrease the highlights in Lightroom afterwards to make it a bit brighter, so maybe in the studio, an ISO of 100 might have been better.
Behind the scenes:


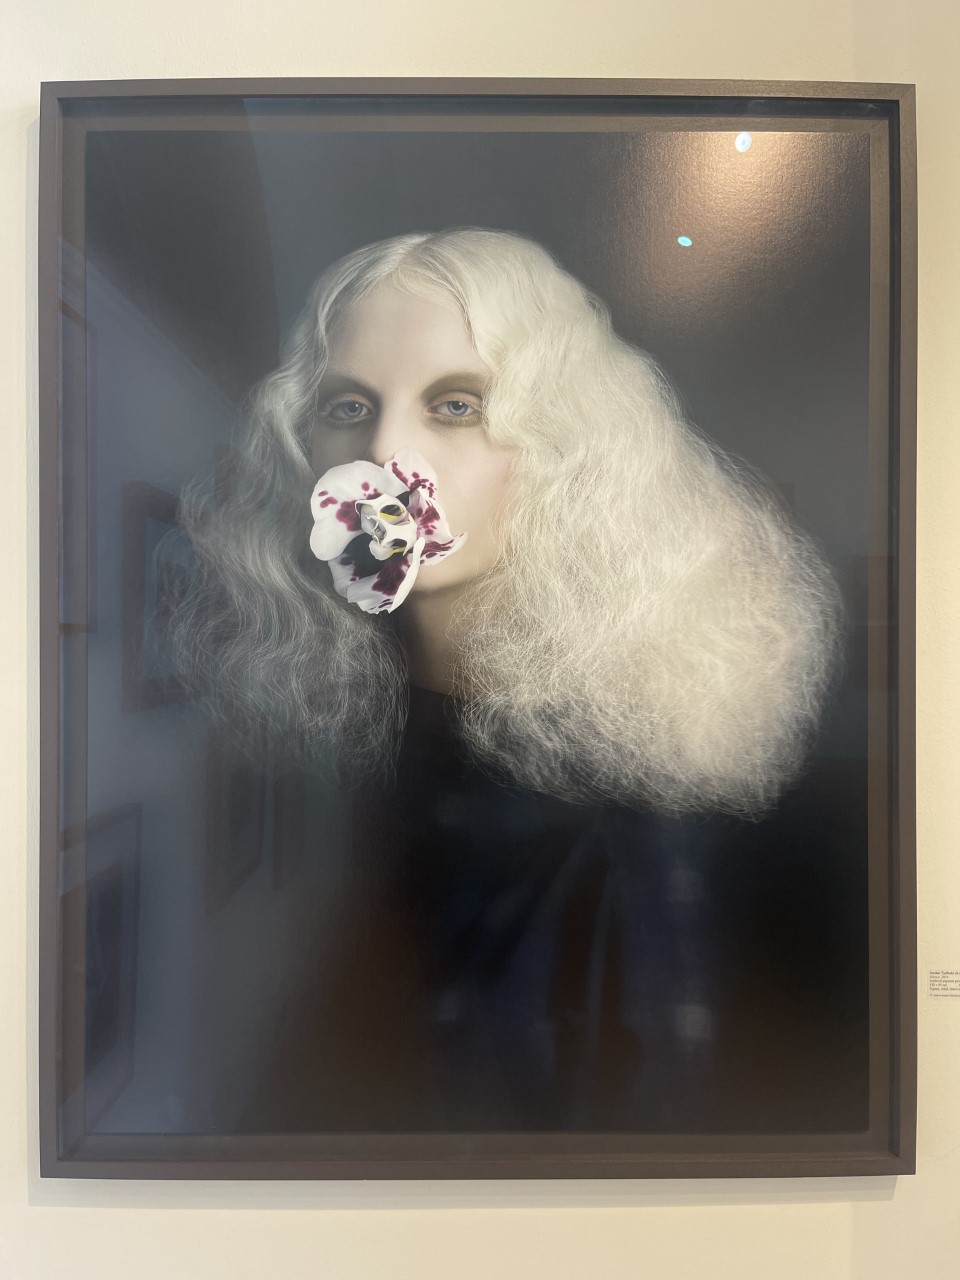
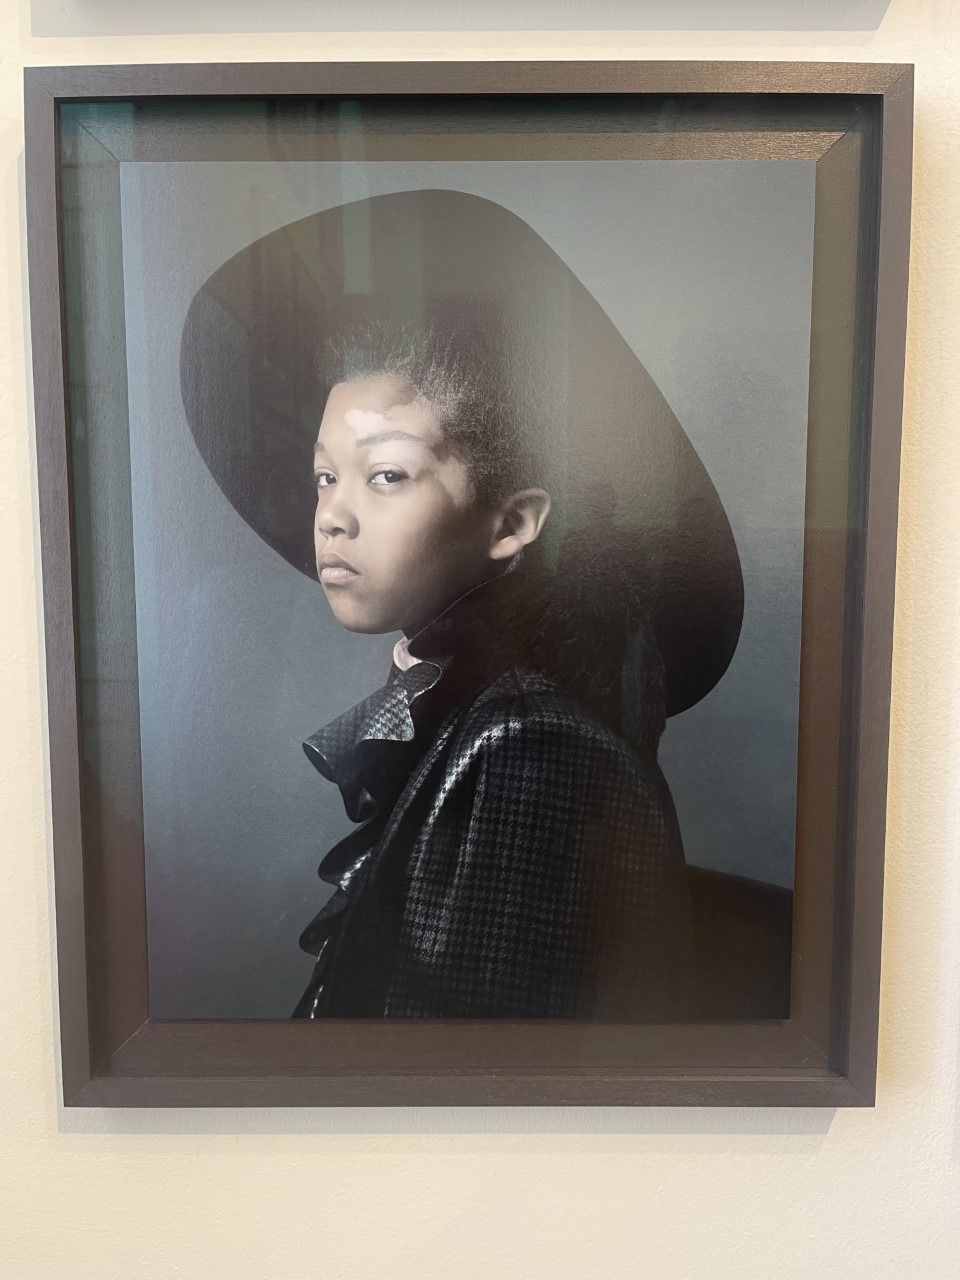
Studio Portraits at Photo London Exhibition:#
I visited the Photo London exhibition at Somerset House and picked out some studio photography work that had taken some past inspiration from old paintings. I could also see several layers of photoshop, which is quite prominent these days!
Portrait of a Lady
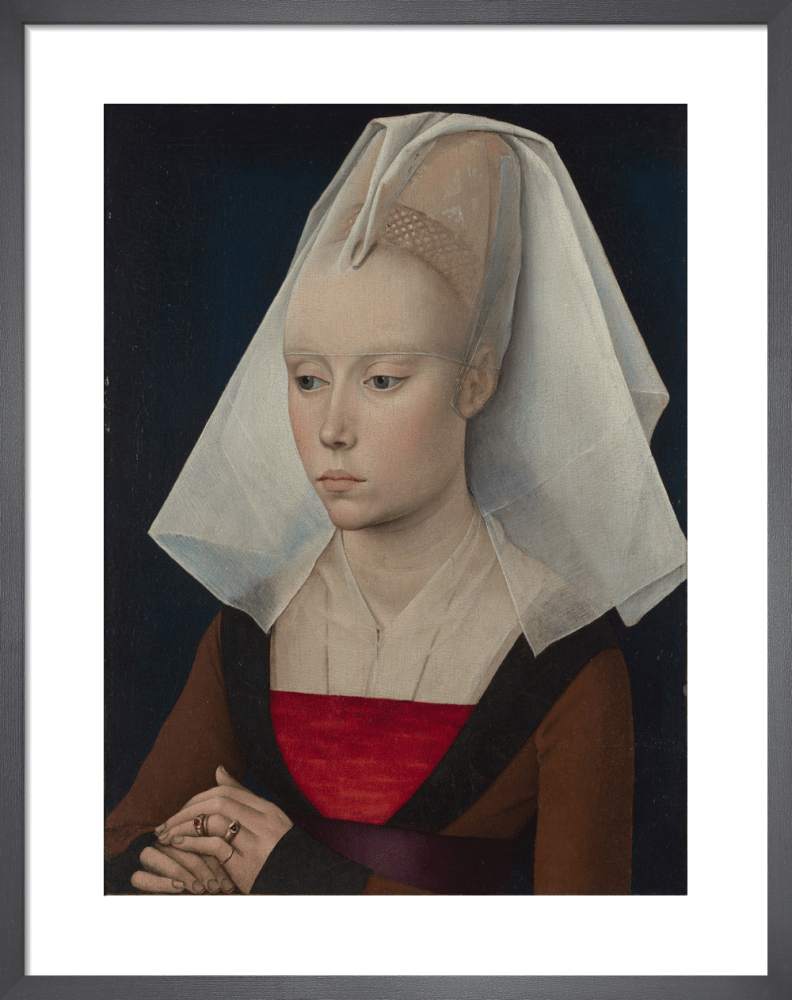
For my chosen painting for my studio work, I chose the Portrait of a Lady by Rembrandt. I wanted to use my wedding veil. I felt the wedding veil would add some drama and mood to the photograph.
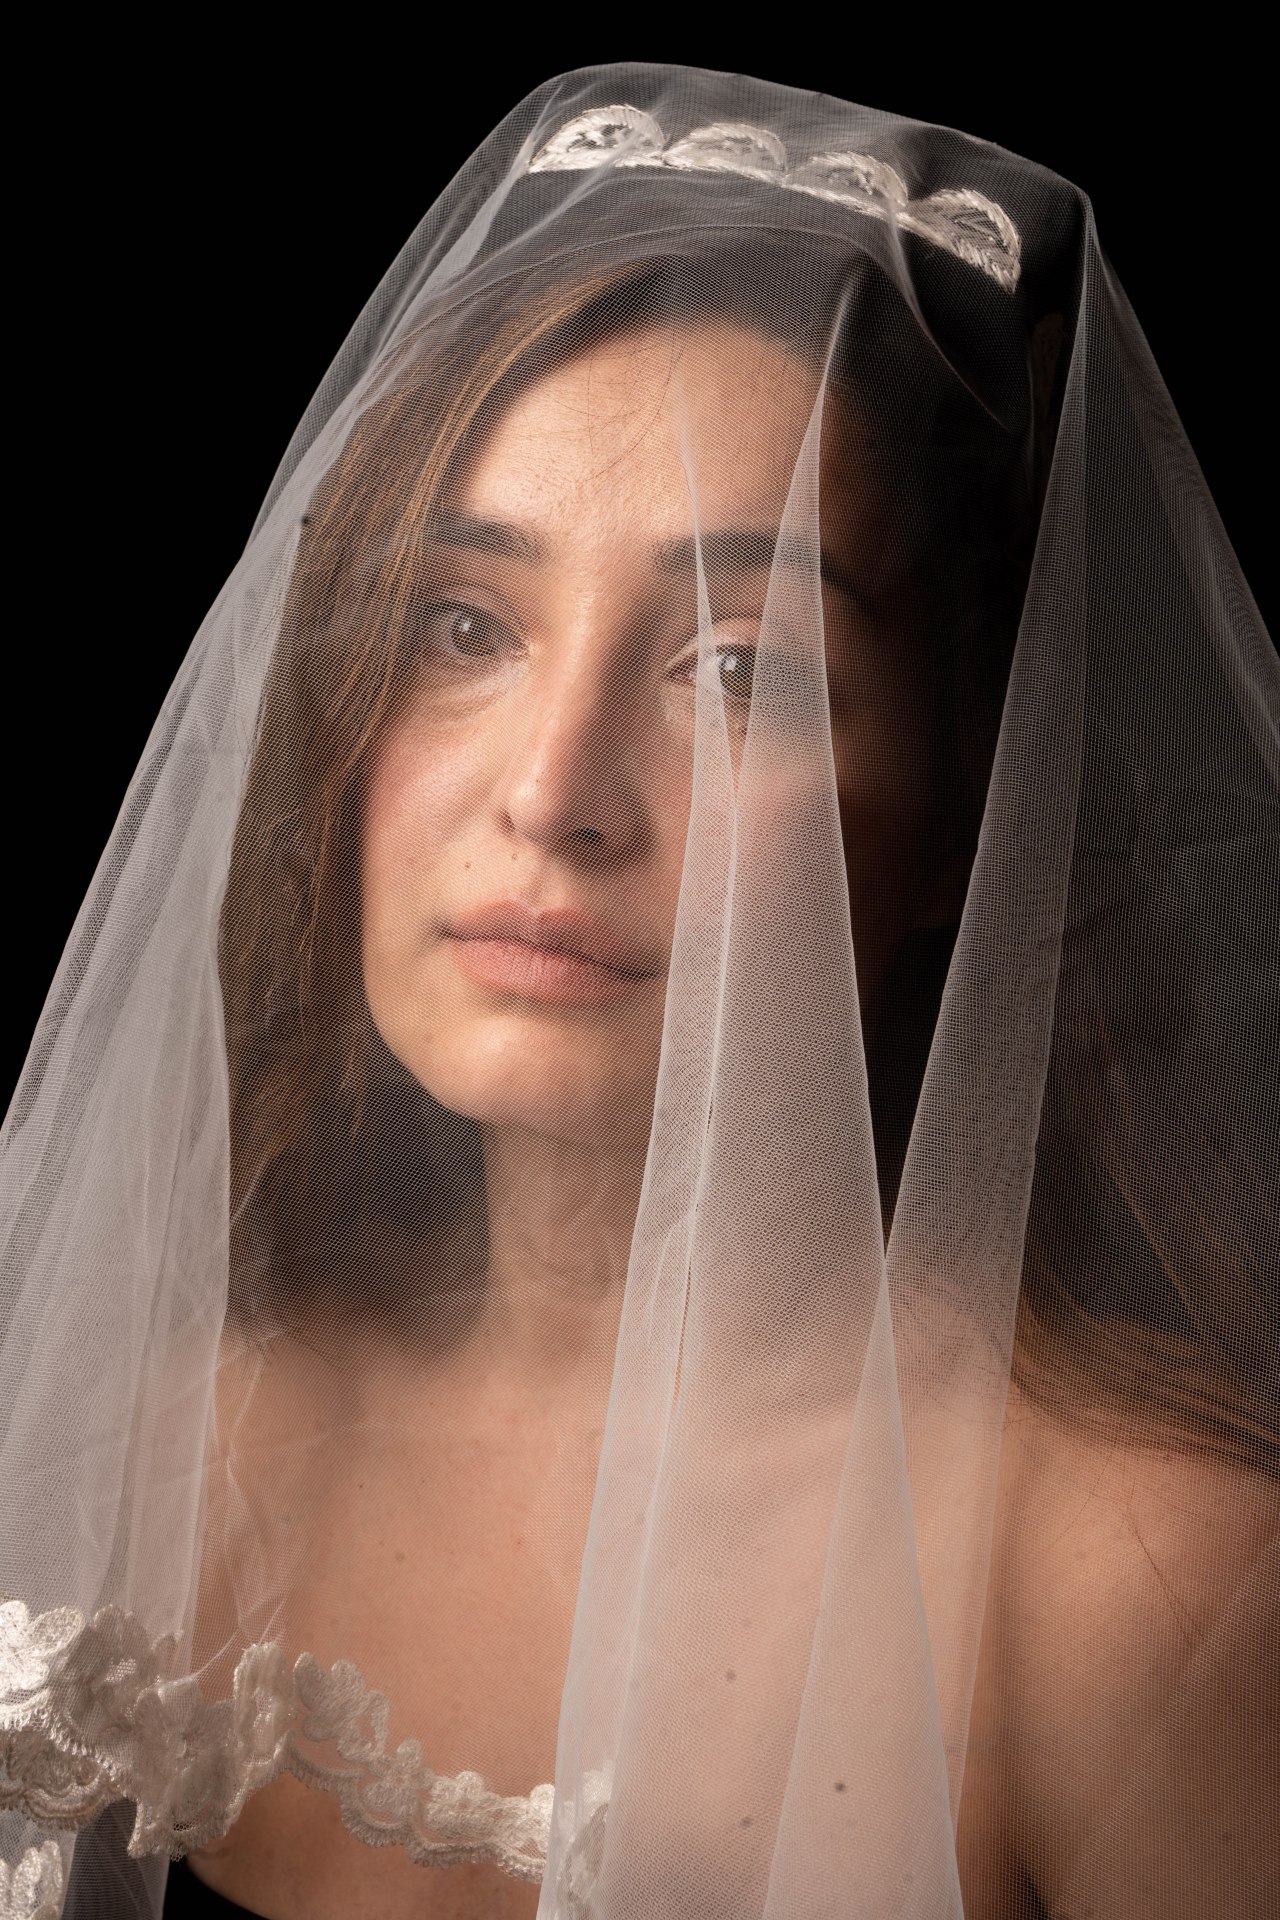
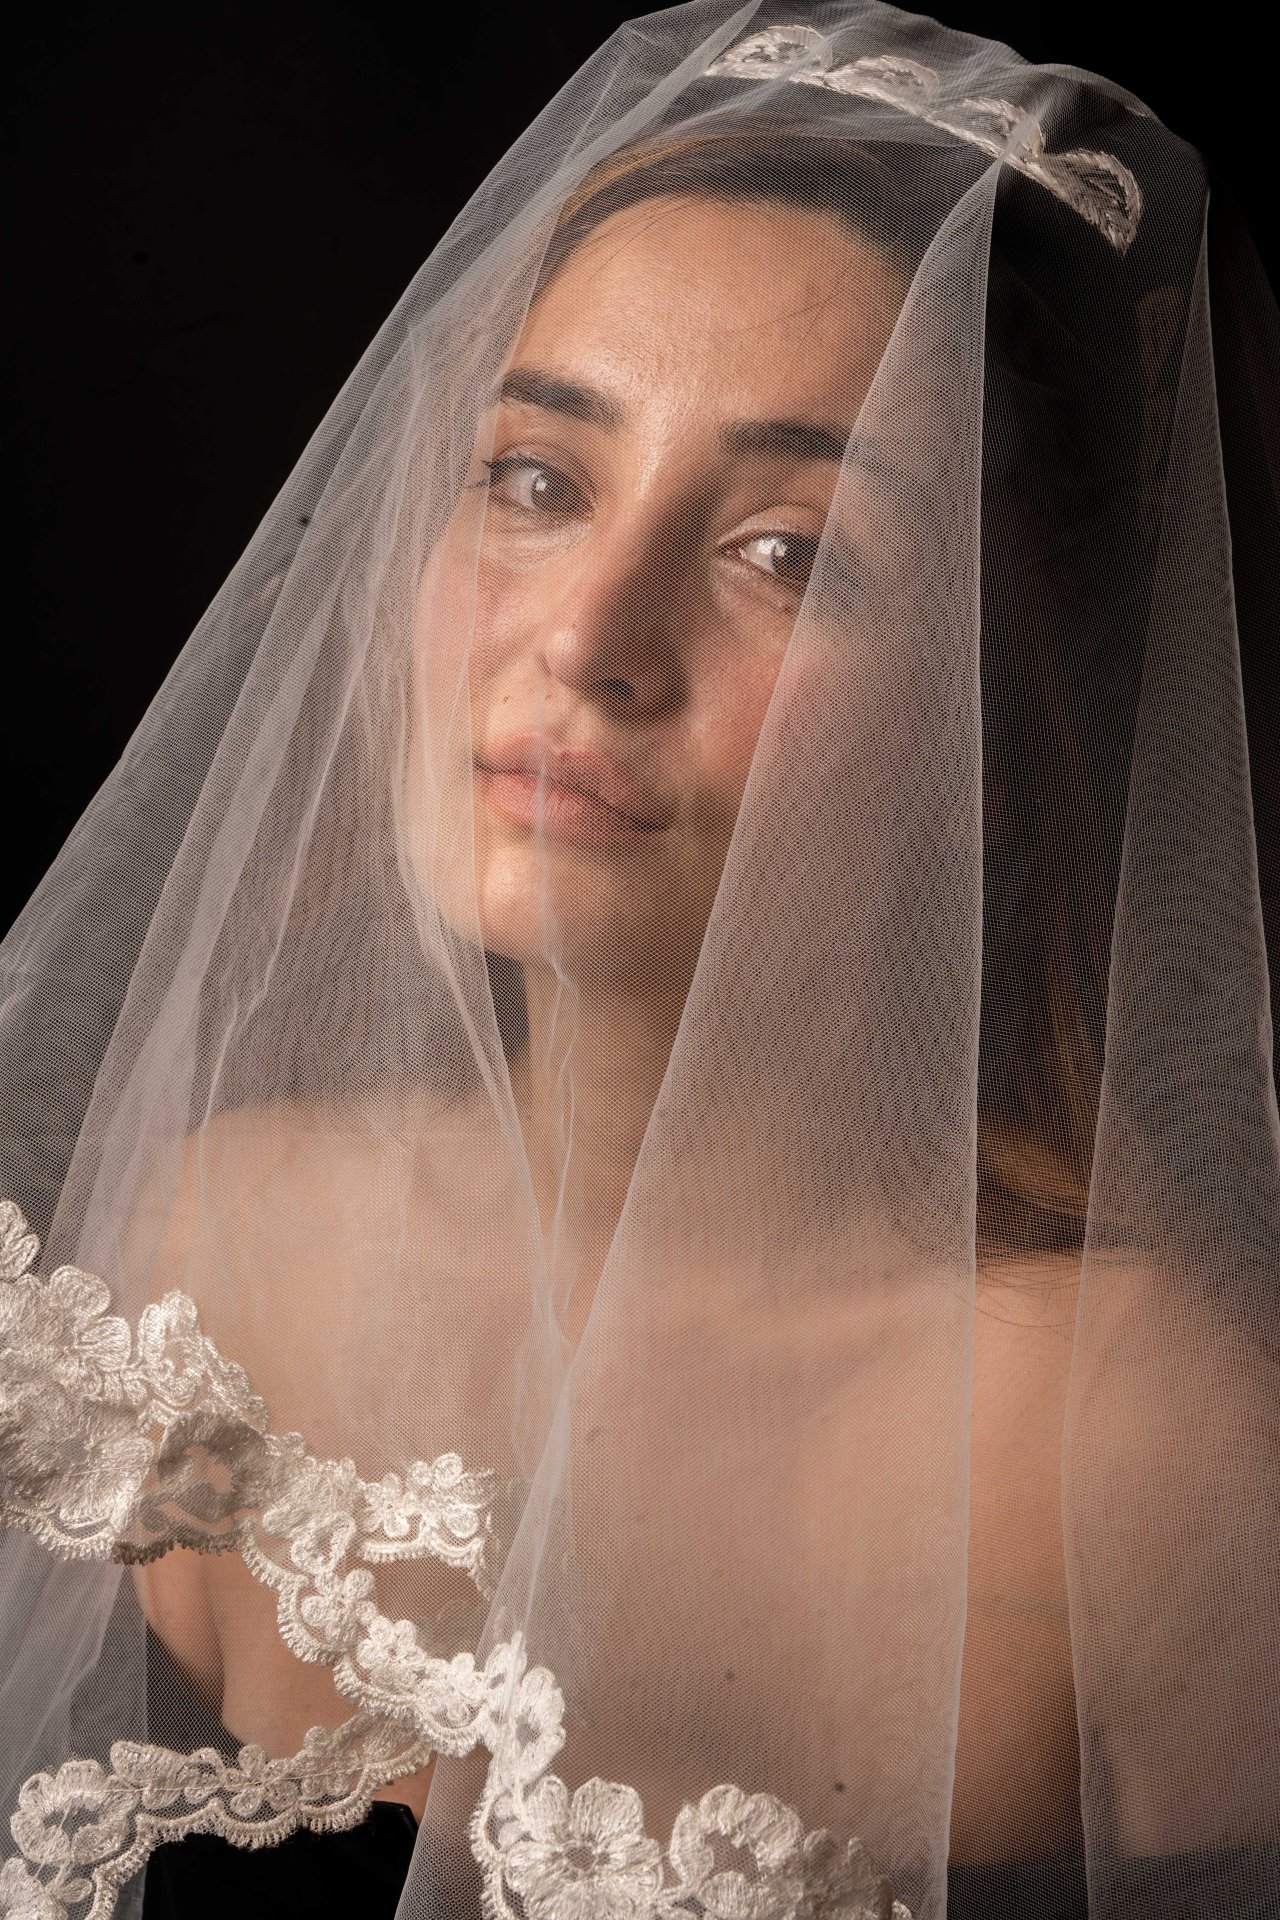
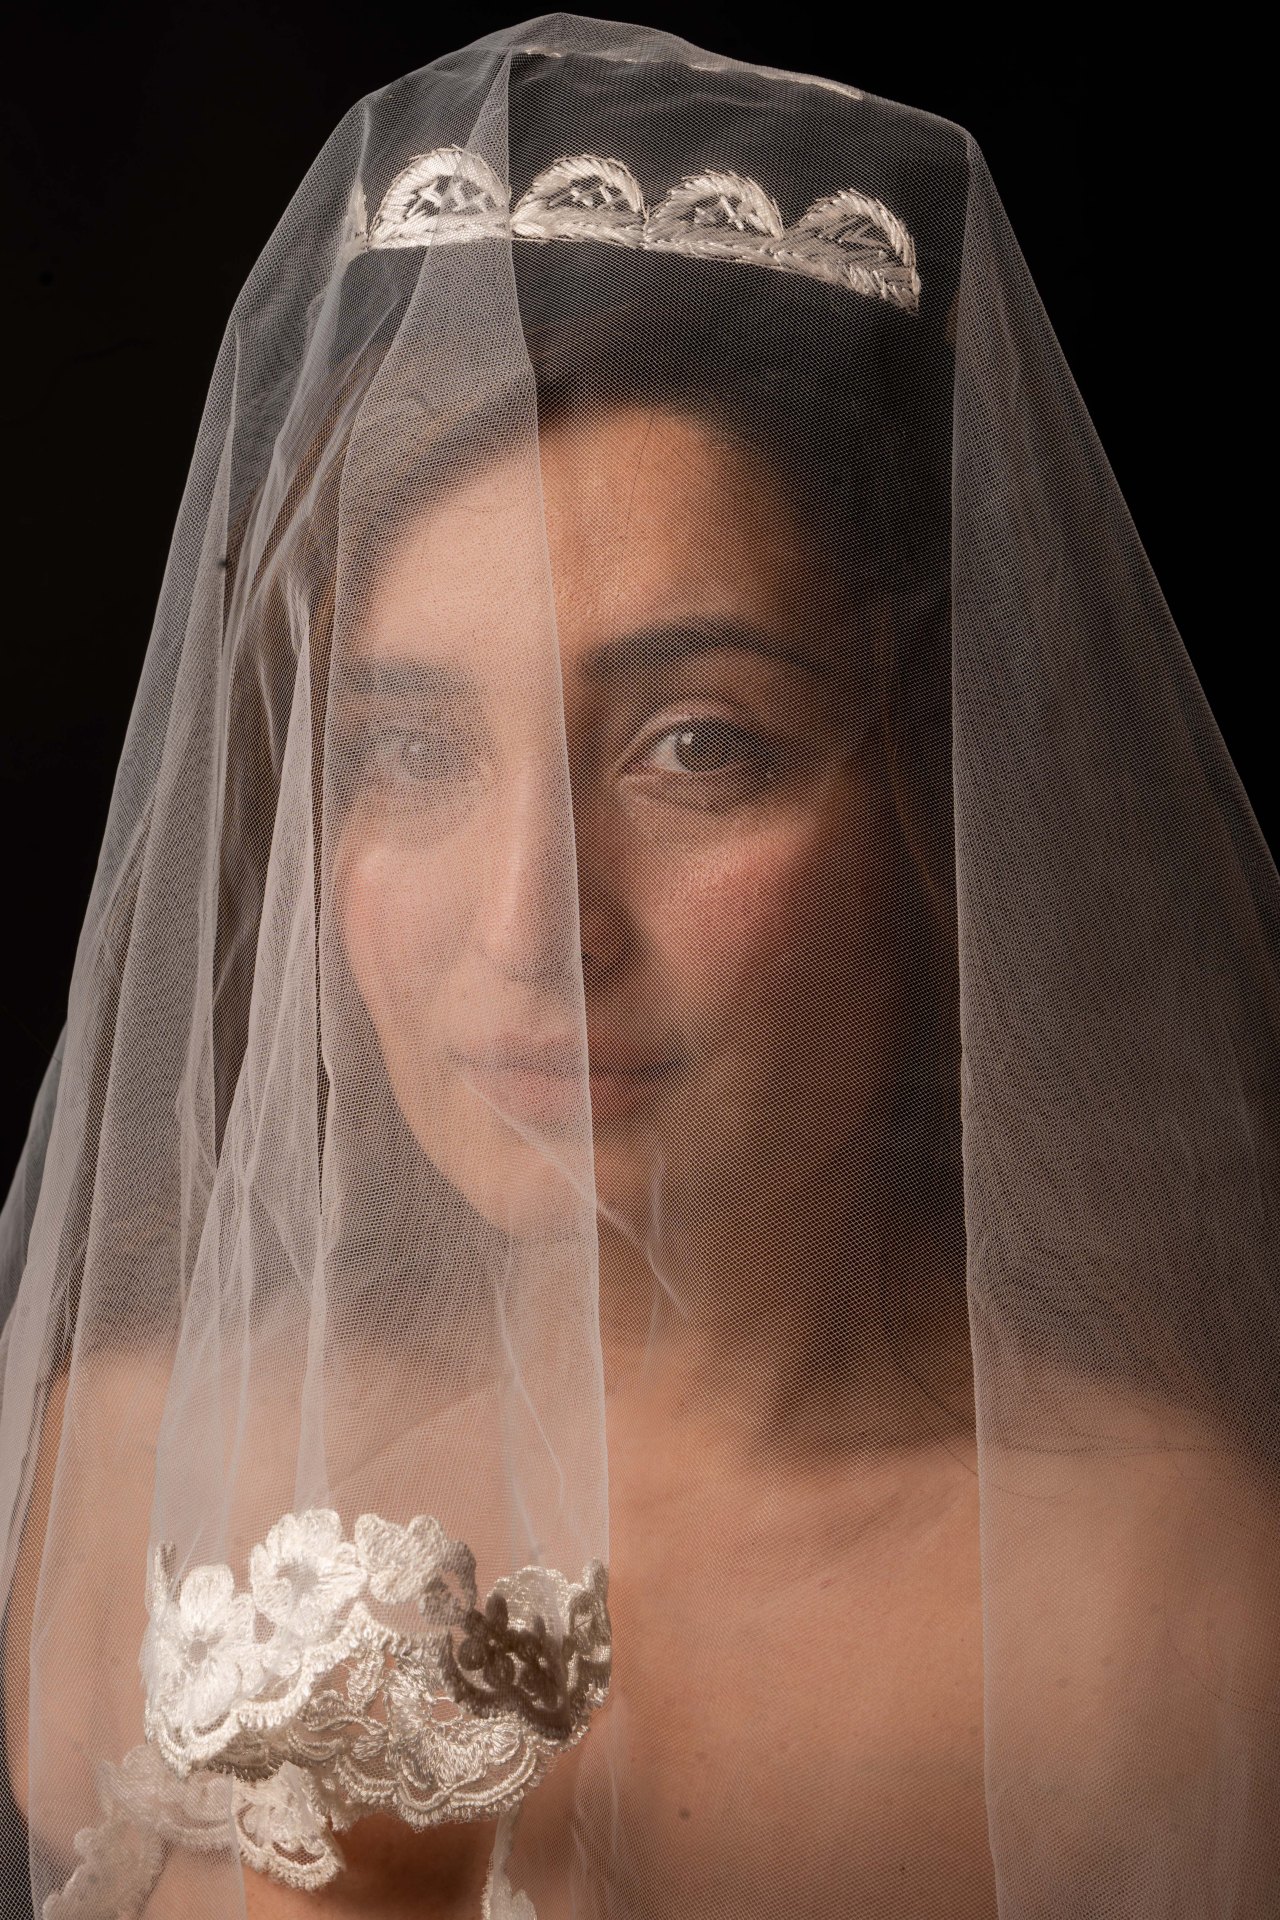


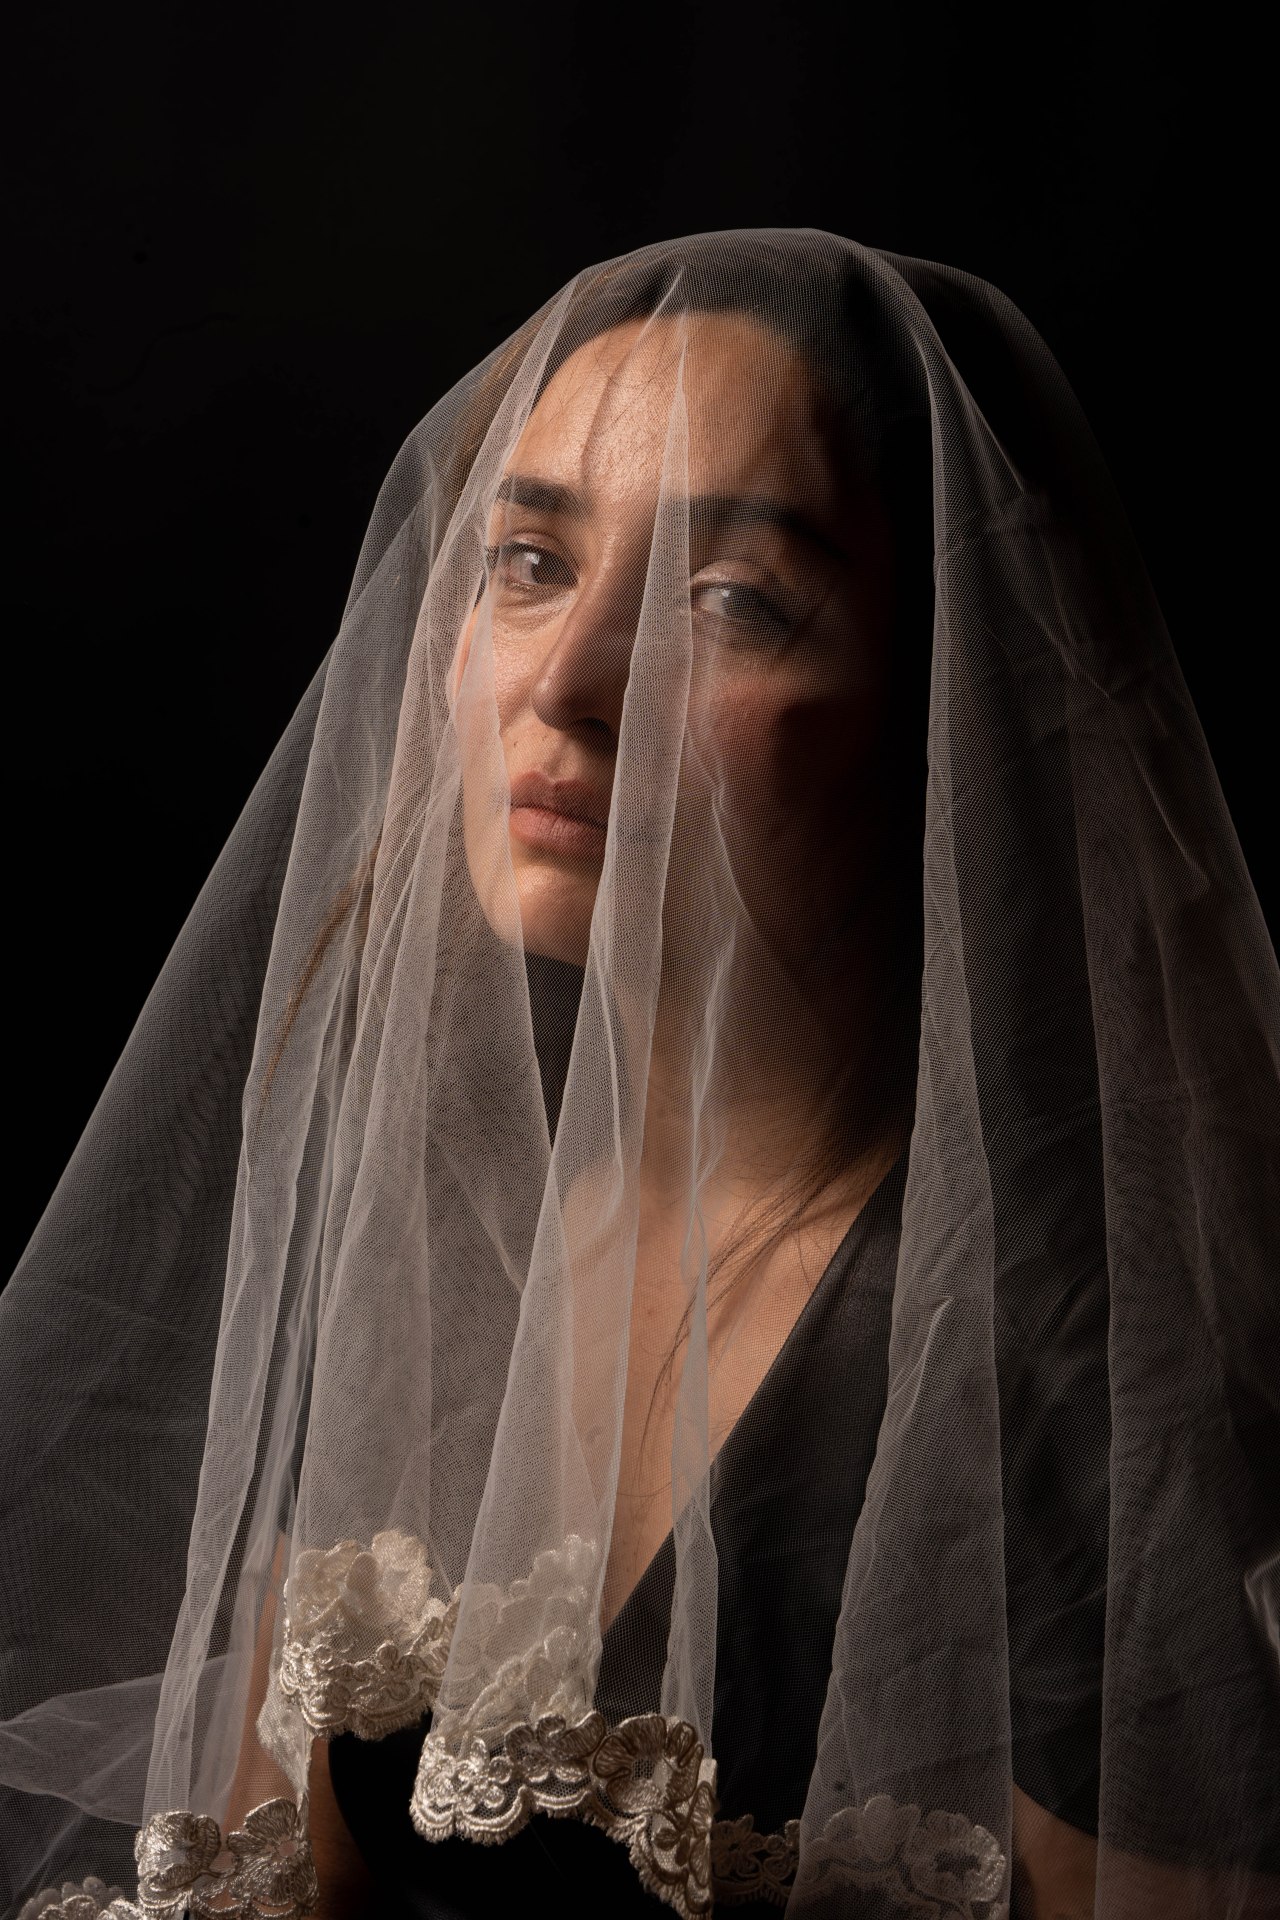


The lighting was very simple with this. I used the beauty light dish and the soft box with 2 lamps. The soft box was above Barno to her right, and she would look at an angle towards the light. Towards the end of the shoot, to add a bit more drama and mystery I turned the beauty light off and the power down to 5 from 6 on the soft box.
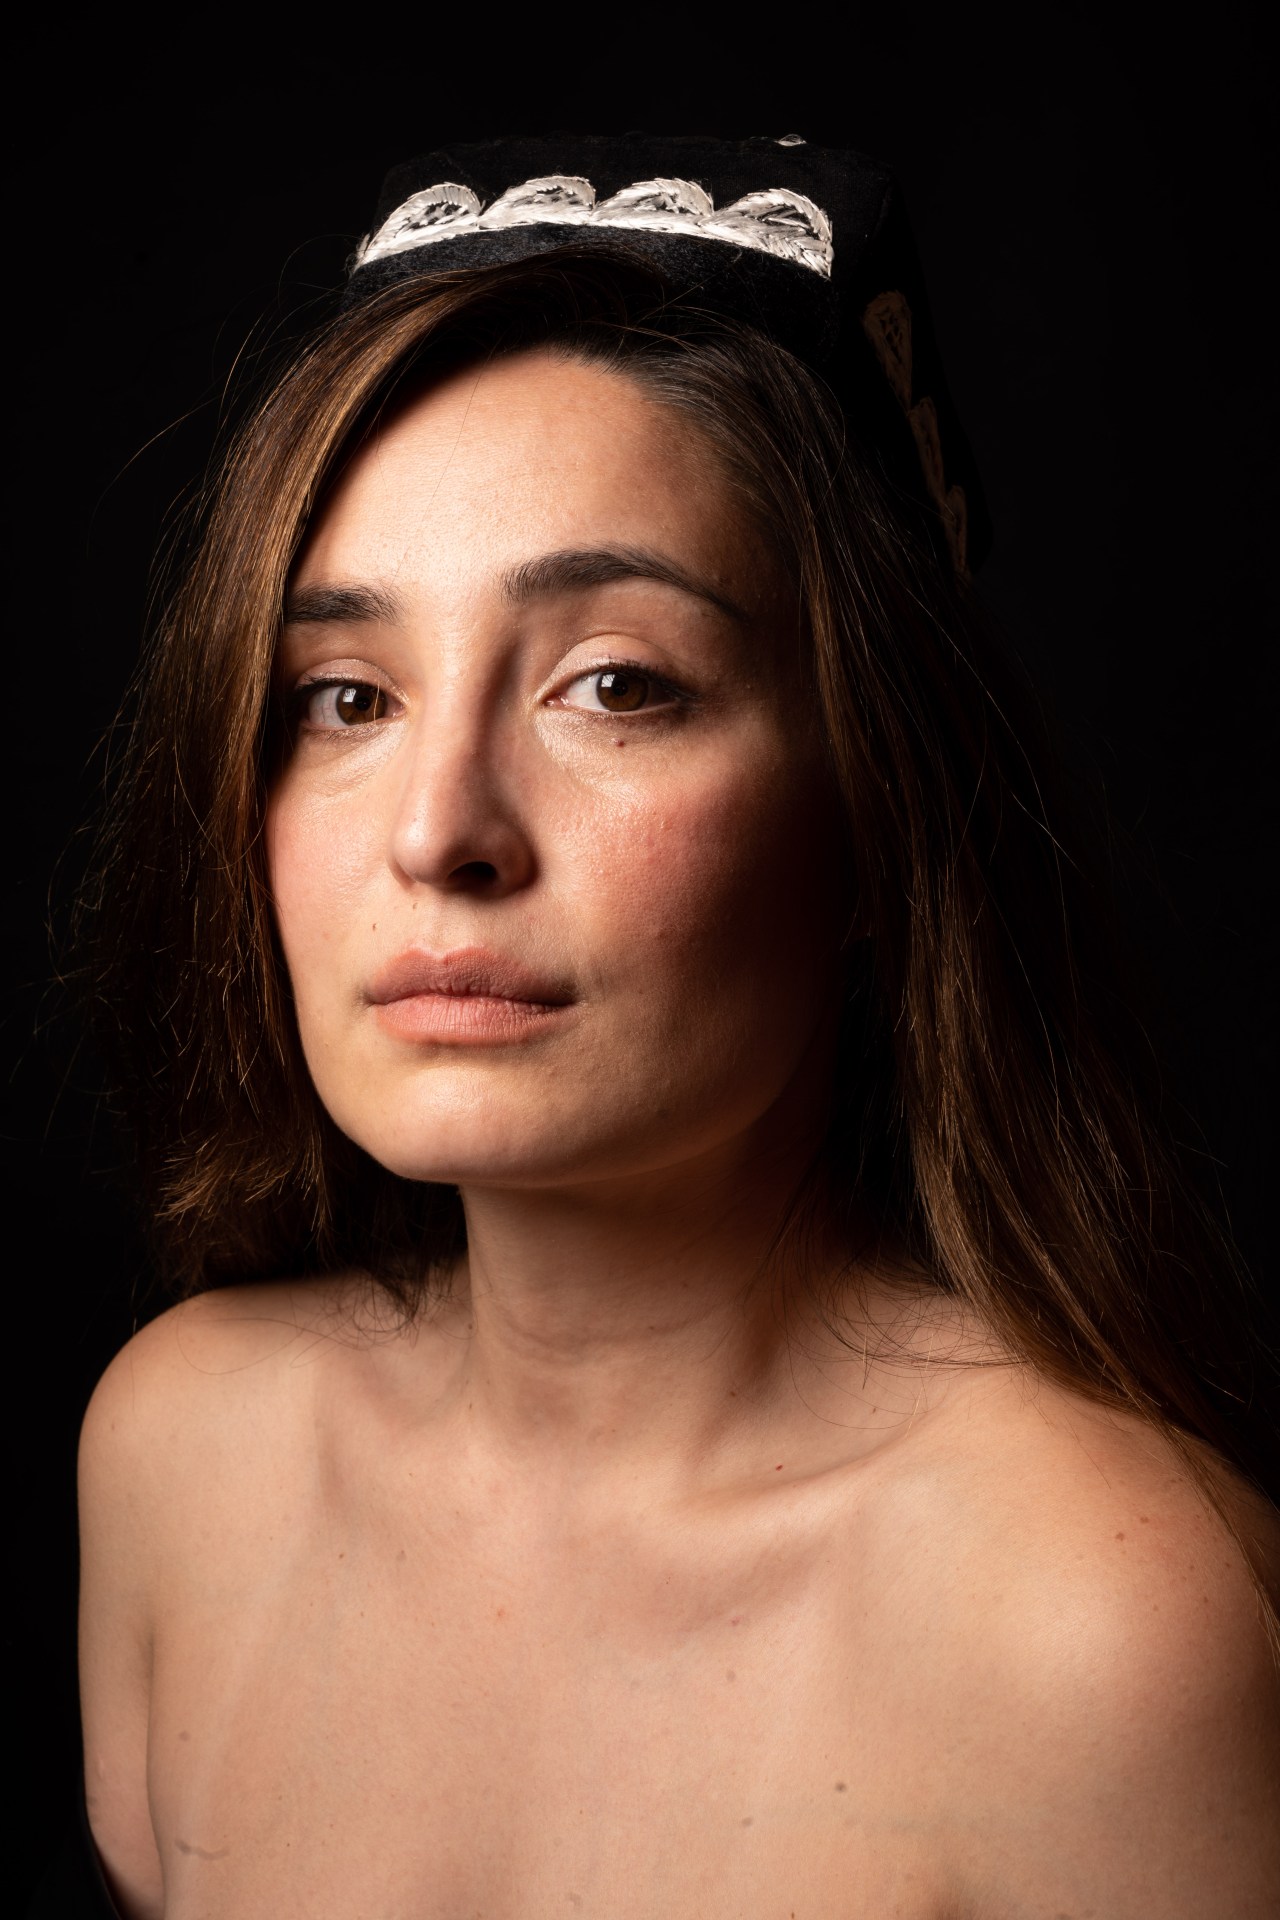
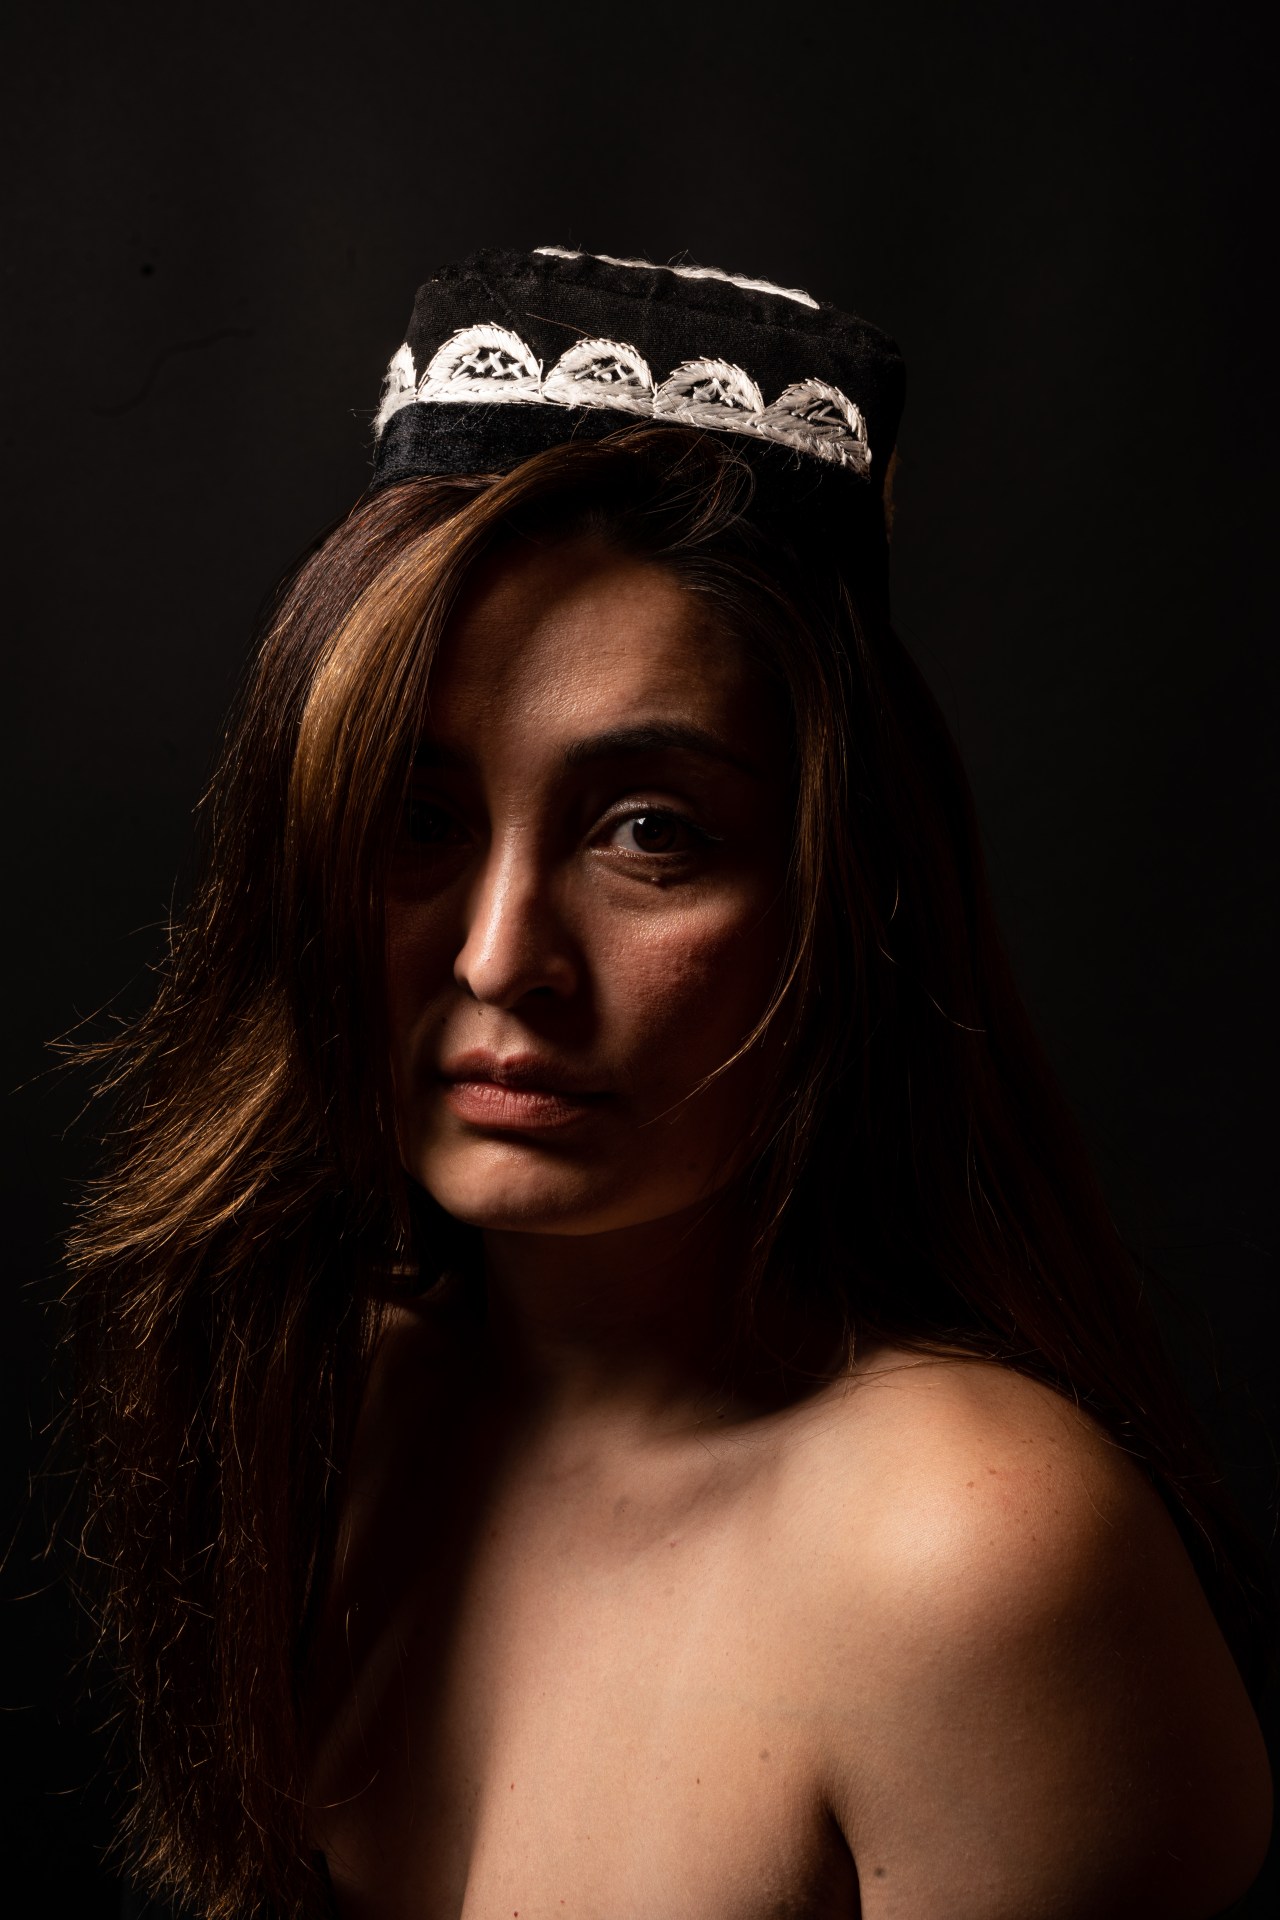
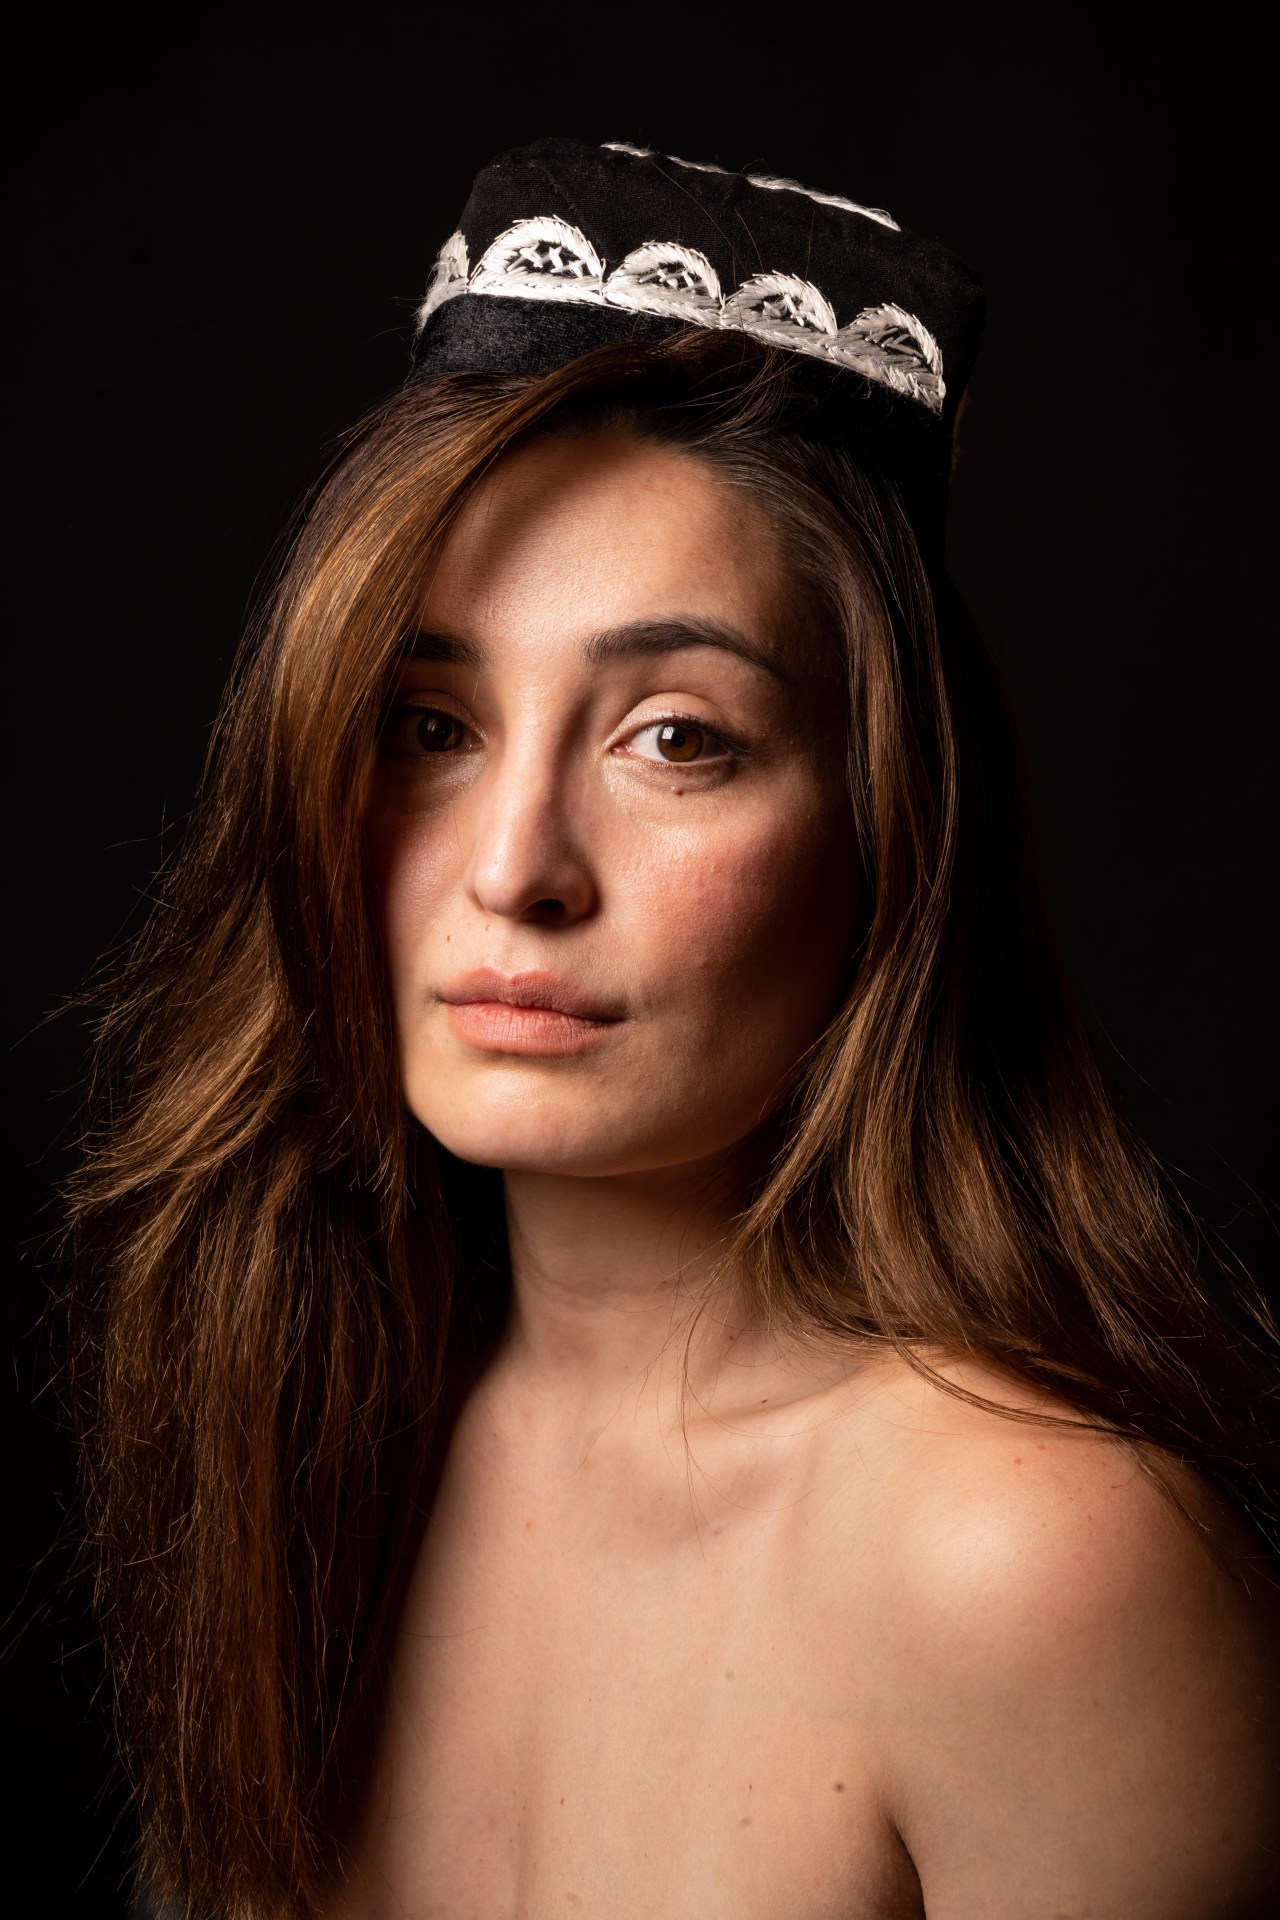

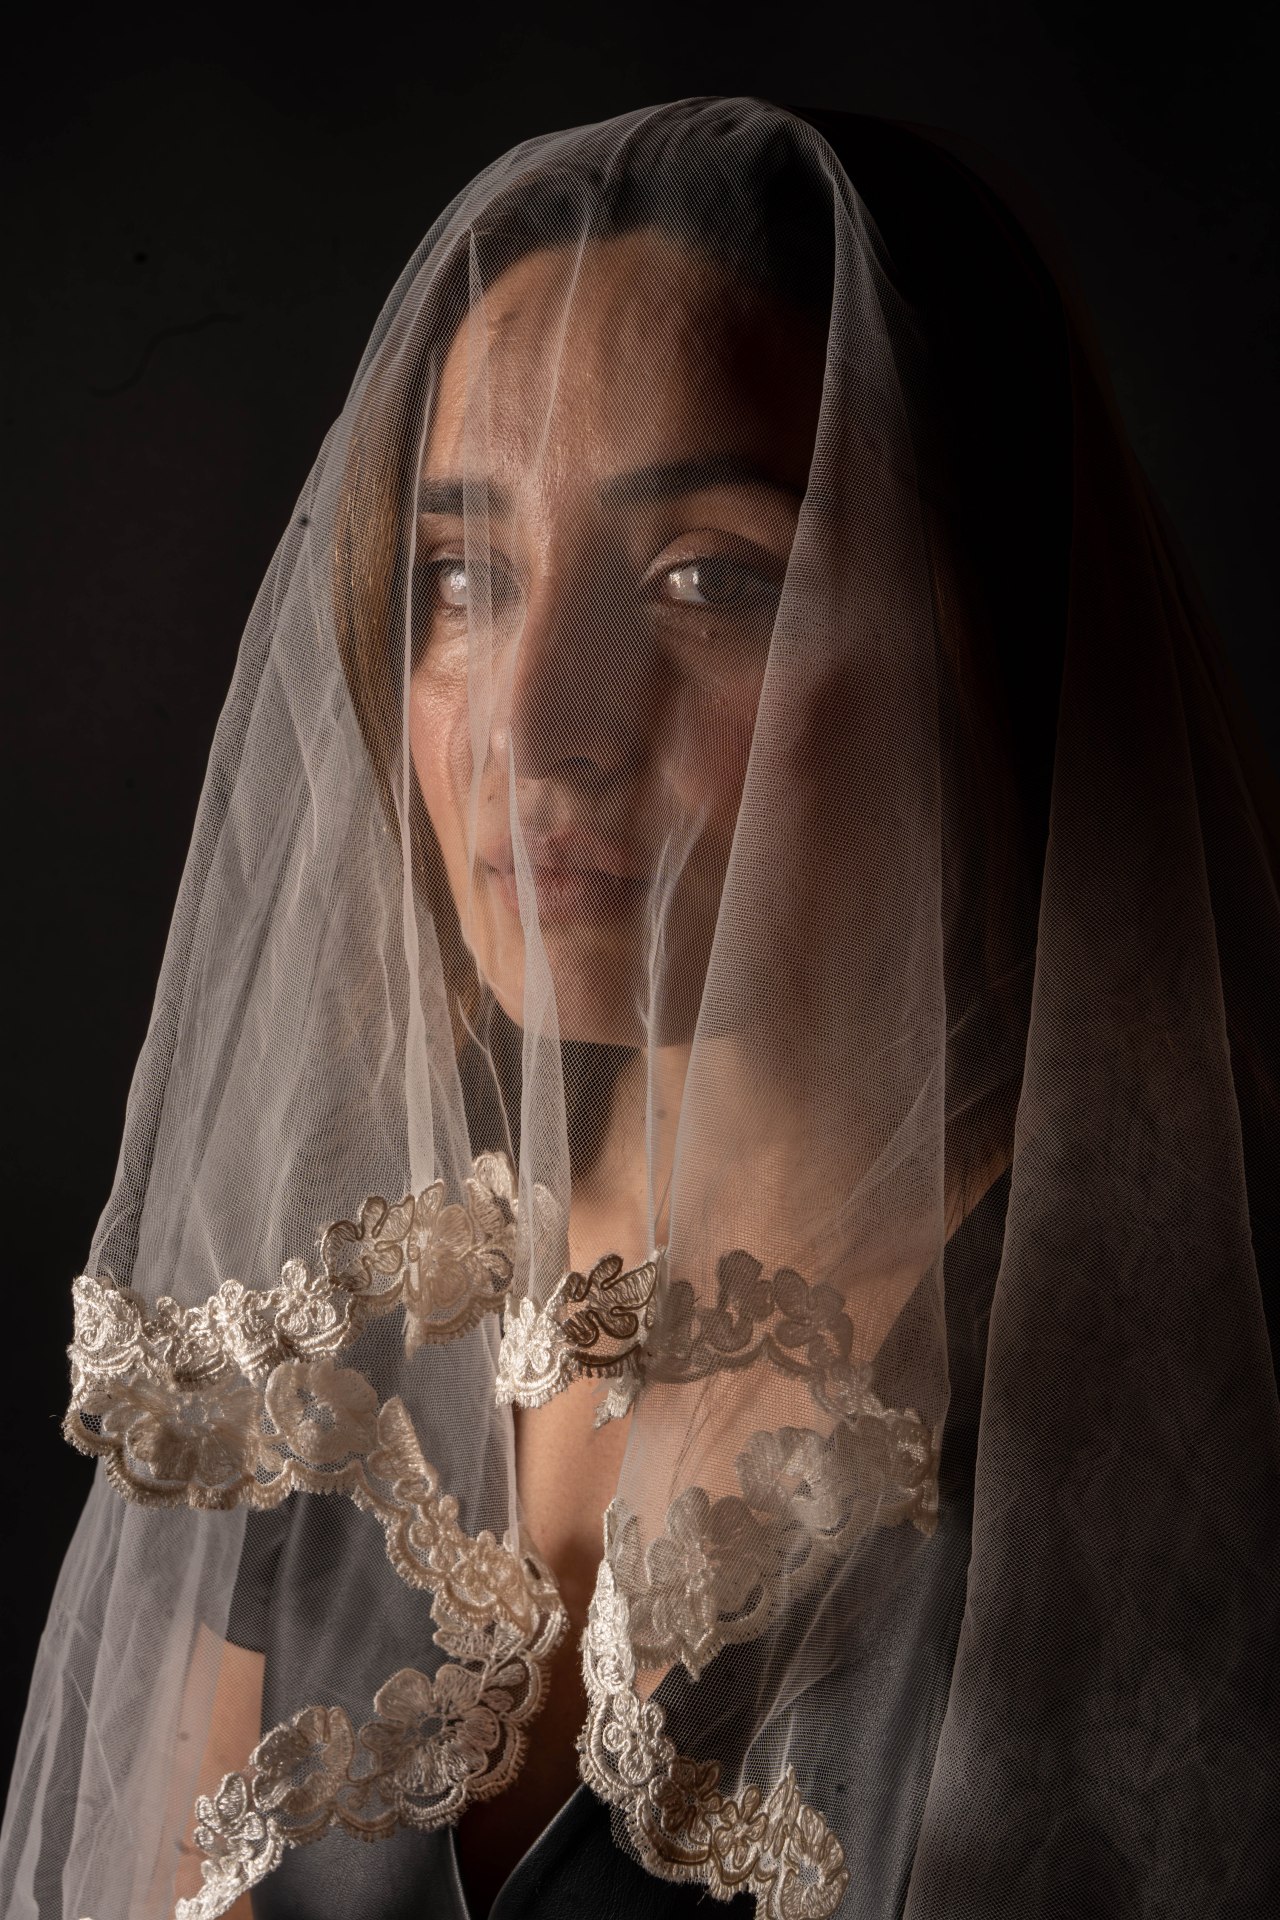
During the same photo session we also worked with Barno’s friend, playing with a great piece of fabric to help frame the image.

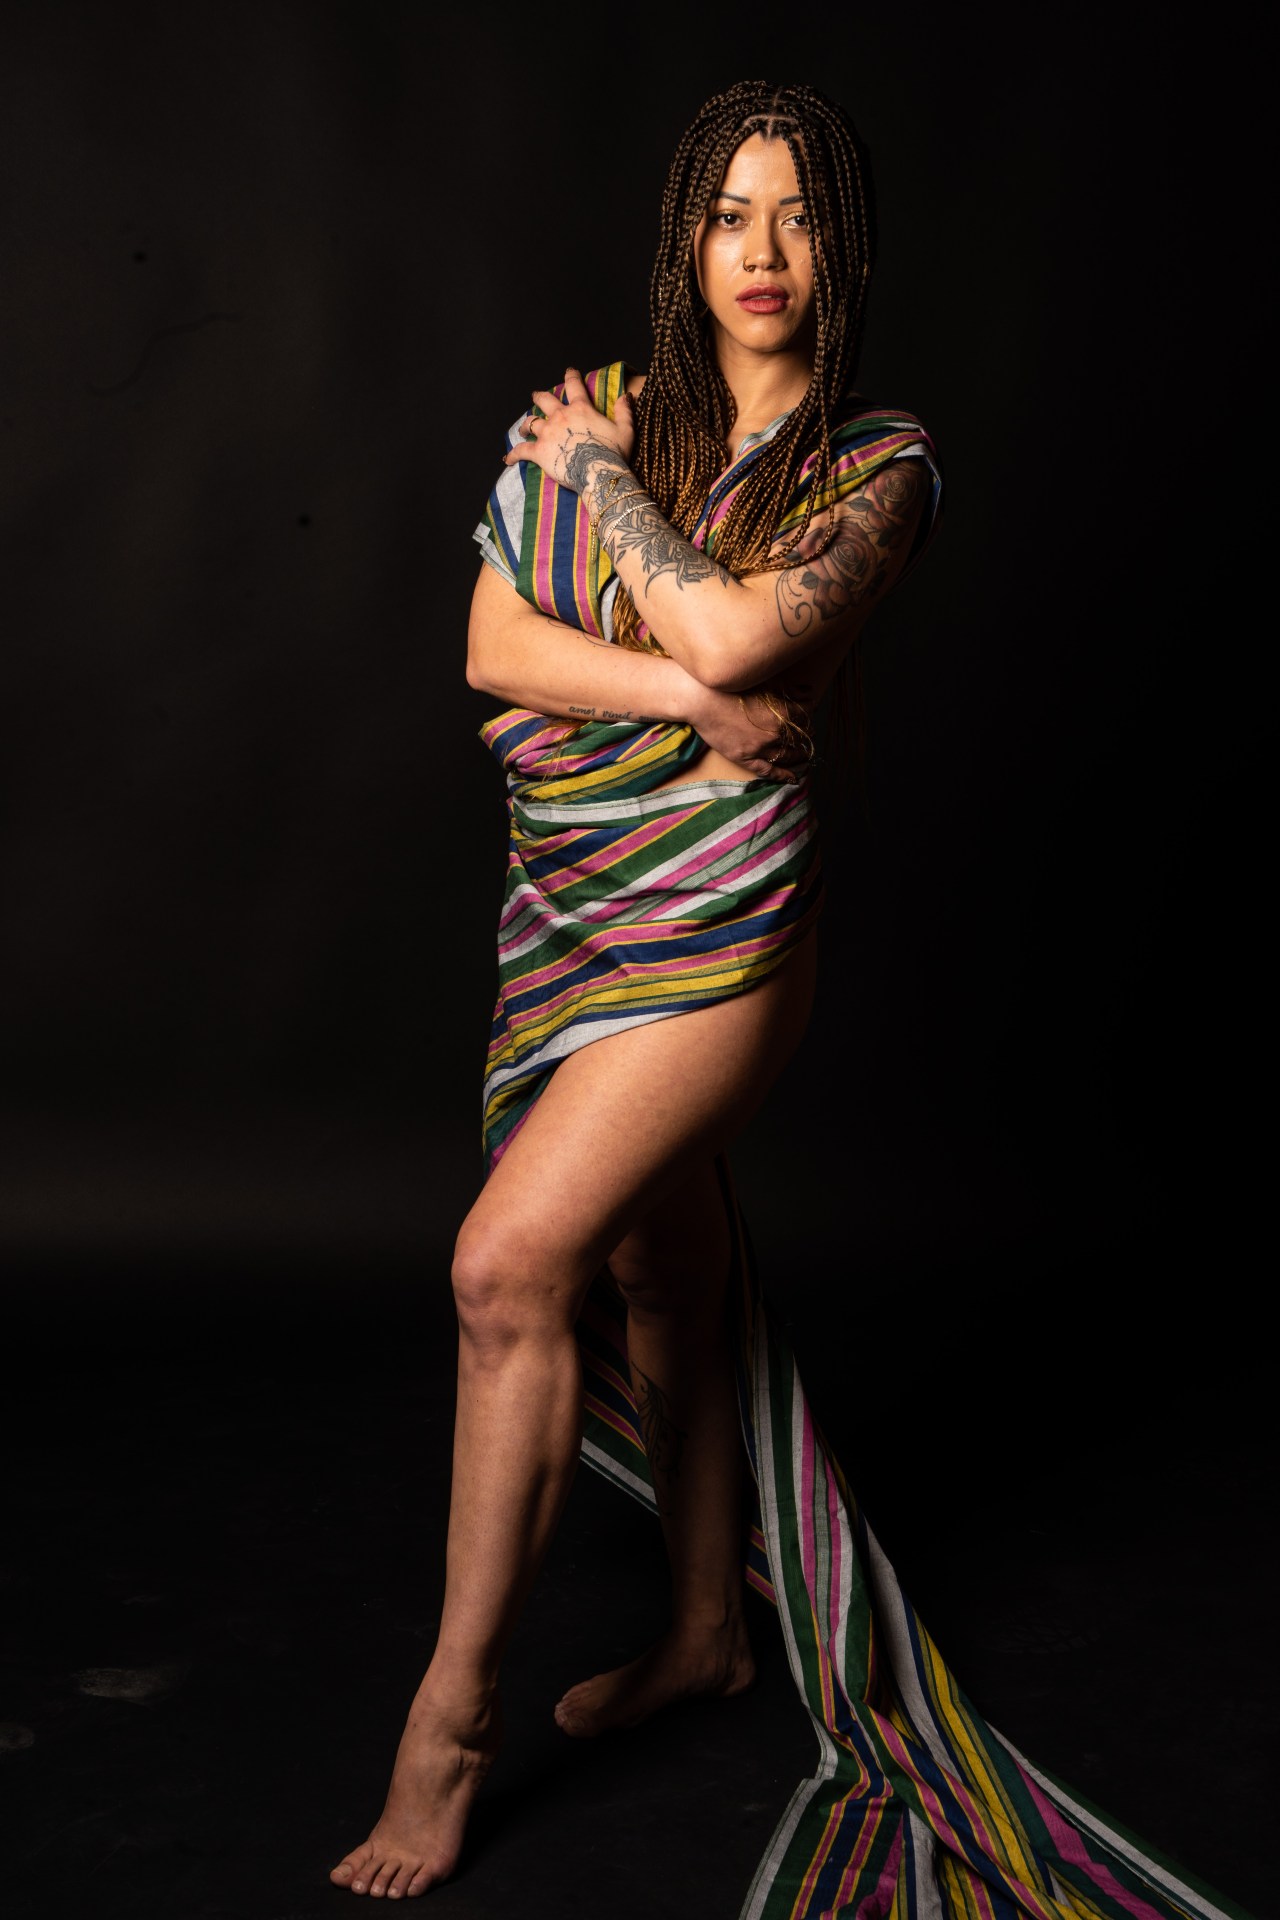

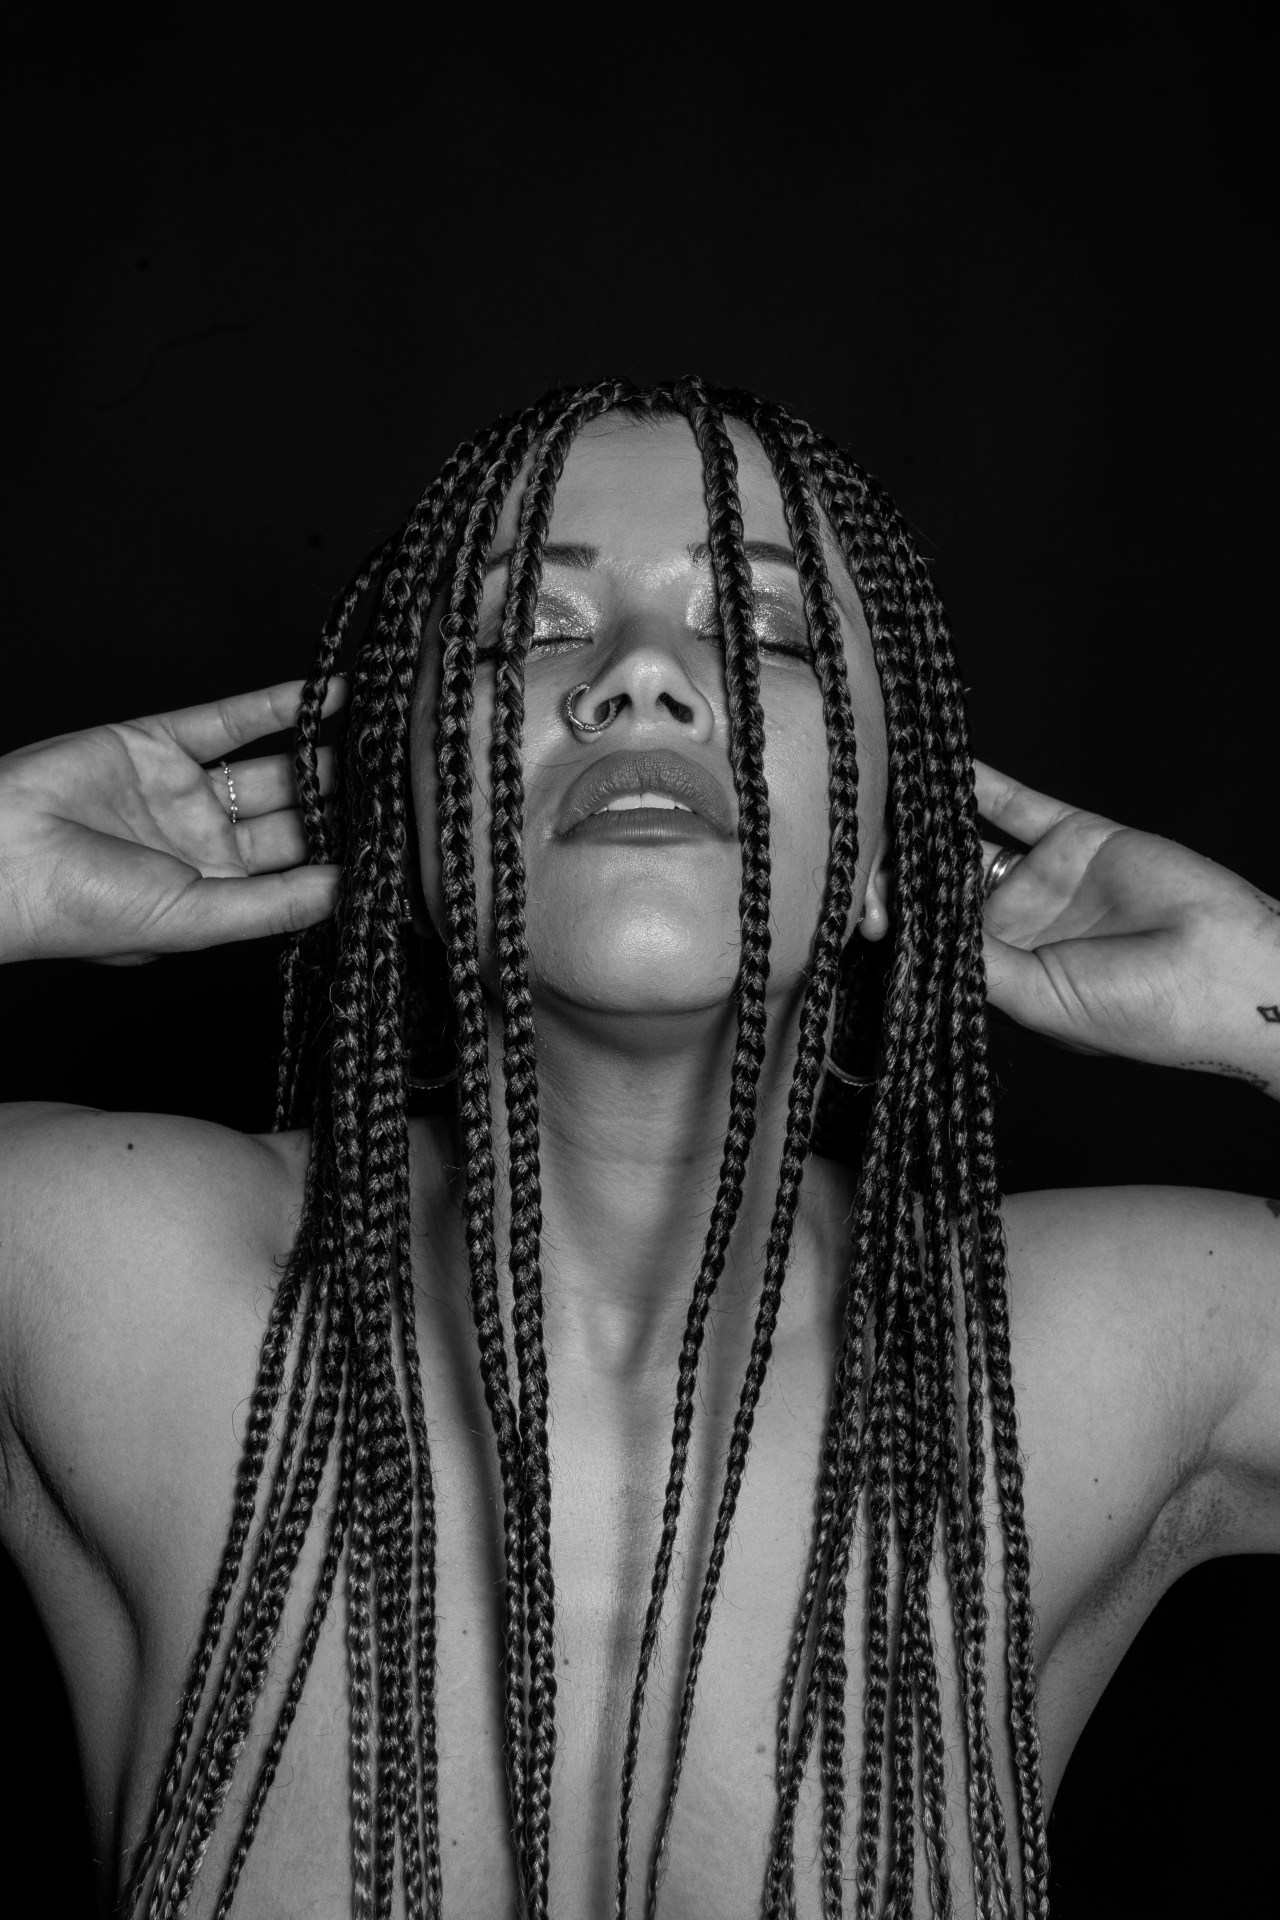
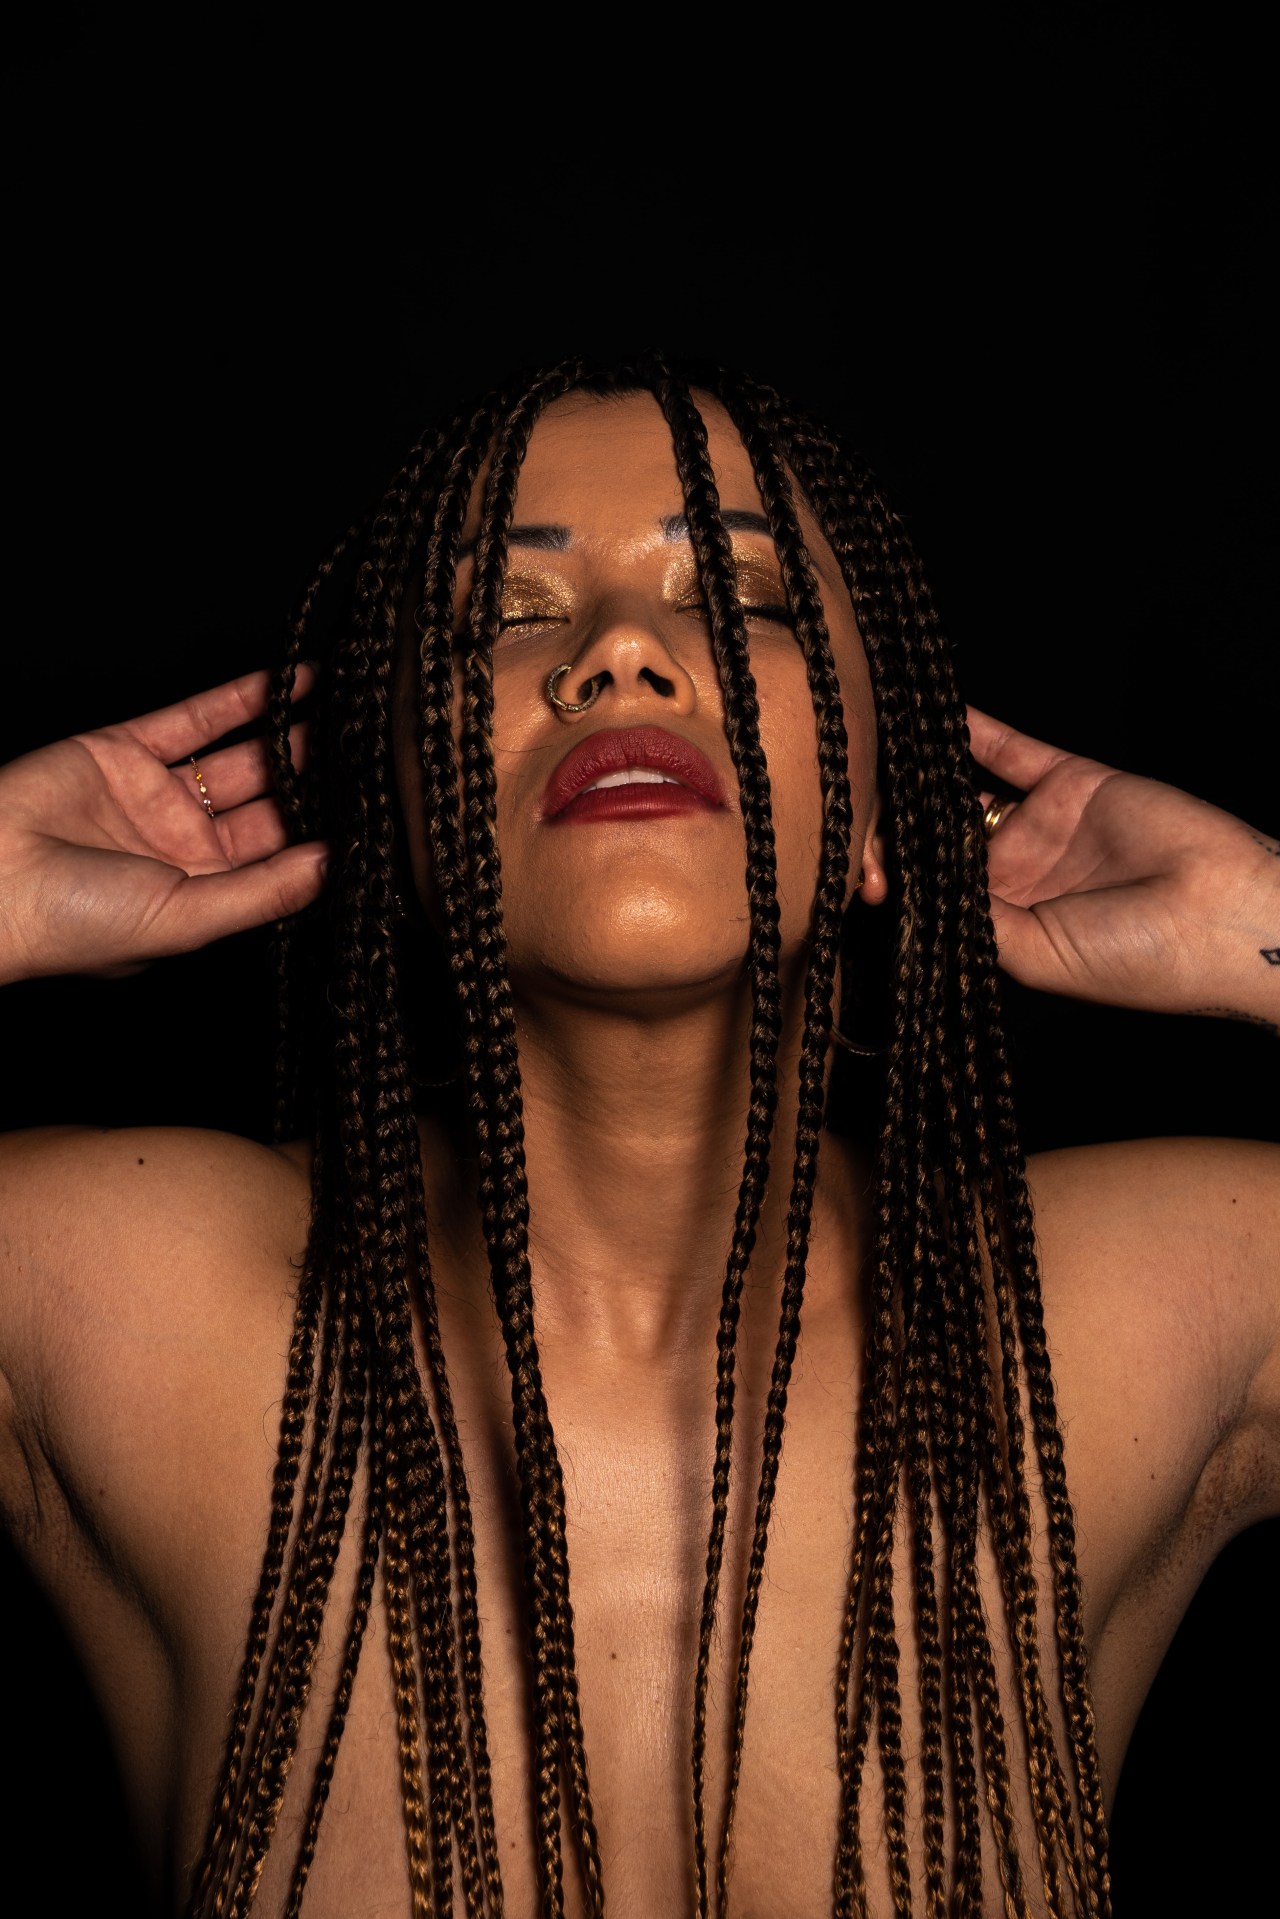
I also made a change from using my 24-70 lens to my fixed prime 50 lens. Looking at the picture below it does add more sharpness and clarity.

Still life Paintings
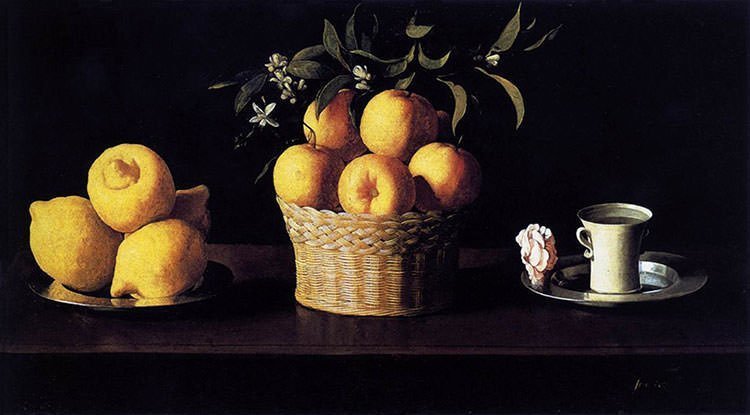
Task 2 – Still Life using classical painting as inspiration
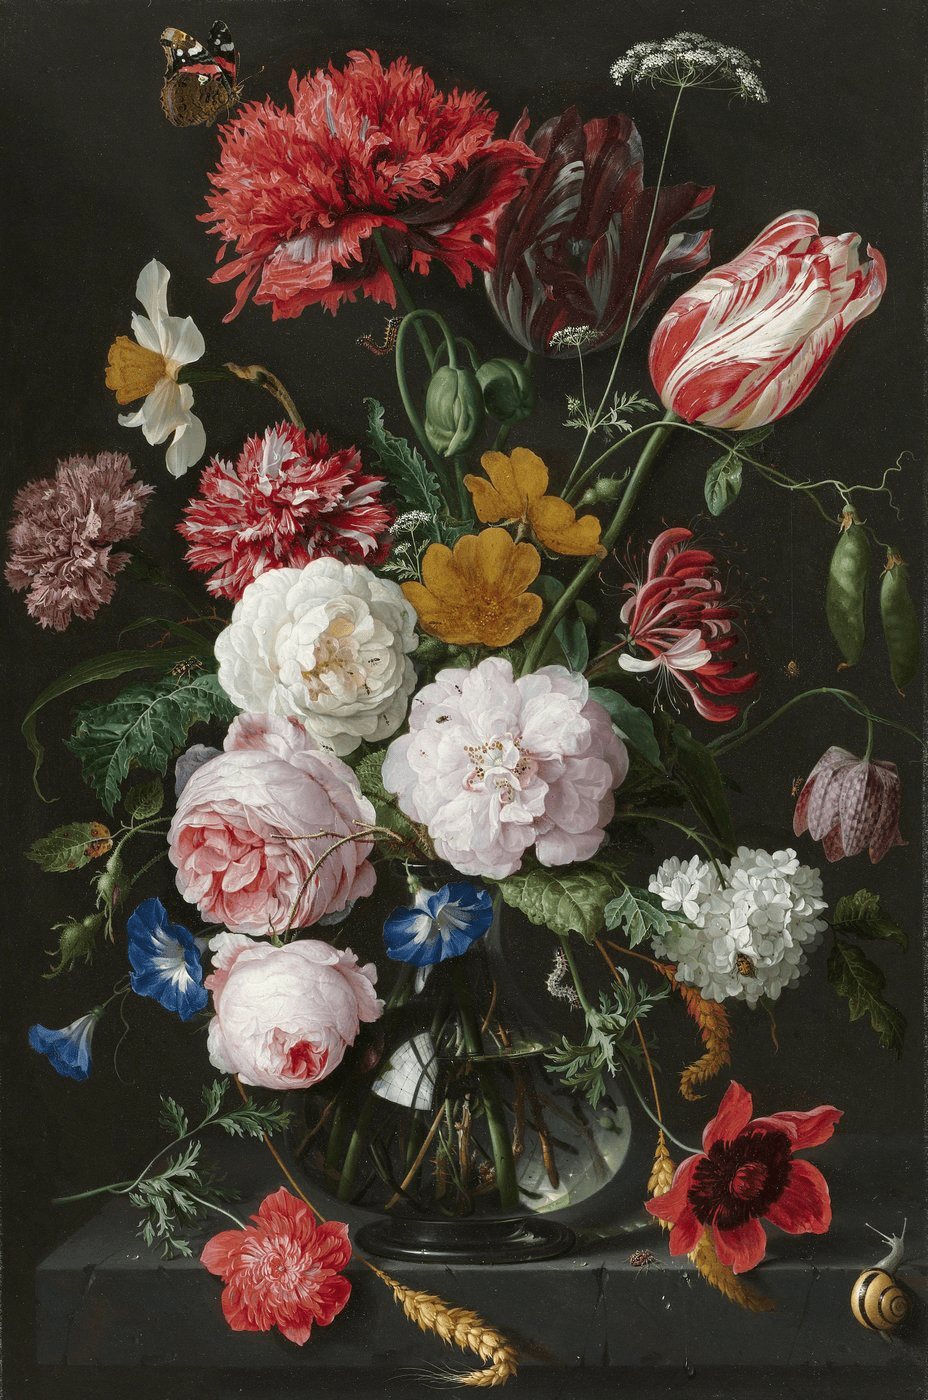
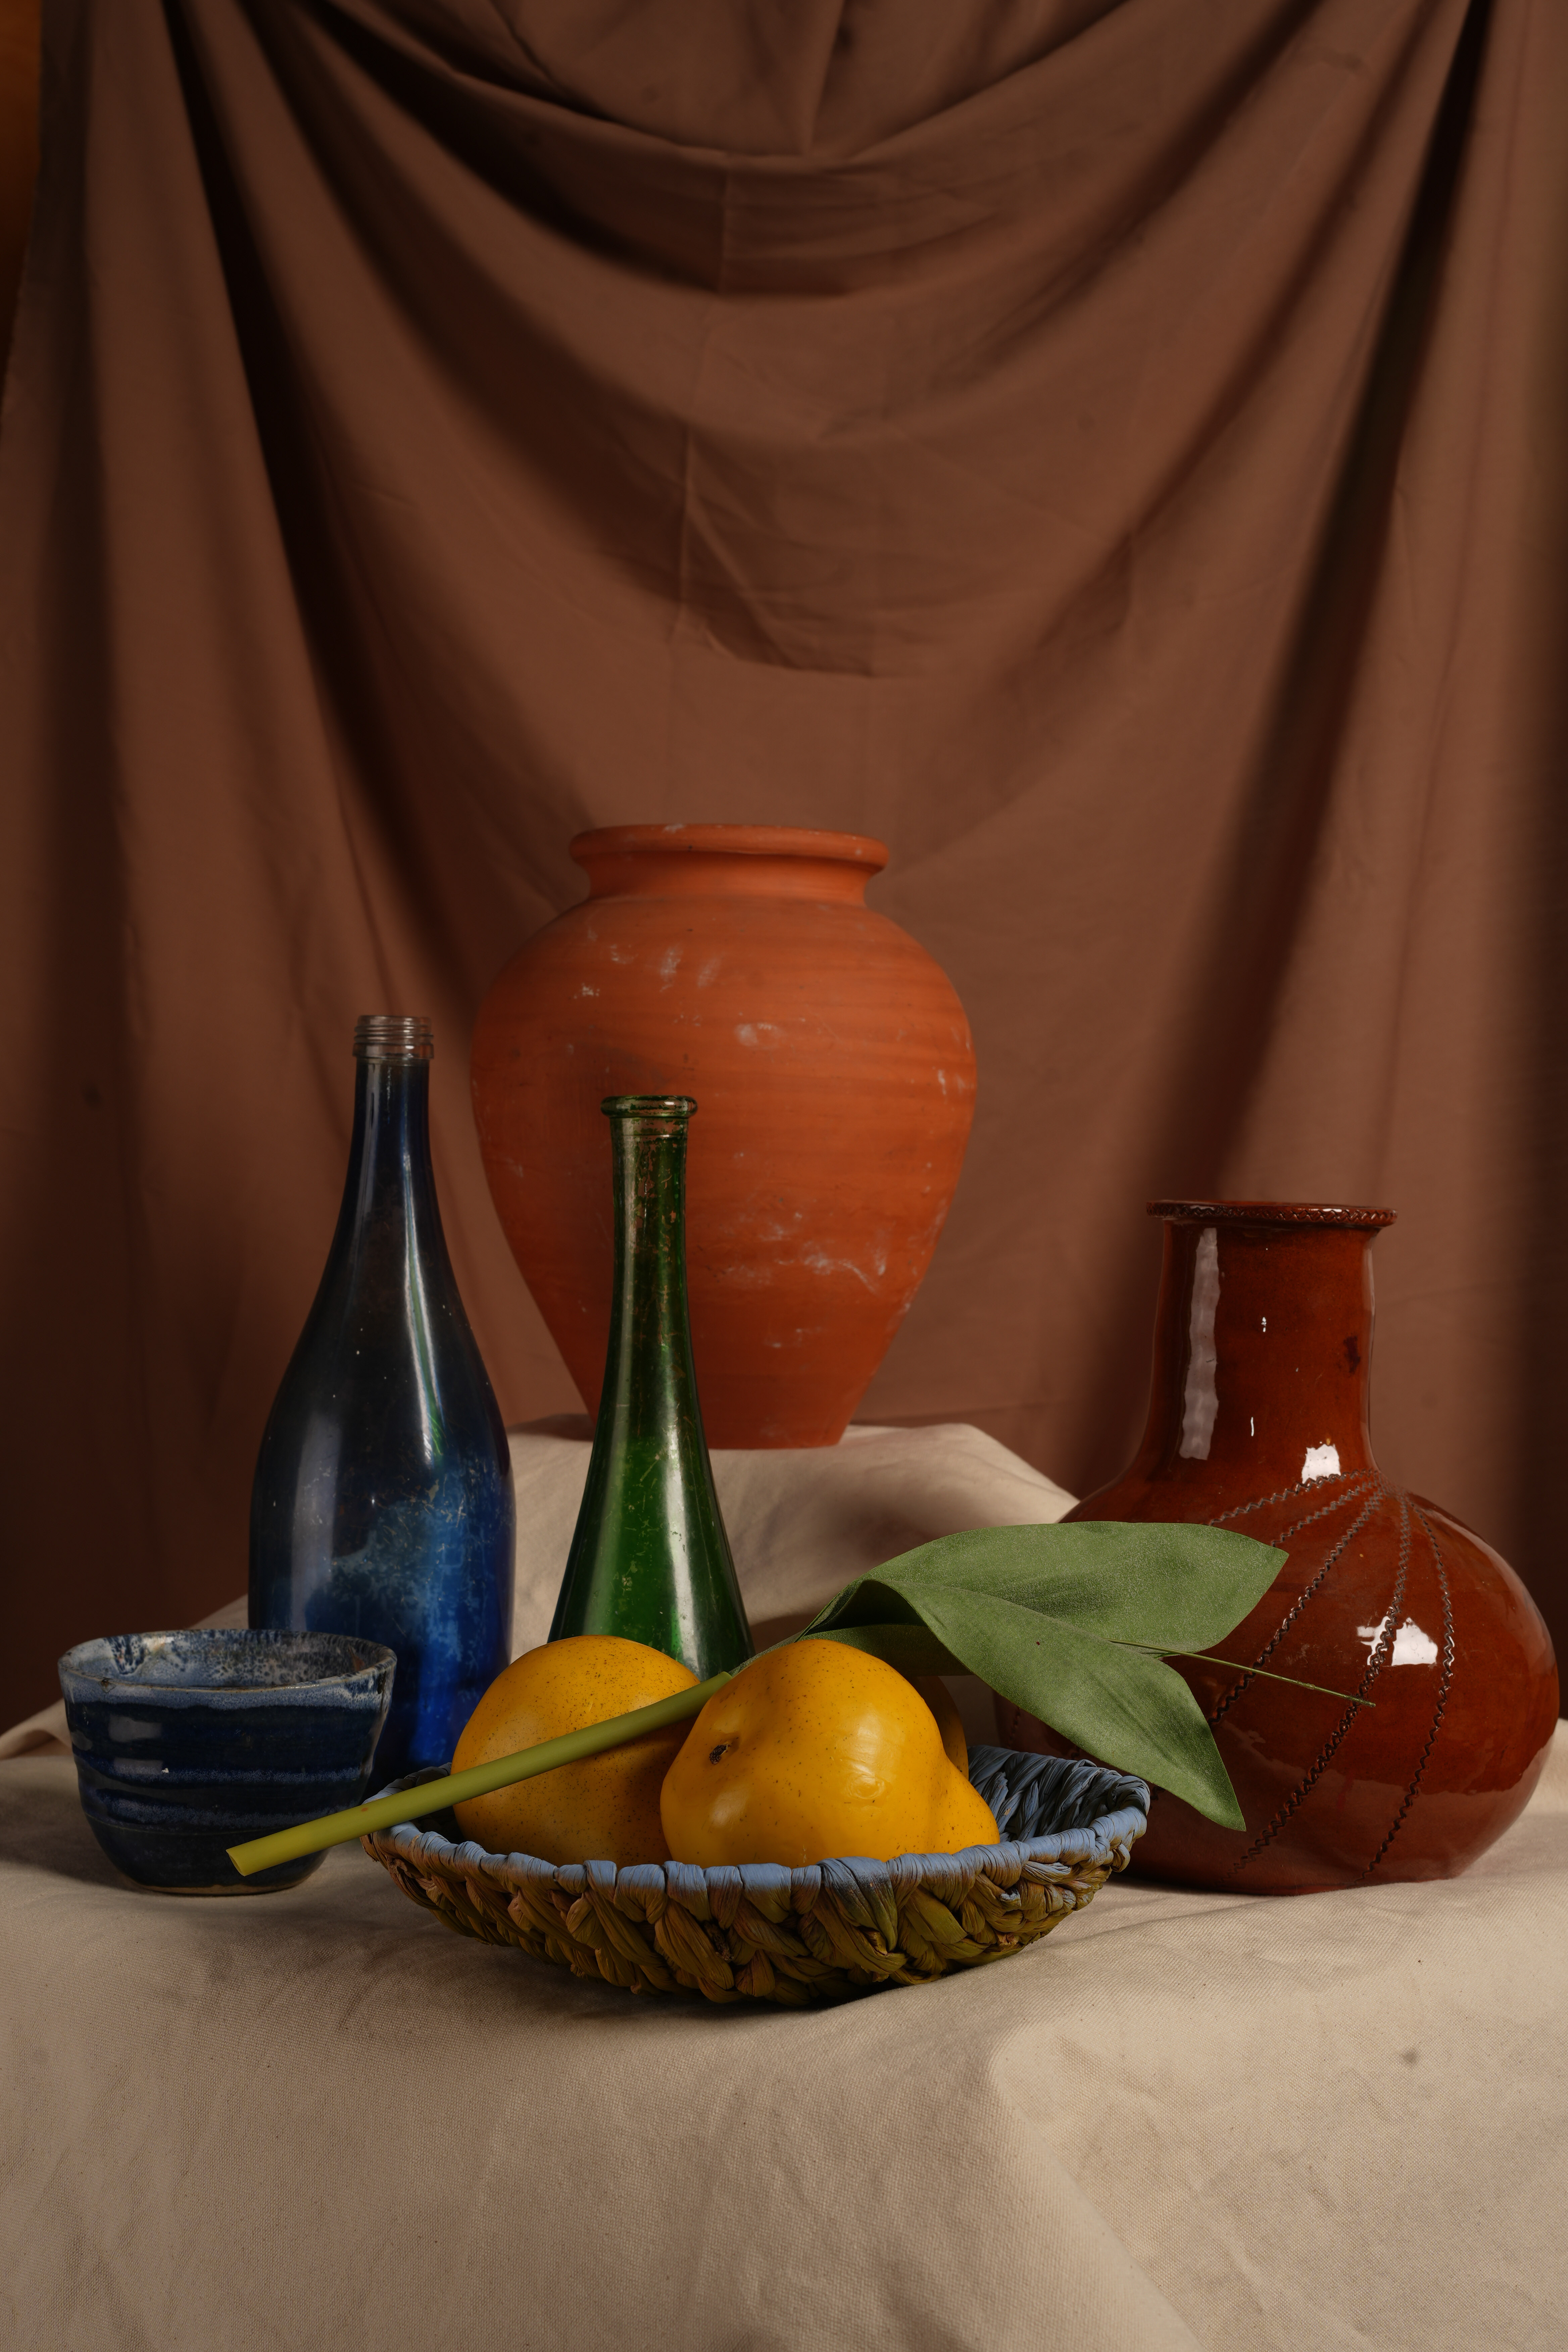
The painting I were drawn to below all have great examples of textures and light reflections.

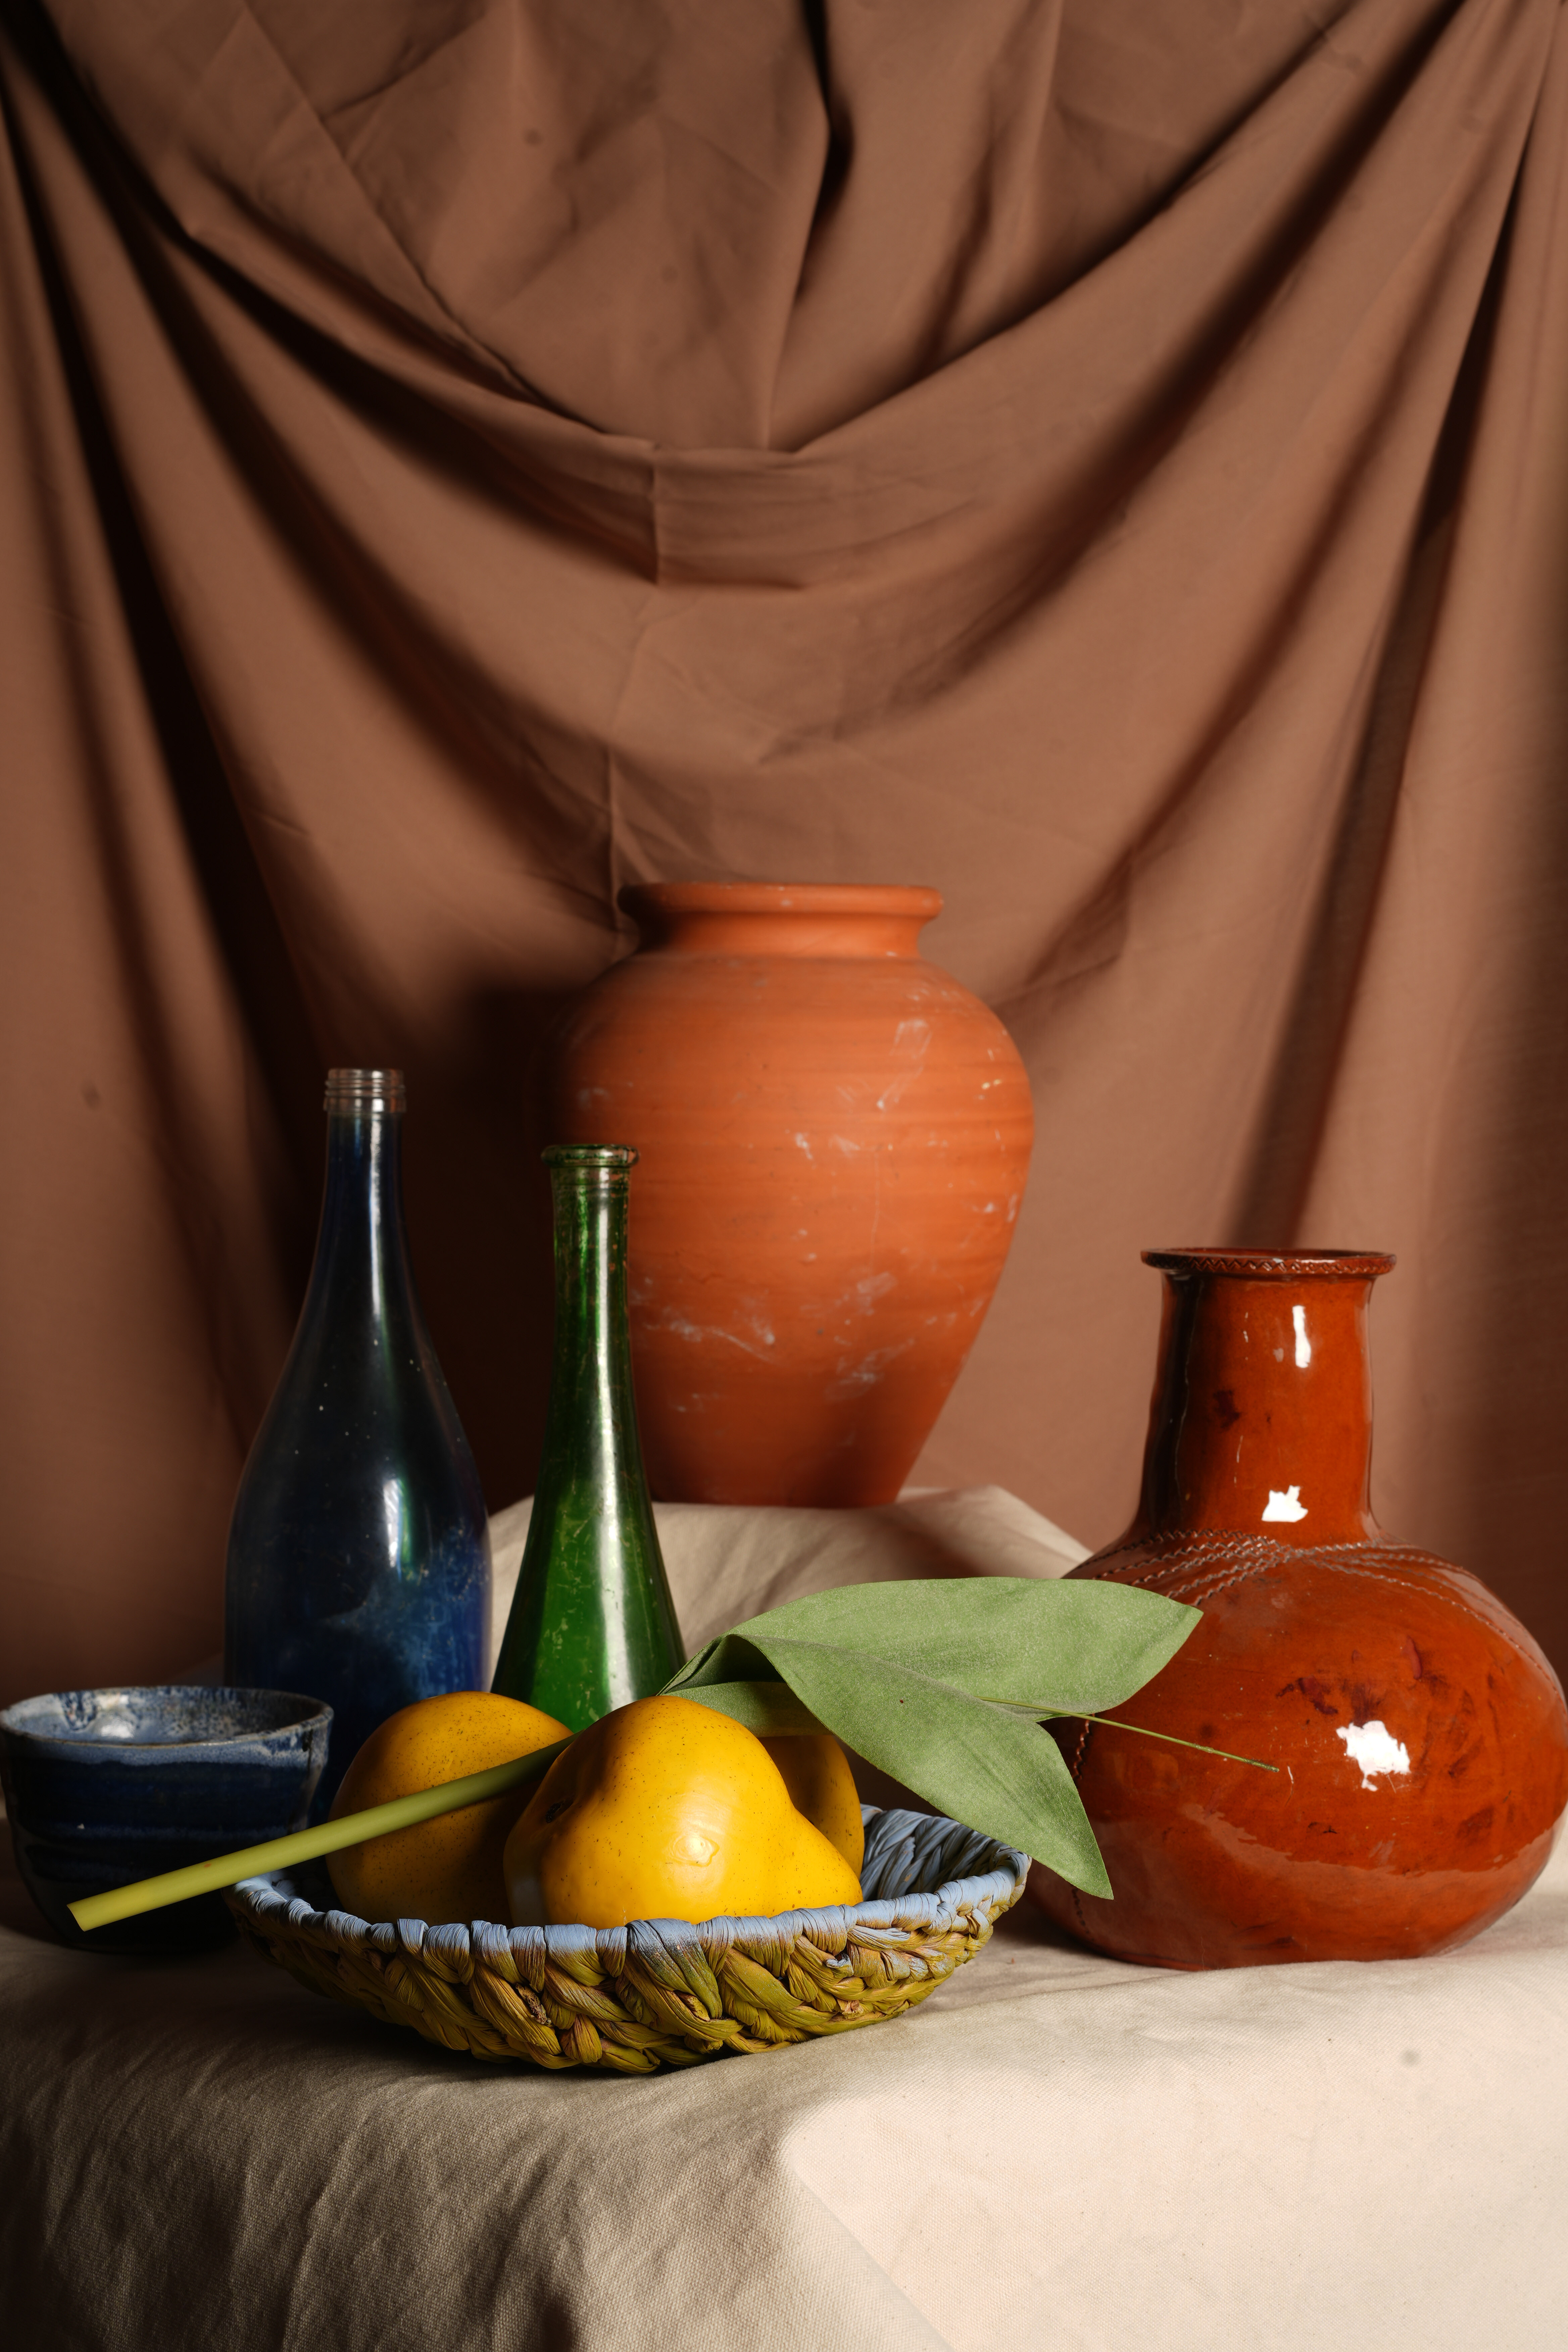
Through my research I then discovered an Interiors photographer who did a modern update showing lots of lovely textures and light reflections in both the pottery and fabric.

In the studio, I then set up a similar scenario to have a go using a meter. I was able to use different props and fabrics from what was already available in the studio. I used my prime lens on a tripod. From the scenes below you can see I played with both the lighting and movement of props and fabric.


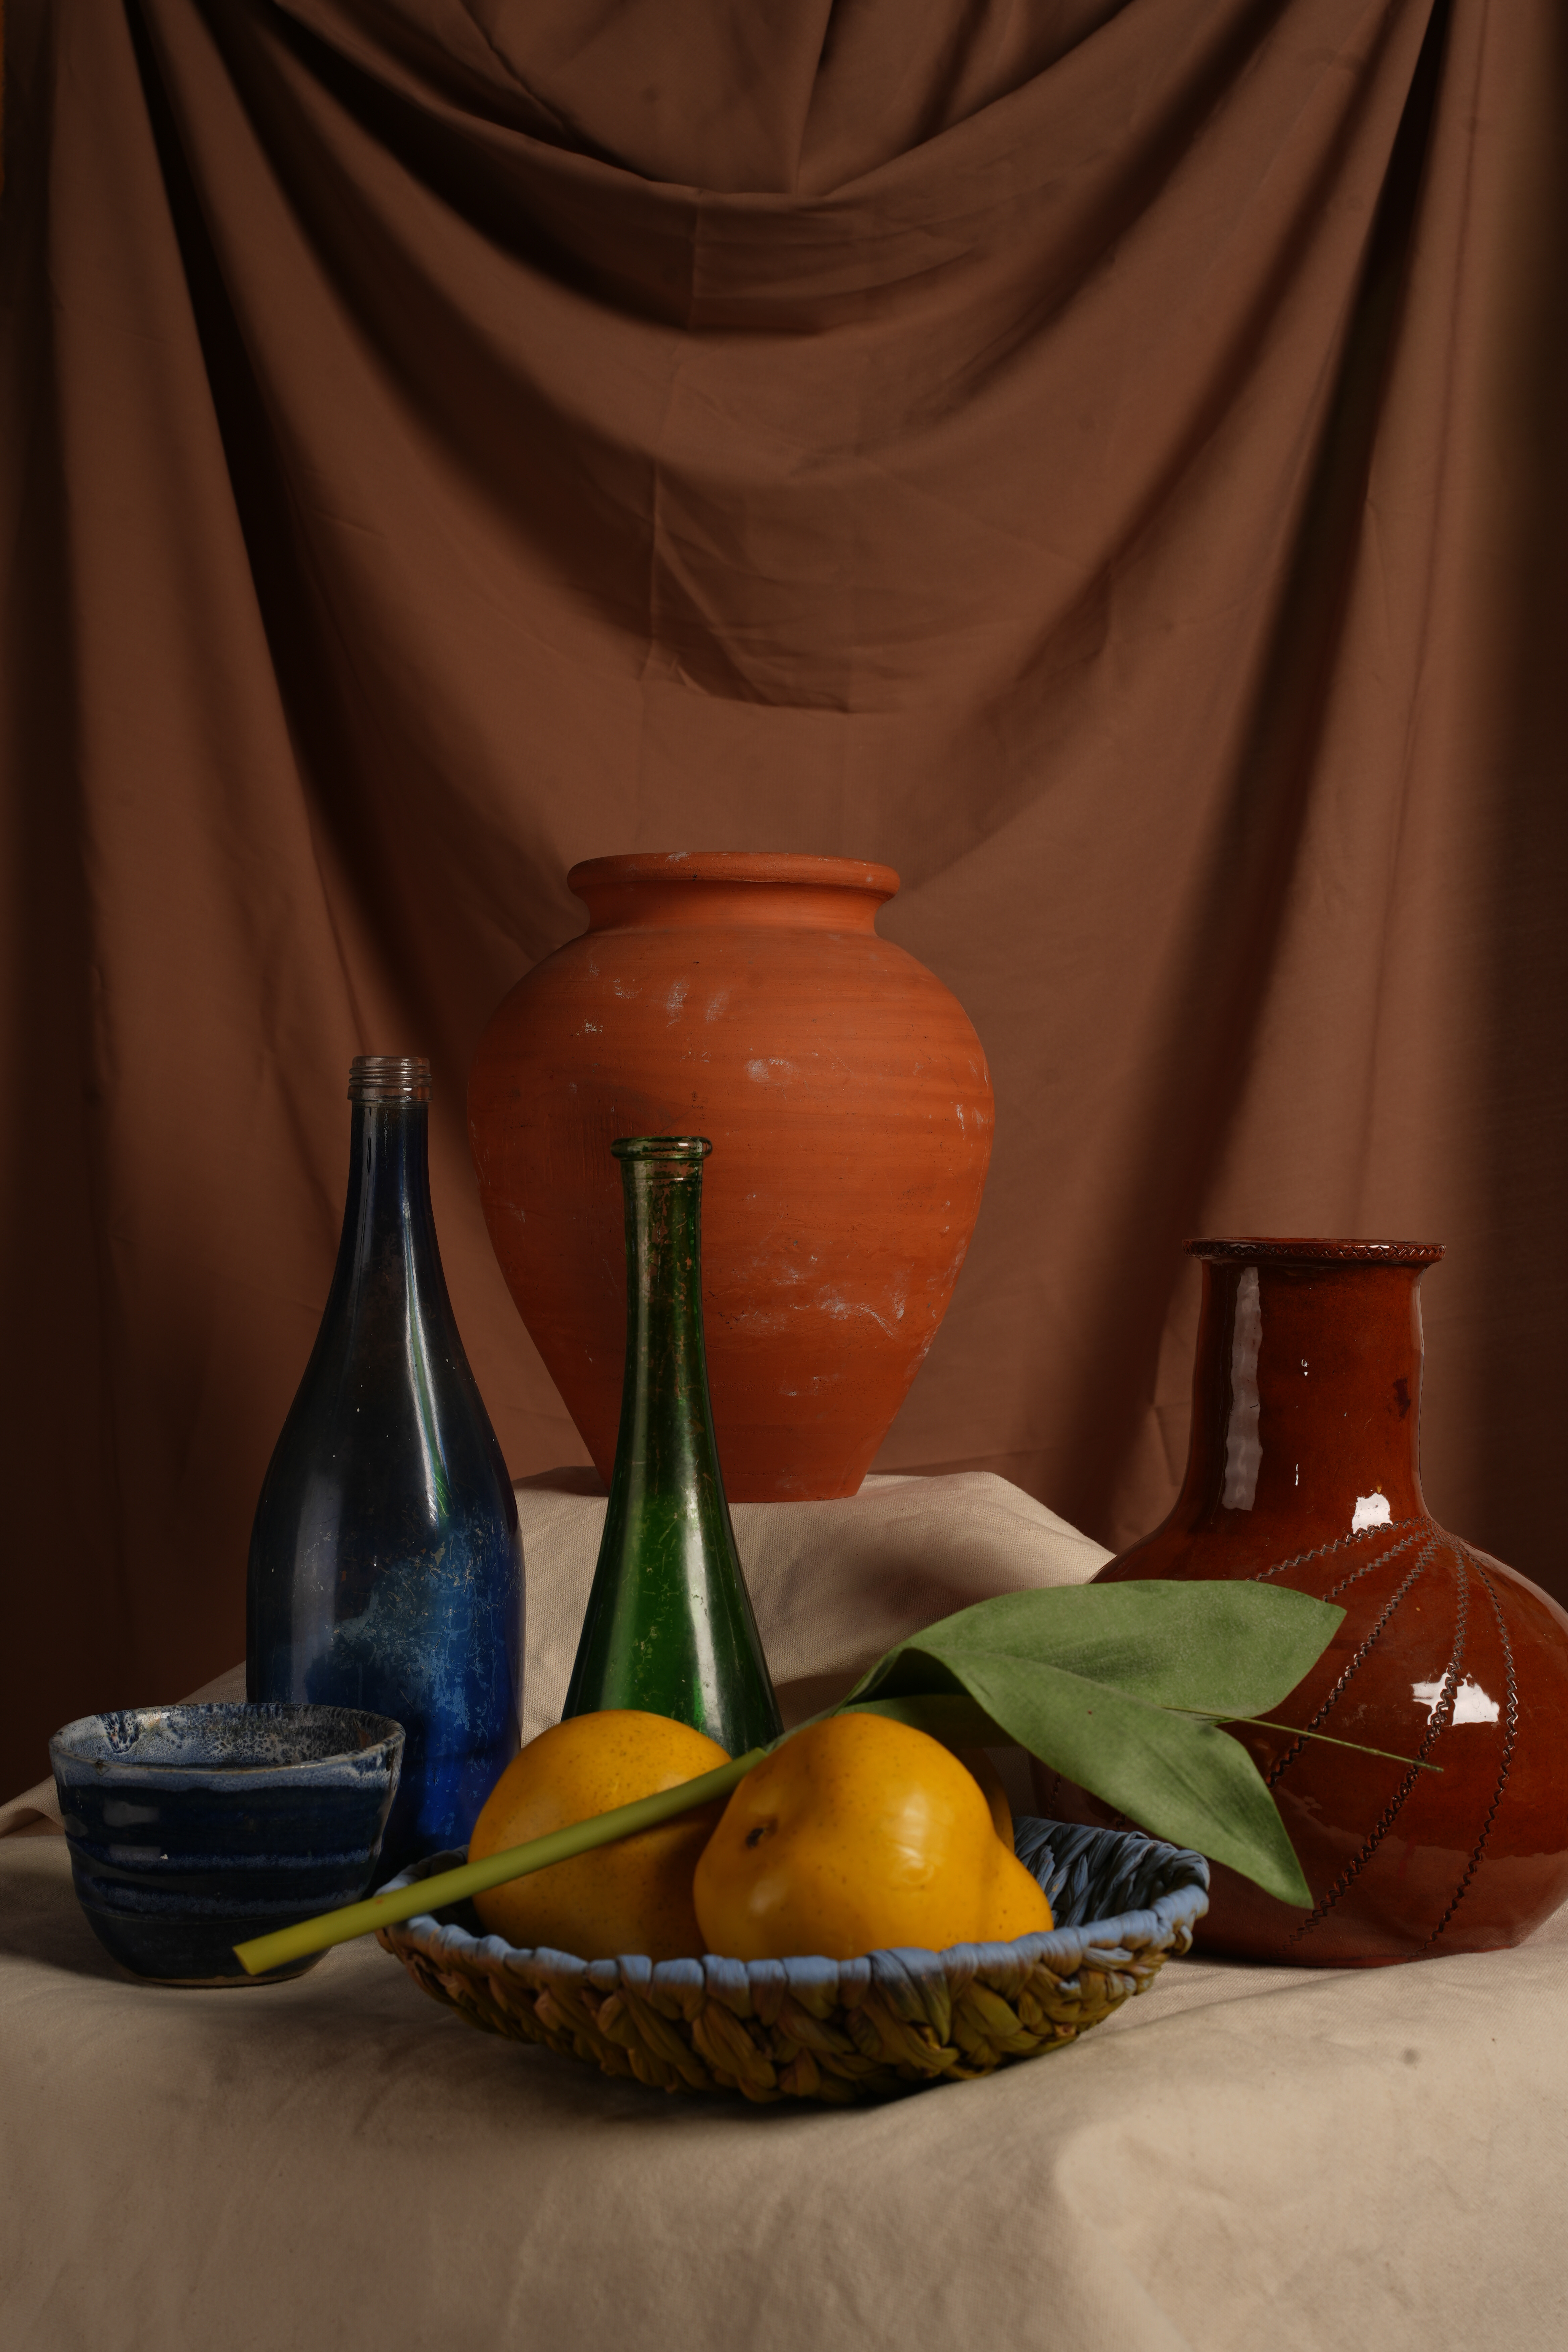

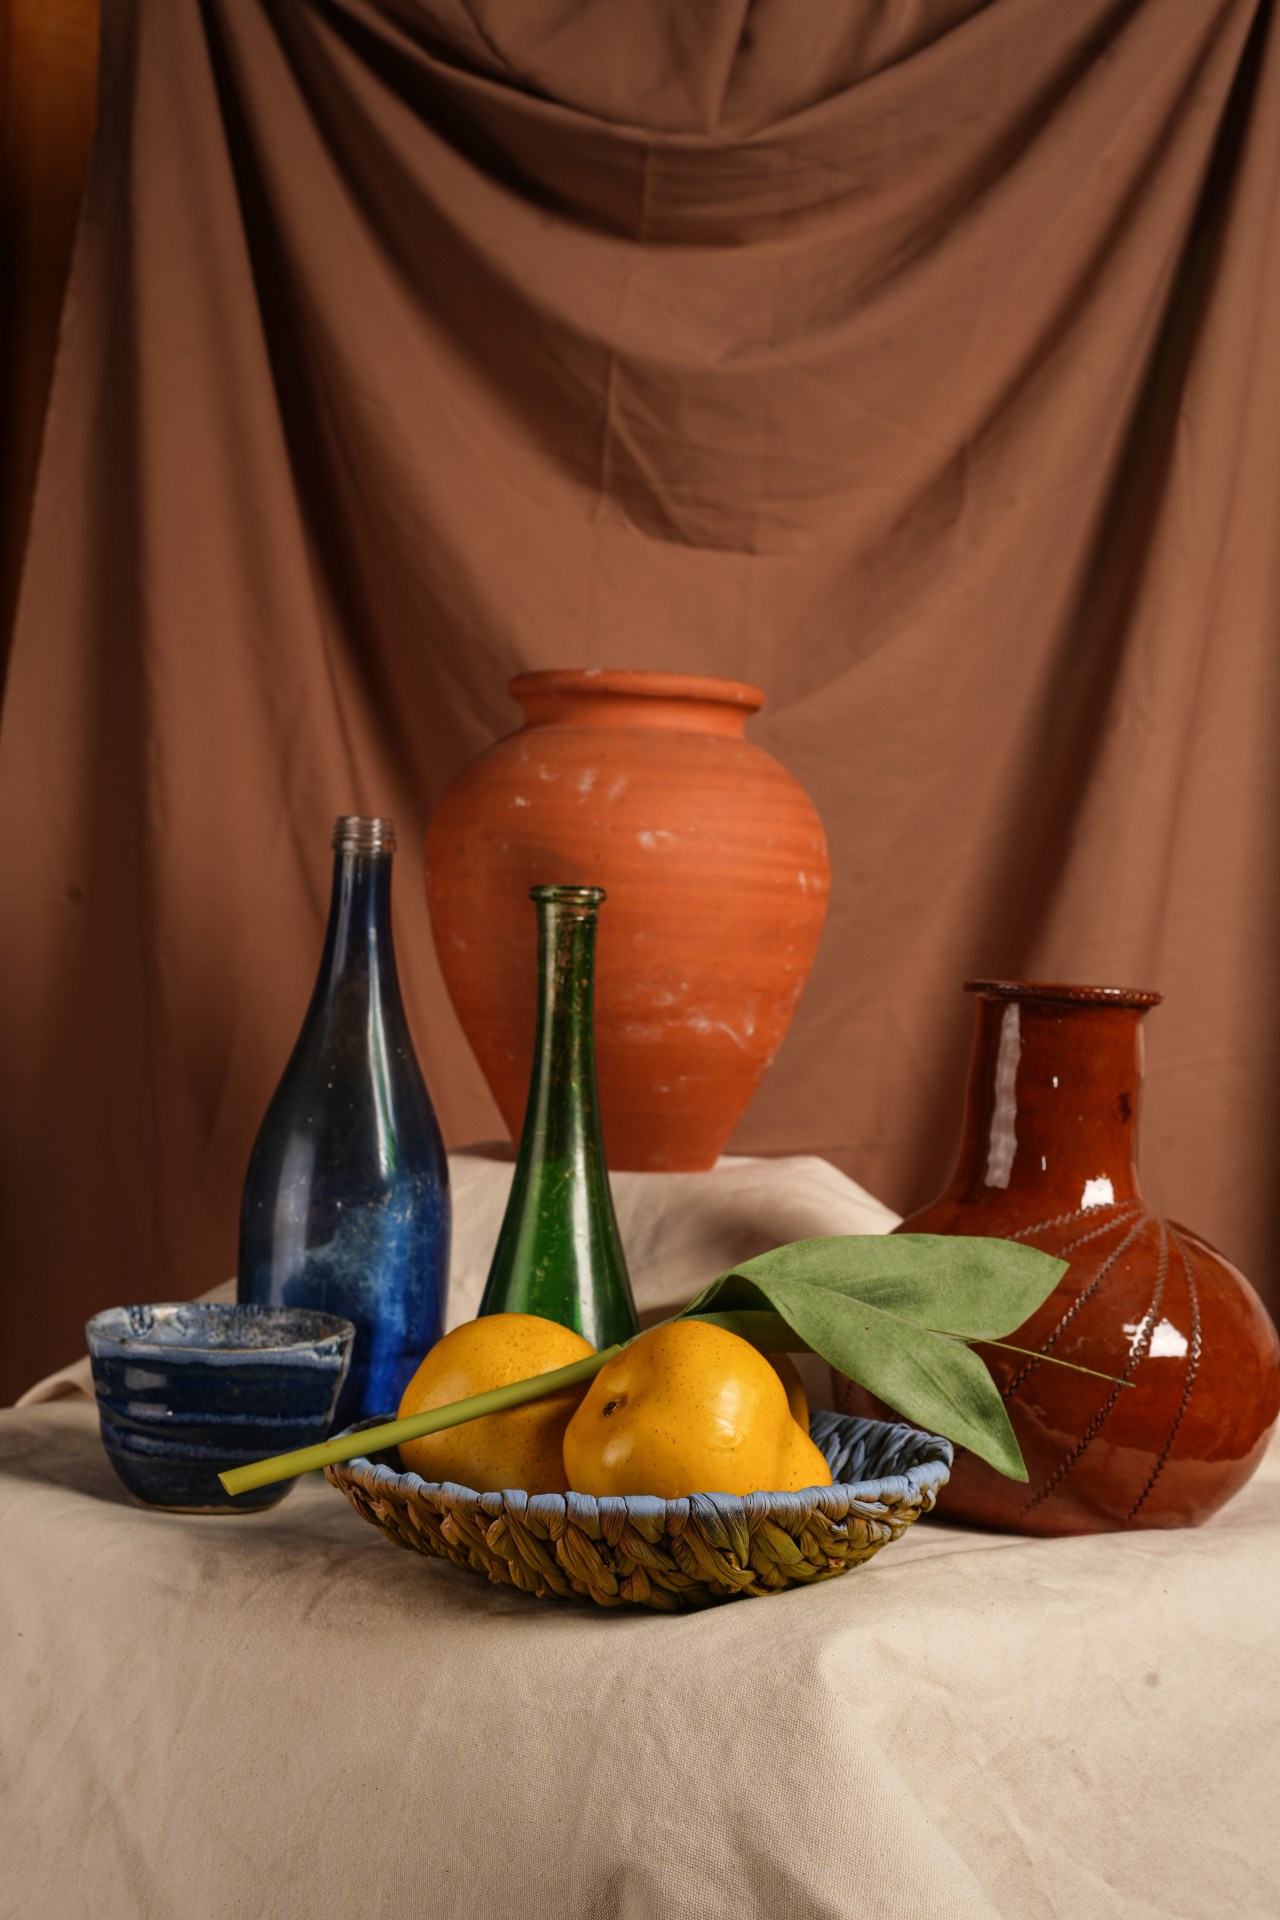
To begin with I needed to add some fill light to the other side so had a soft box on both sides. There was then a bit too much light from the two soft boxes so I lowered one from 6.0 to 5.7 and the other from 5.4 to 5.0.
I then moved the pillar closer towards me and then could adjust the light power up a bit more to the left. Using the light meter I had my shutter speed fixed at 1/125 and ISO at 50. My F stop was put to F11. Keeping my camera steady on the tripod I tried to focus on the green bottle in the front so everything else could be in focus. I then used a white reflector to fill in the light as there was a bit topo much light bouncing back on the vase.
Behind the scenes:

3.2 Analyse and evaluate lighting for photography.
My favourite and best exposed pictures from the portrait task were these 2:


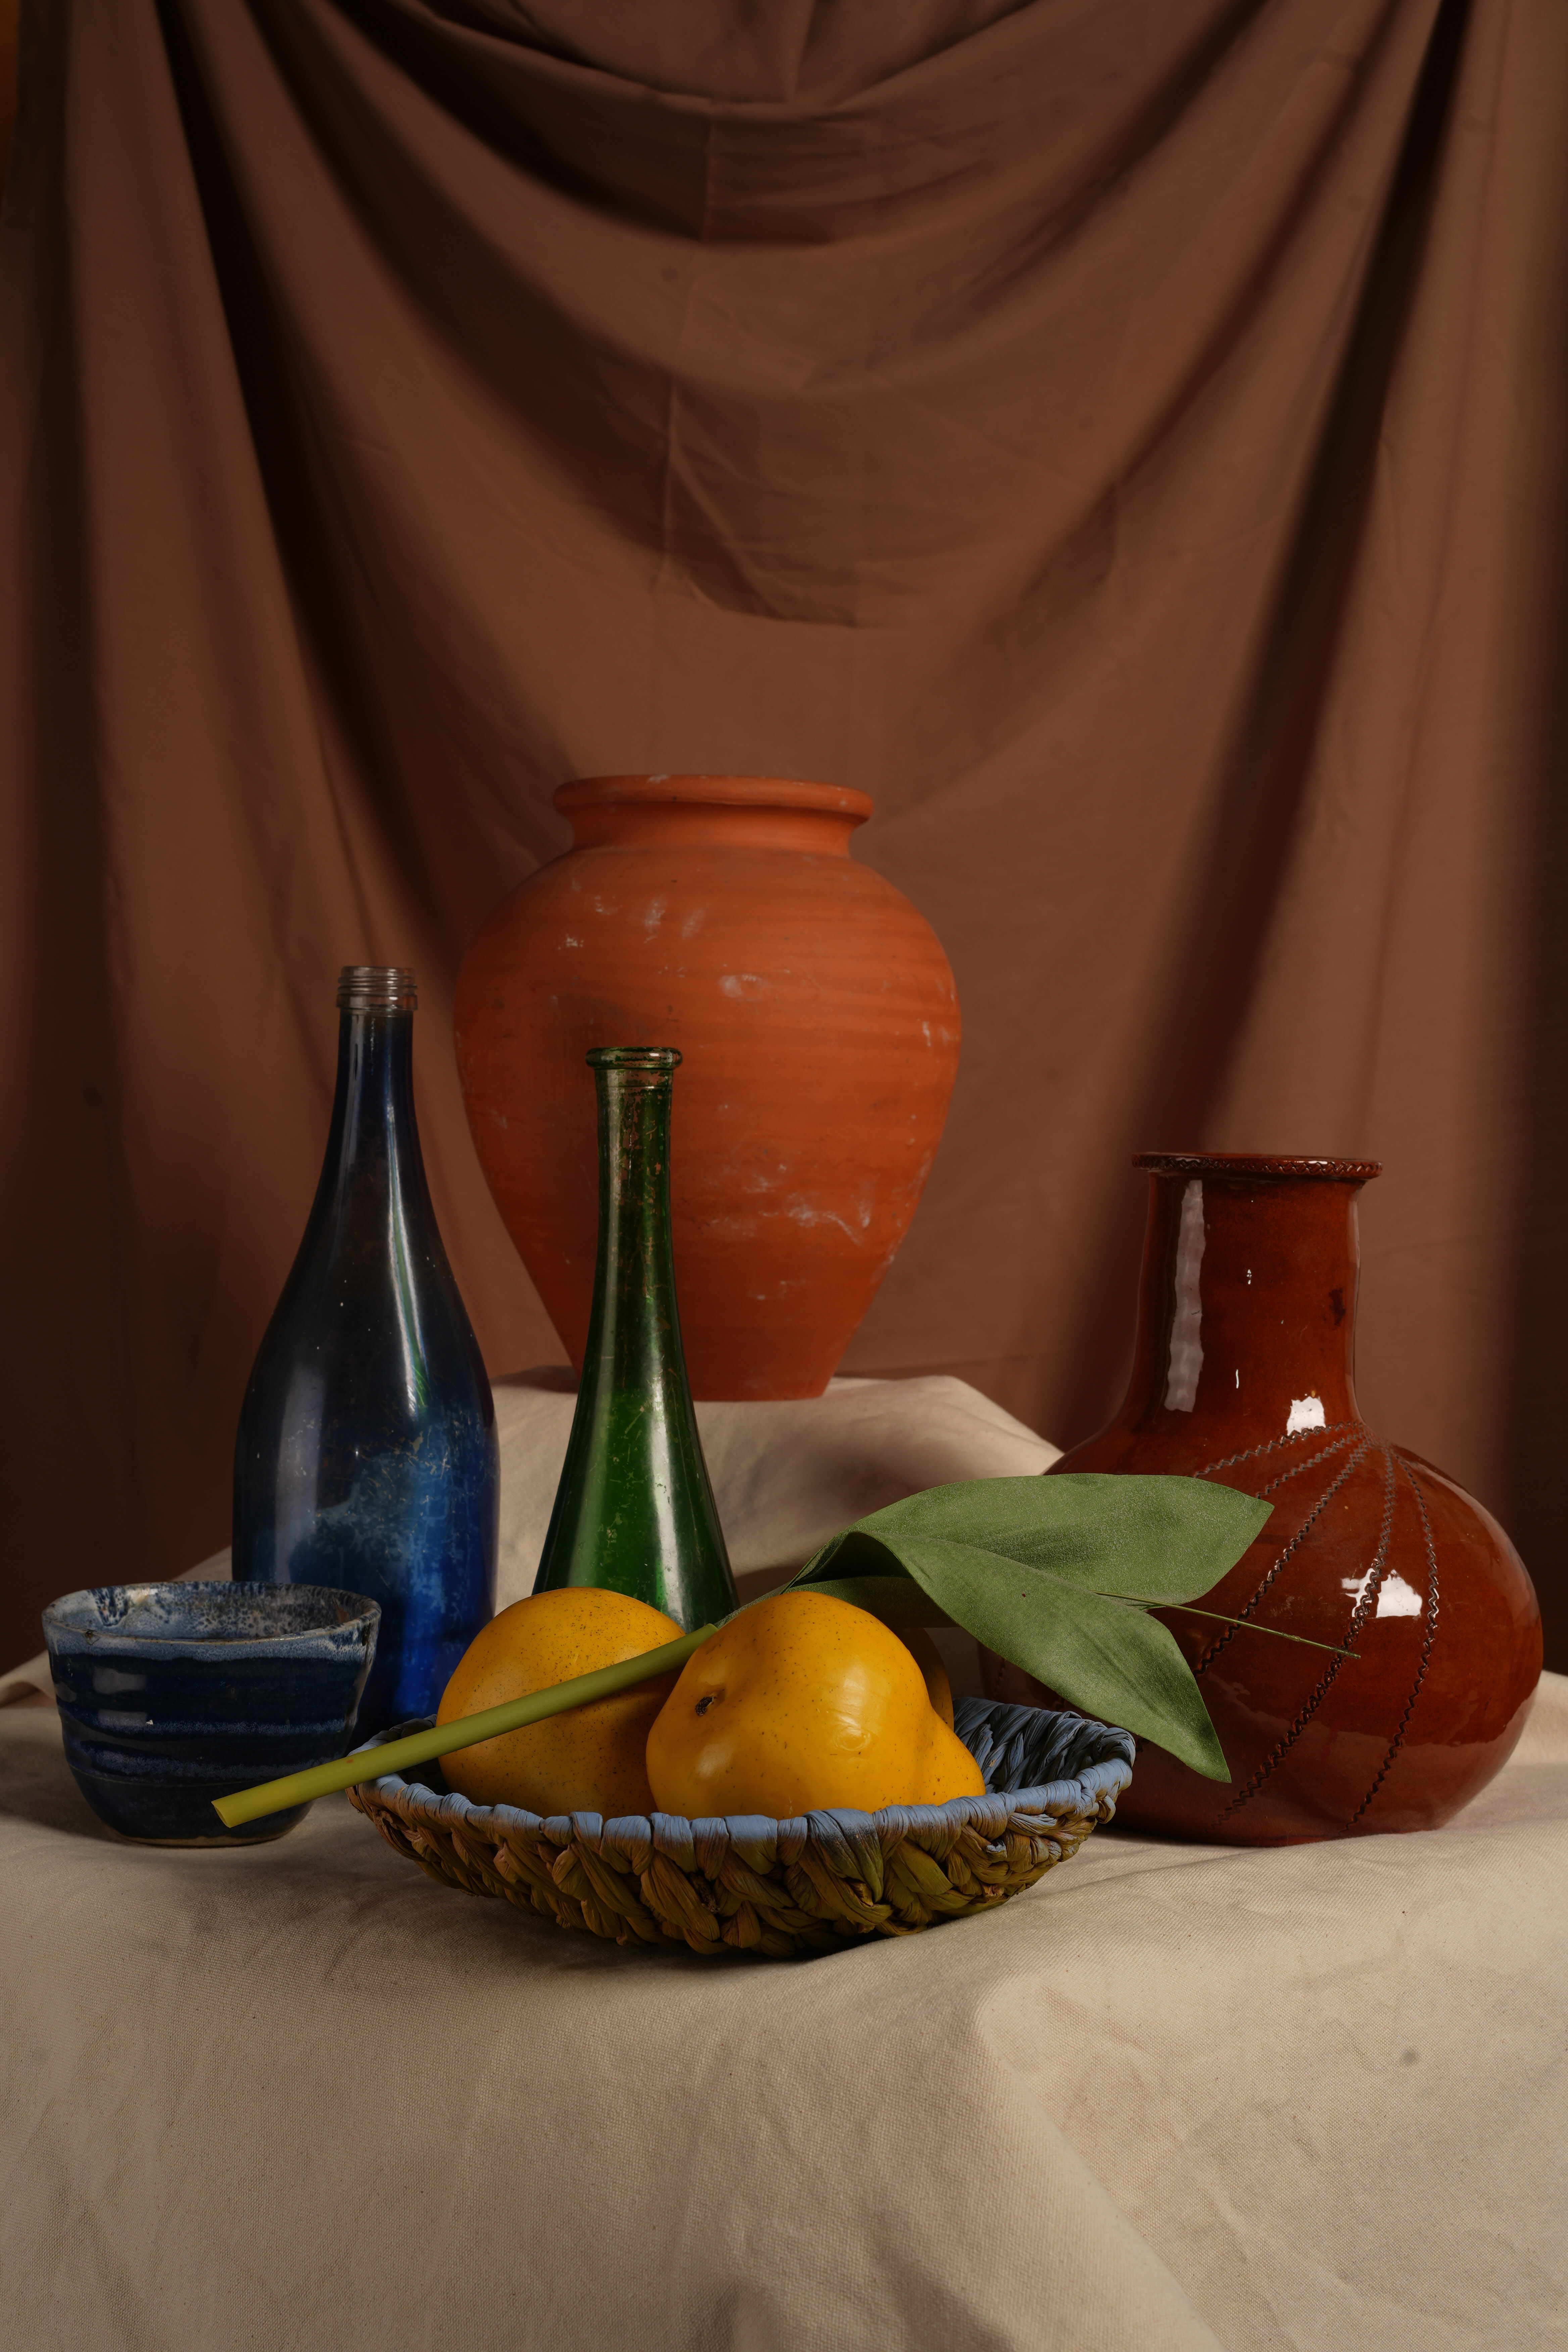
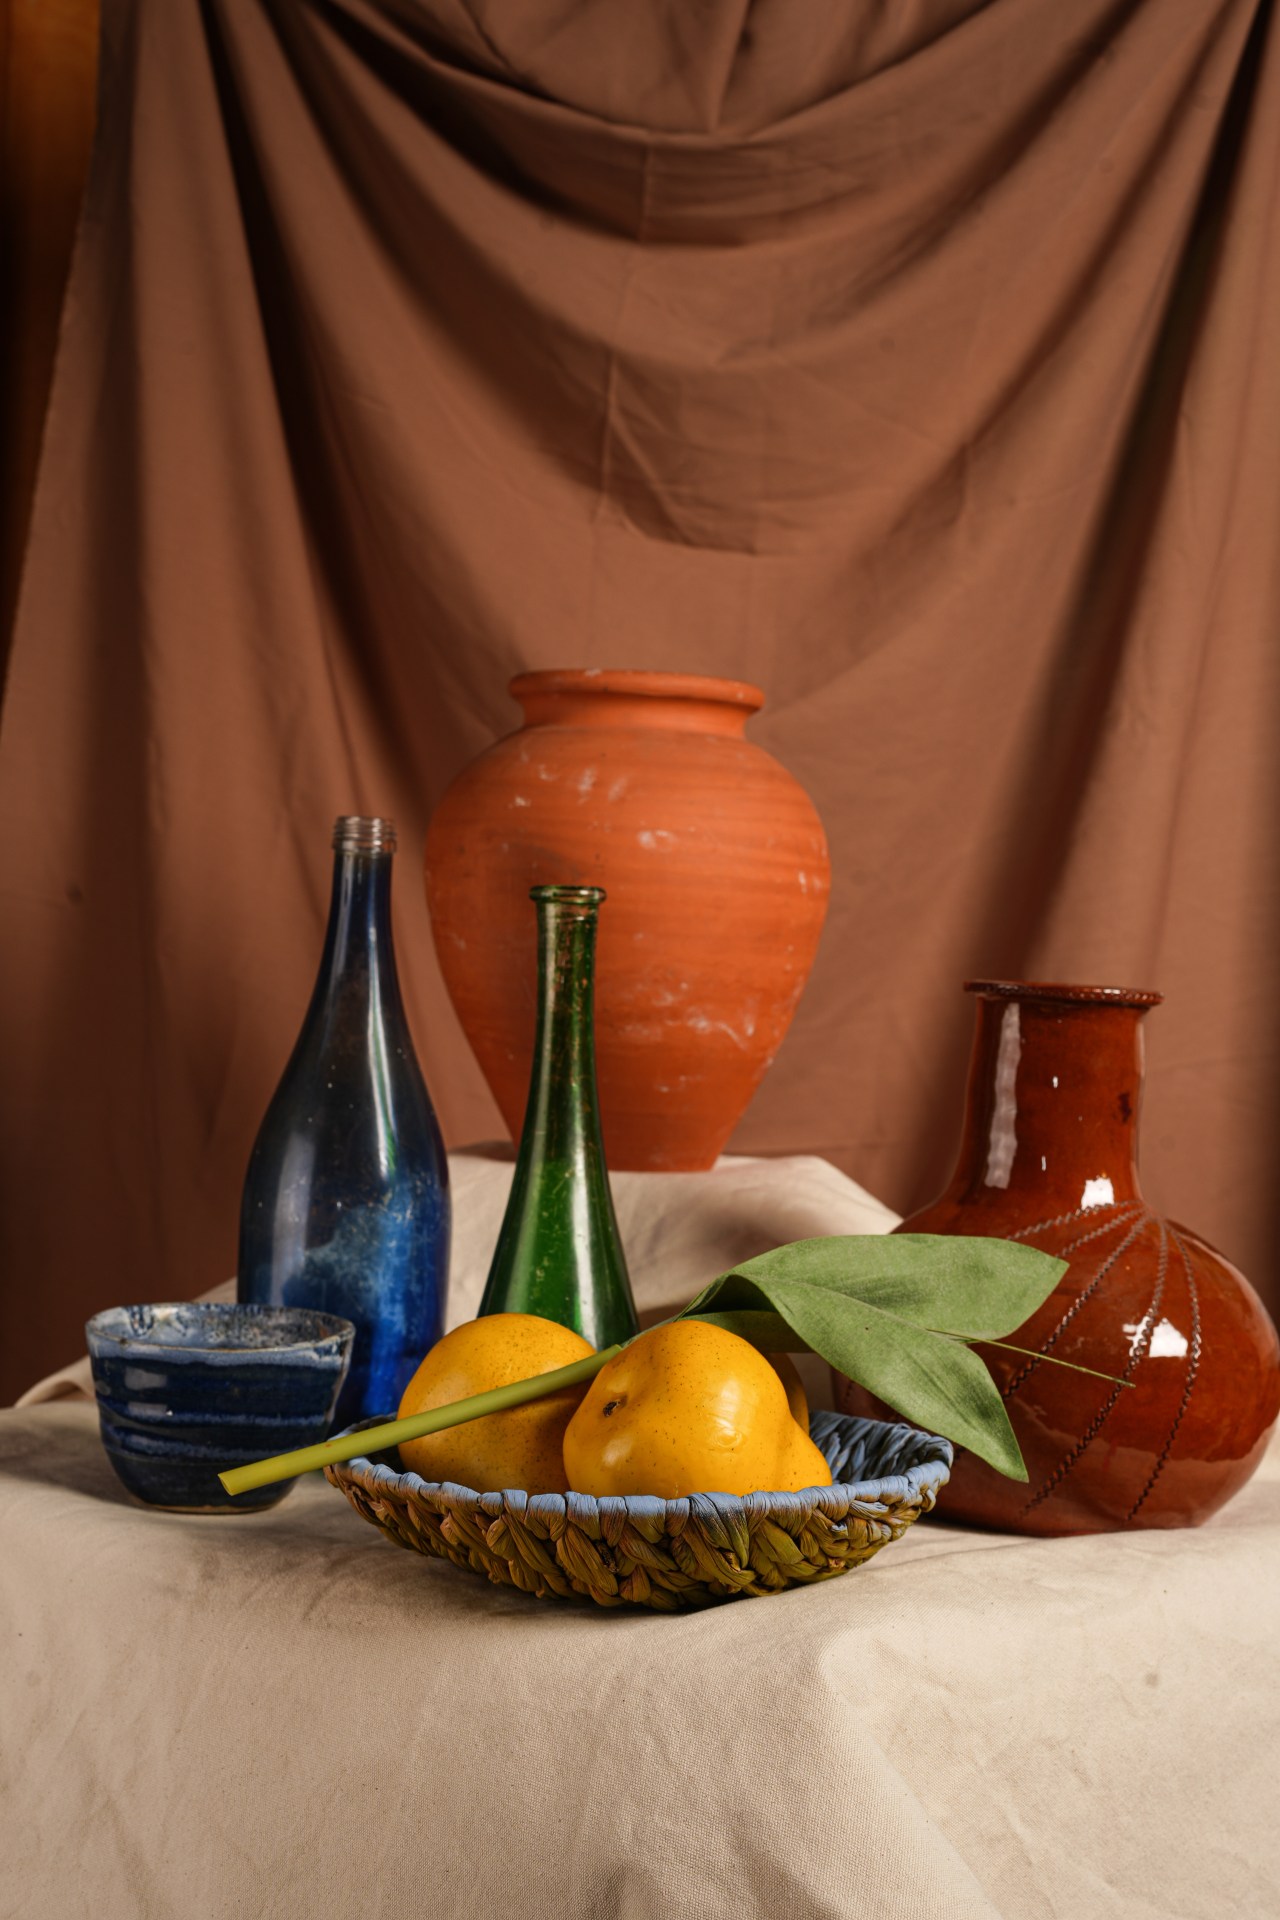
And my best exposed still life:
Overall I was really happy with my studio portraits. It was really useful to experiment with the lighting by either creating shadows, filling with light and trying to achieve a perfect exposure.
I noticed such a difference with my exposure and clarity when I introduced a flash. As I was able to go down as low as 50 on my ISO, the image were very crisp. Without a flash there was more trial and error trying to gauge the correct ISO and shutter speed to use.
Without a flash and just using two continuous lights and adjusting the model accordingly I could achieve the right amount of light on her face. As there was too much shadow to begin with, we moved the model forward and used a black reflector to enhance the shadows on the cheek bones. I also discovered using the white reflector was very useful when we needed to fill in more light and the black reflector was useful under the soft box so there was less spill on the black background.
Overall with all my images when I downloaded them on to a computer I did have to increase the exposure slightly. It would have been useful to have a cable to a capture 1 programme so I could see the image on a larger screen, as it can be quite tricky to gauge how much light is coming in when looking on the small screen of a camera. Perhaps I could have a had a wider aperture or increased the light power on the soft box or continuous light. It was a tricky one to gauge, as I wanted to create shadows or a dramatic mood without it being too bright.
The simple act of adding a prop really enhanced the photograph and helped direct the lighting. The armchair worked really well, I loved the textures and colours of pink and gold on it. I loved how the light reflected and bounced of the wood to create life to the picture. Adding the veil worked really well too, I wanted to create mystery and drama by it covering the model’s face and this worked really well, the texture of the veil photographed really well with the flash and ISO of 50. Also adding a colourful piece of fabric was great when I added it to the model wearing the veil, it softened and warmed the picture, making it less sad and dramatic.
Using the flash and ISO of 50 and the soft box and a reflector helped achieve my best picture with the portrait task.
When working with the still life task and metering, I found this more difficult to achieve the perfect exposure. When recording what F stop I needed to use I found it tricky to get all the objects on the pillar in focus. I guess I needed to remember that it was just a guide and I needed to increase my depth of field and add more light. I tried very hard to focus on the bottle on the front to get everything in focus but I definitely needed a higher F stop to increase my depth of focus. Once again it would have been really useful to have a lead to a capture 1 programme on a large screen, as its difficult to gauge on the small screen on the camera. I also used a tripod for the still life task, it was quite tricky for the heavy camera to stay perfectly still and straight on the tripod.
With my still life task, I needed to achieve a better exposure, I needed to fill in more light and widen the depth of a field. I loved the textures of the fabric and pottery I used, but maybe a shinier fabric could have enhanced it more.
With the majority of my photographs I used a black background, this was mainly influenced by the Rembrandt pictures we chose as inspiration. I really liked the black drop as it did remind me of a painting and added the most creative drama. However it would have been good to maybe explore some other backdrops. I was really keen to use a retro floral background but it looked very expensive to get a large piece. I will definitely keep my eye out for one in a vintage market so I can experiment in the future.
4.1 Identify and use safe working practices in lighting for photography
We had to be aware of the lights getting extremely hot, if we needed to move them, special heavy duty gloves could be provided. The flashlights are very strong and can damage eyes, so we made sure whoever was being photographed was not exposed to it for too long. When moving the big heavy light on the leads we made sure no one was under them so they didn’t bump their heads.
